
Behind-The-Scenes of AddOhms #14
After moving from learning a new tool to mastery, the resistance for me to switch becomes very high. This can apply to hardware tools like a drill, saw or CNC milling machine. It can also apply to software tools like EAGLE, Programming Languages or video editing software. In AddOhms #14, I gave an overview of the VirtualBench from National Instruments which I’ve covered on this blog as a hands-on, written review and video review.
[featured-image size=”featured” single_newwindow=”false” alt=”learn a new tool” title=”learn a new tool”]Photo courtesy of smuay/Shutterstock.com[/featured-image]For this AddOhms Behind-The-Scenes look, I talk about my experience with changing my tool set, the most critical tool in fact, I use for creating AddOhms Videos. If you’ve ever wondered how I do those hand animations, keep reading for the deepest look yet into my workflow.
When I started making the AddOhms Tutorials, I stuck to a tool I knew very well–Apple’s Keynote. It’s a presentation software like PowerPoint but, in my opinion, to creates more polished presentations. Well, that idea only lasted one video and isn’t something I ever published. I did, however, include it as an extra in the AddOhms DVD Volume 1. I knew I needed to go about learning a new tool, but didn’t know which one.
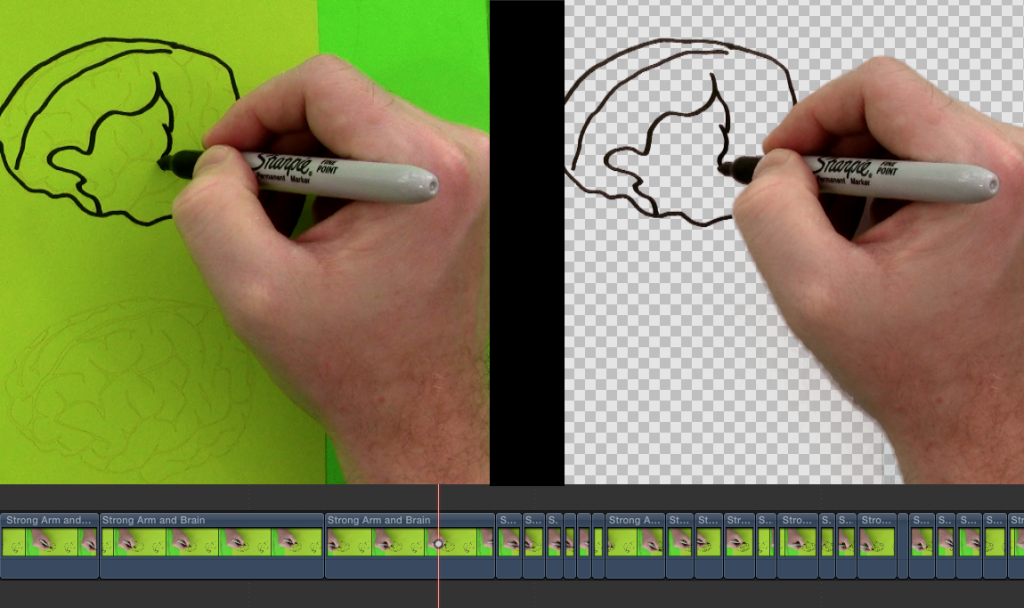
Eventually I came up with the idea of green-screen drawings which is what lead me to the first 3 schematic videos. These are render-intense videos because I would chroma-key (remove the background) in Final Cut Pro X and have to stack multiple clips on top of each other, to smooth out the keying. This resulted in hours of rendering for minutes or seconds of video. Shortly after I started looking at animation tools which lead me to Motion. If you aren’t familiar with Motion, it is a “key-frame” animator. I started using it around AddOhms #4 and heavily used it starting in #8, but more on that in a minute.
The First Move
The first a-ha I had with moving from an “Editing Tool” to an “Animation Tool” is that I suddenly had all new capabilities available to me. That’s actually when I started using the 3D animation for the introduction. By learning a new tool, Motion, I applied my previous FCPX skills to learning 3D animation capabilities.
Oh, and I should note, it took me about 8 hours total to make the intro below. This includes the time I spent watching lynda.com videos on 3D in Motion.
With Motion, if I discovered a mistake I could edit it in real-time. In this case, learning a new tool was about saving time–and I did. I dropped from 100-120 hours per video doing the green-screen removal to 40 hours with motion.
Even with the initial 30-40 learning curve, I still saved time learning a new tool!
I’d call that just a bit of a savings.
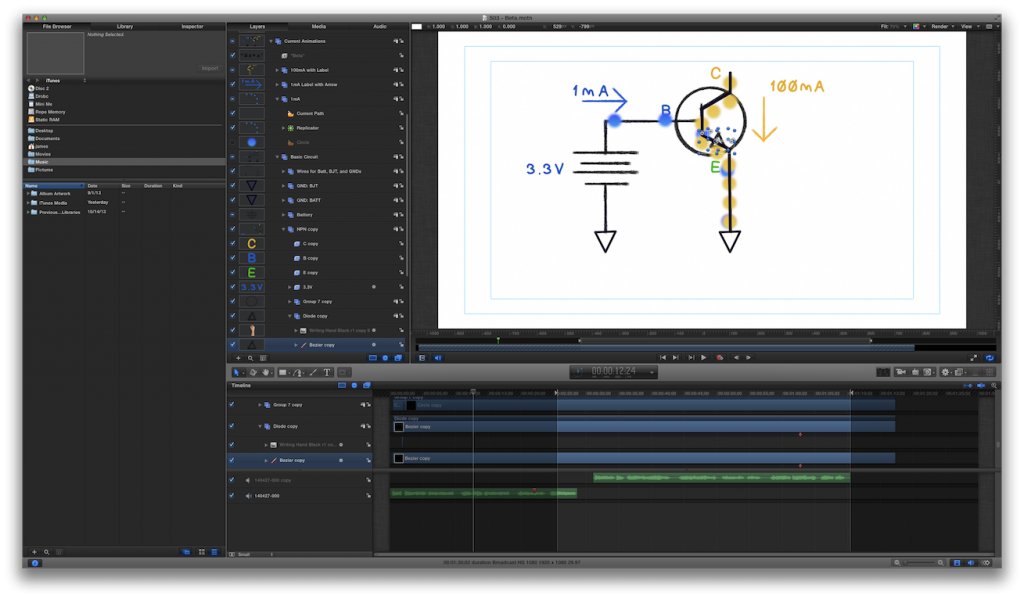
So AddOhms 8-13, the “Post Your Code” Song and the channel trailer were almost done entirely with Motion simulating hand-writing. There’s a couple of times I’ve re-used footage of my hands as live-action.
Become an Expert or Learn a New Tool?
Whether you believe Gladwell’s theory that it takes 10,000 hours of practice to become an expert or not, I was becoming very proficient in Motion. So why did I change away from it? It was saving me 300% of the time, right?
Well, for one, Motion has a lot of bugs in it. But that isn’t a surprise, most reasonably priced video authoring tools do. Also, I was running into limitations for automation. So I decided to try the much more popular key-frame animation tool, After Effects.
Since you’re probably not in video production (and by the way, if you are, please contact me!) let me use an analogy to explain what the different from moving between Motion and After Effects.
Motion to After Effects is as BASIC is to C++.
Motion is a fantastic tool and at $50 it is really fun to just play with. You could do professional work with it, many people do. For me, it was a great starting point.
Moving to a higher (or is lower?) level tool when you’ve gained experience on another, vastly accelerates your learning on that most complex tool.
It took me a fraction of the experience in After Effects to duplicate my workflow–even though the “language” is completely different. The benefit, is now I’m opened up to an entire new world of possibilities that I couldn’t do before. For example, I’m now writing a script to automate much of the animation work I do, which is going to result in even more time savings down the road.
Here’s what I learned.
- Decide on a reasonable project and dedicate yourself to changing. Whether it is a tool or a habit, you have to eventually make a change in order to make a change. I spent MONTHS planning to use After Effects for a video. It wasn’t until I committed myself to using it in a project–at least for a single scene–that I made serious progress. At the same time, if you’re up against a major deadline and time is running short, that may be the wrong time to make a major change.
- Keep an open mind, especially when asking questions. In Motion, I used a behavior called “Write-On” to animate the lines I “drew”. Then I created a Motion Path that the image of my hand would follow, based on that write-on behavior. Well, for the life of me, I couldn’t figure out how to make Write-On in After Effects work. So I went to the expert forums and asked multiple times, leading to confusing explanations. Eventually, I realized (well, RTFM’d then realized) “Write-On” in After Effects meant something totally different. So no wonder there was confusion. How many times have Arduino users mixed up for() and loop(), while seasoned people gave (seemingly) incomprehensible explanations?
- Being a new user (again) is humbling. When asking questions in a forum of experts, I realized the importance of first impressions of a new community to a new user. The people who were short with me, made me re-think this new tool I was learning about. The people who helped, I have significant gratitude towards and how they one day need Electronics help!
- Forget the sunk cost. As engineers or enginerds, it is really easy to calculate a cost associated with switching tools. We see the time it takes to ramp up on something new as a total waste and add it to the total cost of switching. However, consider my situation. What took me 30 or 40 hours in Motion to figure out, I figured out in After Effects in less than 8. That 8 hours isn’t a sunk cost. Instead, it has expanded my skills and enabled future time savings.
How’s this apply to you?
You might be thinking this post doesn’t apply to you, because it is all about video production tools. This is an electronics blog after all.
Think about a tool you’re using in electronics. Arduino? EAGLE? NOOBs on Raspberry Pi? An Auto-ranging DMM? Now consider this simple thought: What if you made just a slight change in one of those tools? What could you learn?

2 Comments
Very nice explanation of your job. Just yesterday I find you on youtube and your videos are fantastic without nedless blah blah. 🙂
Thanks for the kind comments. Though, not really a job for me. It’s just my hobby!