The first time I saw the VirtualBench from NI, I was amazed by its shear size—or lack of size. At the time, the unit I had access to an uncalibrated pre-release unit at the Austin TechShop. So I didn’t think it was fair to do a full review. Fast forward to today. Now that I’ve spent a week working with the VirtualBench I have some comments and thoughts. What follows is a review of this “All-In-One Instrument” that runs $1999 USD.
After understanding what the VirtualBench is, you’ll probably ask yourself: is it worth $2000? That’s a great question. Keep reading to find out what I think and why.
What is the VirtualBench?
National Instruments is well-known for their modular instruments and LabView software. The VirtualBench is a new product that has a Logic Analyzer, Oscilloscope, Function Generator, Digital Multimeter, Triple Output Power Supply, and General Purpose I/O pins in a single box. A PC or iPad running the VirtualBench application is required. Communication for the PC is done by either USB or WiFi, while the iPad App only supports WiFi connections.
There is also apparently a LabView driver available, but I did not test or focus on it for this review.
The base unit is available from NI for $1999 USD with a reasonable lead time (as of this posting, 5-10 days.)
Now let’s take a look at what’s in the box in a little more detail.
Overall Specs
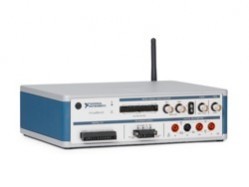
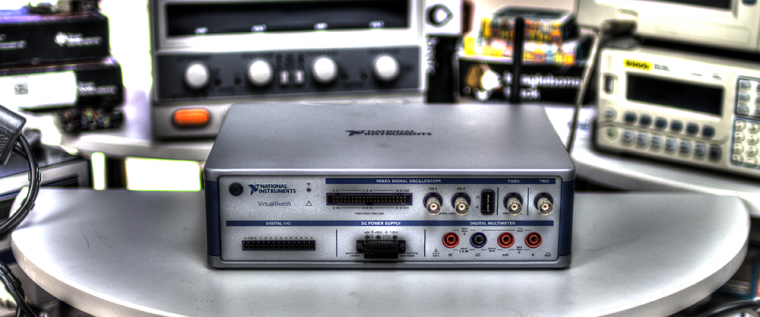
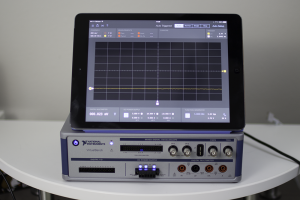
The blue box (NI-Blue, not Doctor Who) is only 10in (25.4cm) by 7.5in (19.1cm) by 2.9in (7.4cm). An iPad Air with its 10inch screen fits comfortably on top. Almost like that was designed on purpose.
All measurements connections are laid out on the front panel. My only gripe is that the DMM connections are on the bottom while the scope connections on the top. It seems to me that I’d more often move the DMM leads between Voltage and Current compared disconnecting my scope probes. Look at any traditional oscilloscope, the input connectors are on the bottom.
Now let’s take a look at each measurement instruments built into the VirtualBench.
The following is based on the unit and information available as 01-FEB-2015. Only functionality available through either the Windows or iPad application was evaluated. There were some capabilities listed in the data sheet that required access to the LabView driver. (I did not test these capabilities.)
Quick Jump Links
- Power Supply
- Digital Multimeter (DMM)
- Function Generator (F-Gen)
- Mixed Signal Oscilloscope (MSO)
- GPIO Pins
- Conclusion
Power Supply
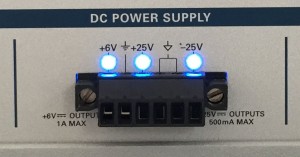
The Power Supply is a triple output with two positive supplies and one negative supply. The negative supply goes down to -25V and provides up to 500mA. The positive high voltage complement provides 500mA up to 25V. When you need more current, there is a 6V supply with up to 1A of current output.

All 3 supplies provide adjustable voltage output along with adjustable current output. This allows for powering a circuit with a current limit which is great for preventing damage when powering-on or debugging a new board.
It’d be nice to see higher current capabilities on both of the positive supplies, or the ability to parallel the two positive supplies. However, for most circuits, this is more than enough.
The real downside of the power supply is the lack of standard banana sockets. Instead a screw-terminal style connector is used. This means you’ll need new special cables and keep a screw driver handy. There is an accessory pod available that breaks the connectors out, but that adds $60 to the cost.
All outputs are either ON or OFF, there is no individual control available.
Digital Multimeter (DMM)
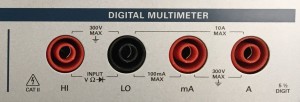
The Digital Multimeter has 5 1/2 digits of resolution which samples up to 5 Samples per second.
The standard measurements include:
- DC Voltage
- DC Current
- AC Voltage
- AC Current
- Diode
- Resistance, and
- Continuity testing.
Function Generator
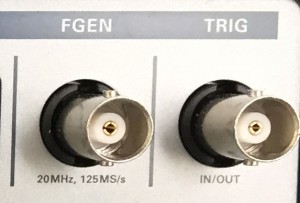
When it comes down to it, I don’t see much need for a function generator. In fact, the only reason I have ever used mine was to teach about or test an oscilloscope. VirtualBench’s F-Gen has a fundamental sine wave of 20MHz which can also be used to create a 5MHz square wave along with ramps, triangle, and DC.
Overall the F-Gen’s specs seem impressive. I didn’t notice anything that concerned me, but really.
Logic Analyzer / Mixed Signal Oscilloscope

The VirtualBench’s marque function appears to be the mixed-signal oscilloscope. What is a Mixed-Signal Scope? The simplest definition is a combination of analog (traditional analog scope) and digital channels (logic analyzer), that are time correlated. The VirtualBench’s The Analog Bandwidth is 100MHz and can sample up to 500Ma/s on both channels or 1Ga/s on a single channel. This 5-10x over-sampling is more than enough for 100MHz measurements.
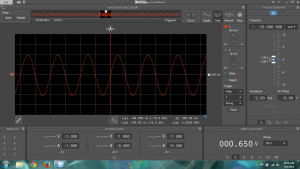
Oscilloscope (Analog Channels)
The Analog Scope has some really impressive specifications.
- 100MHz Analog Sampling
- 500 Ms/s on 2 Channels, 1Ga/s on 1 Channel
- 1 Million Samples per channel
- DC or AC Coupling
- 10mV/div to 5V/div across 10 vertical divisions
- 1MΩ Input Impedance
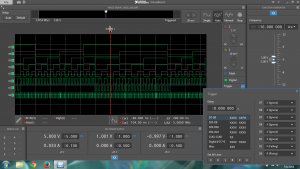
Logic Analyzer (Digital Channels)
- Max Frequency: 100MHz
- 34 Channels
- 0 to 5V Input Voltage
- Input Threshold: 0 to 1.65V
Under most conditions, the logic analyzer can acquire 1 MS of data. Under some conditions with very high sustained activity on multiple inputs, the logic analyzer may only capture 4 kS of data.
This sounds like a potential buffer issue. I’m not comfortable with the “under some conditions” terms–it has no business being in a data sheet, let alone a footnote.
Common Characteristics
The trigger system supports analog channels, digital channels, function generator start, digital I/O lines, external trigger (TRIG), and power line frequency as input triggers. The modes are a bit limited with only Edge on the analog channels. Digital channels support a pattern, and level trigger.
- 22 Measurements (like Period, Vpp, and Rise Time)
- 2 Cursors
- 4 Math Functions: Add, Subject, Multiple, and FFT
GPIO Pins
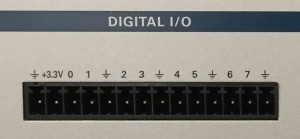
There are 8 GPIO pins that are 5V tolerant with 3.3V outputs. This means they should be suitable for most TTL or LVTTL work. Typically I/O pins like these will get used to control or watch the DUT. For example, maybe you want to automate RESET. These probably have more utility when programming the VirtualBench with LabView than controlling it from the software.
Software
As mentioned in the beginning, I did not do any testing with LabView. I only made use of the Windows and iPad applications. When connecting via Windows you have a choice between USB or WiFi. The update rate on the scope and other instruments was definitely slower over WiFi. While the VirtualBench does have the ability to create an Ad-Hoc network, I didn’t bother. Mucking around with WiFi settings isn’t something I like to do. In cases where I need the maximum update rate, I’d rather just use USB.
When I received my unit, I almost sent a strongly worded email about forgetting to include a CD. Of course, with VirtualBench even the CD is Virtual. When attached to a PC, the VirtualBench appears as a “Virtual CD Drive.” This lets you launch the VirtualBench application directly from the VirtualBench itseslf. This is the first PC-based instrument I’ve encountered that worked like this.
Windows
In terms of features, the Windows application has far more capability than the iPad application. Display persistence and Digital Channel support are only available on the Windows version. The App doesn’t follow typical application UX design, but that’s okay. It’s clear and consistent throughout.
Screen Size
Whether I used my 13” Laptop Screen or my 30” Desktop Monitor, the layout worked nicely. You’ll be okay on a 4:3 or 16:9 display. However, the horiztonal nature of the oscilloscope display really benefits from a 16:9.
Using A Mouse
Quick story: my co-workers like to poke fun at me when they pull out their paper notebooks. I don’t have the update necessary to enjoy using that particular technology. Despite trying existing almost entirely only in digital form, I’m old-fashioned when it comes to knobs and buttons on test equipment. Using the mouser to interact with virtual controls, just doesn’t seem as intuitive or as convenient as touching a knob. Not only that, I rarely have room on my work area for a mouse.
That said, the VirtualBench application does support intuitive scrolling. Hover your mouse in the waveform area and scrolling works like Google Maps. Same with any of the controls on-screen. You can even scroll up and down things like the voltages for the power supply. This is nice, but still, I hope someone develops an Arduino-based USB attach front panel for the VirtualBench.
iPad
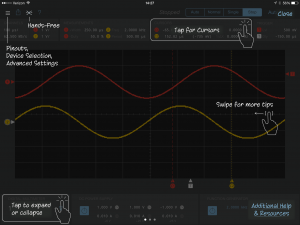
You can download the free iPad App from the Apple App Store. When launched, it’ll look for VirtualBenches on the local WiFi network or give you the option to use built-in demo data. If you aren’t lucky enough to have access to a real box, I suggest at least playing with the virtual data.
Zooming in and out on the waveform display uses intuitive touch controls. Pinch to zoom, touch and drag to move.
Entering numeric values can either be typed in like a keypad or using “drag” controls. This is useful for things like ramping up voltage or adjusting frequency.
Screenshots with a bang
One of the fun (and useful) options is to enable actions with based on the accelerometer. For example, you can start / stop the instrument or save a screen shot by banging the desk. Just be careful when you start banging your head on the desk. You might fill up your iPad quickly. (Just Kidding.) This kind of forward-thinking UX design is an excellent use of the interactions that a tablet style instrument provides.
I also like the idea of sitting back in my chair while evaluating the data being shown.
Conclusion and Rating
Overall, the VirtualBench continues to impress me. This really is going to be the future of physical Test Equipment. Just like the smartphone integrated many electronic devices into one, I think our test equipment will do the same. The hardware specs are substantial and really drive home the value of the $2000 (USD) price point.
Quick breakdown of the Pros and Cons:
Pros
- Wide voltage negative supply will work great for op-amp circuits
- Strong oscilloscope specifications
- Intuitive iPad Controls
- All the key instruments you need in a single box
Cons
- Power supply doesn’t have standard BNC Connections
- Can’t measure voltage and current with DMM
- Limited math functions in the scope
Rating
For a hobbyist, the $2000 price point is going to be hard to stomach. However, if/when you can afford the price the VirtualBench won’t disappoint.
For the professional engineer, I can definitely see this being either a supplemental device or your entire workbench. If you’ve got a lab full of test gear already, this might find itself a place on your desk, next to your mouse.

4 out of 5 LEDs



3 Comments
It’s a nice tool, but to me the power supply is still too small.
A 0-20V 3A would be perfect ! (and not sure I need a negative supply).
Of course, I understand it’s not easy to satisfy everybody.
But when it comes to the power supply, did you notice it’s extremely hard to find a very compact ~60W supply ?
the advantage of “compactness” of the virtual bench is lost if I need an other supply around.
Maybe NI should offer more options (currently only 2 variants).
Price is pretty fair for professional use.
“I totally agree about the lack of banana plugs for the supply being a design oversight.”
The hardware team heard your feedback from several other users, too, and the result is the VB-8034 — more current on all three channels and banana plugs for your banana cables.
I own a VirtualBench and use it quite a bit in my lab, and I totally agree about the lack of banana plugs for the supply being a design oversight. That weird dongle-adapter NI offers to correct it isn’t much better. It bothered me enough that I designed and built a little rigid adapter that works quite well.
Of course any time you do a custom PCB, you end up with a bunch of extras whether you want them or not. I only need one of these things myself, so I’ve made the extras I got available as a kit here if anyone is interested: https://www.tindie.com/products/SCALARElectric/dc-power-supply-banana-plug-adapter/