
As your schematics grow in complexity, it isn’t always possible to draw simple connections between chips or devices. Sometimes it isn’t possible to put two parts next to each other like a pin header and I/O chip meaning that wires have to run all over the schematic to make the connection. That gets messy quick and not very easy to follow.
EAGLE automatically connects all nets (or wires) inside of a schematic when they have the same name. This means even if they are not physically connected on the schematic giving them the same name will connect them together. Using this trick, it is pretty easy to break up nets across the page.
Simple Net Example
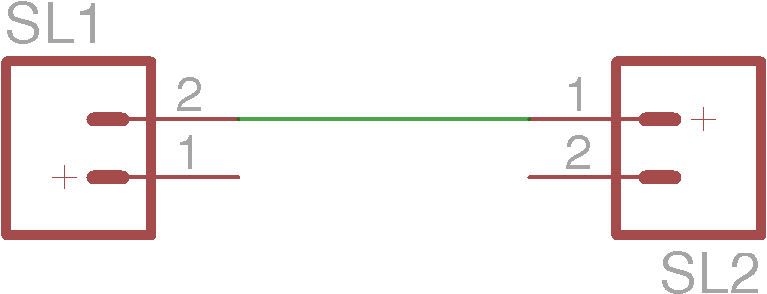
For example, this is pretty obvious that there is one net in this schematic and it is connected together:
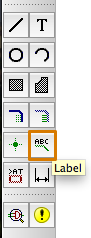
To show the name of the net, use the LABEL command, shown on the left. Keep in mind that when you press the ALT key while moving something, it uses the Alternate grid. Which in the case of the shematic editor is very high resolution. Also the newly added label is already “smashed“. This means the label is disconnected from the wire itself. You can easily use the MOVE command to just move the label around.
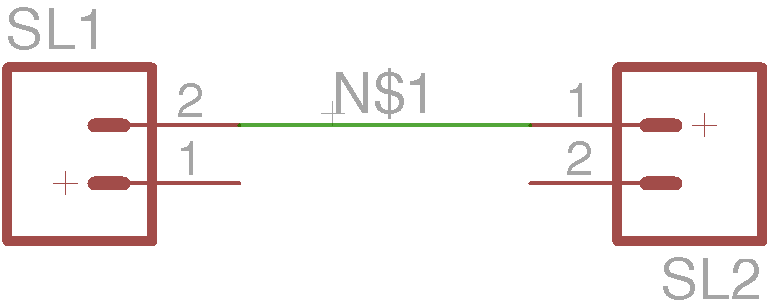
The default name for the net isn’t all that descriptive, is it? Using the NAME command, it doesn’t take much to change this to something more descriptive. For example, maybe this is a SENSOR input, so that’s let name it that instead of N$1. (Click to Zoom).
Once the name is created it will appear above the net. Using the MOVE command, you can move it around as to a good location.
 This is a pretty straightforward example. This works well for connectors since the pins of a connector may not be labeled. How about if there are two connectors on opposite sides of a board? Or one chip on the left of the schematic has a connection to a connection on the right, how can the nets be connected together?
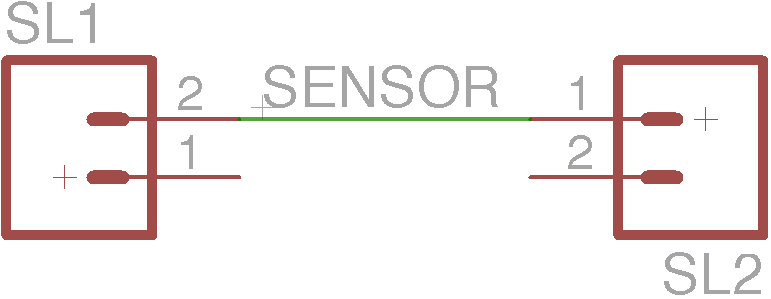
Split Net
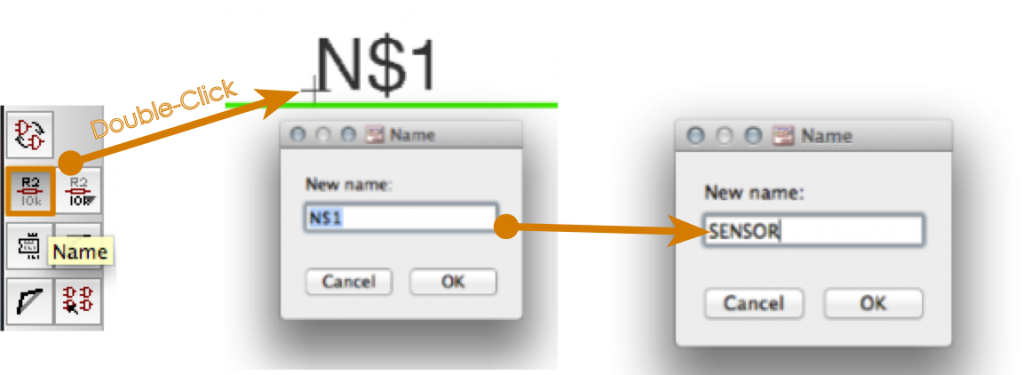
Since EAGLE automatically connects nets with the same name together, it is pretty easy to split the net up visually. All you need to do, is make sure the nets are the same name, like shown here.

Any time you split up a net, it is a good practice to add the label. When splitting up an existing net, make sure both nets have the same name.
Connect?
When you name a net the same as an existing net (try this with VCC and GND too!), EAGLE will prompt you. The prompt is asking if you want the nets to be connected together, since they are going to have the same name. If this is what you intended to do, just click YES and move on.
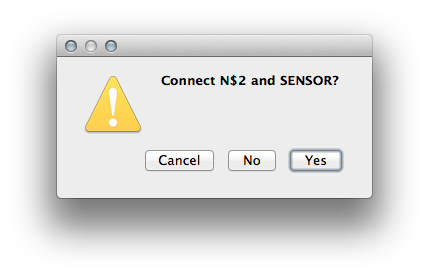
 Even though the dialog offers “Cancel” and “No”, they both do the same thing. If you click “No”, the net won’t change names. One more command that you might want to keep in mind is the SHOW command. Shown on the right, if you click SHOW and then a net, all of the nets with the same name will light-up.
Conclusion
By using the NAME and LABEL commands, it is easy to connect “unconnected” nets inside of EAGLE together. This can for schematics that are a little bit easier to read and not very cluttered.


3 Comments
Also when you choose the label command there’s a new toolbar that appears that allow you to put on those little tags rather than just having the plain text.
I’ve used that to great effect in building charlieplexes – rather than trying to untangle a rats nest of nets, I just stub out wires on the LEDs and label the source and drain pins and let Eagle figure out the nets on the board rather than hand-crafting the nets in the schematic. It’s easier to understand what’s going on too, in my opinion.
I agree. It is almost like comments and functions in software. Instead of chasing a wire around a schematic, quickly seeing where it is connected with a label is much simpler. When the file is open in EAGLE it isn’t so much an issue. When looking at a static version of the schematic, you can’t just click on a wire to see what node it is.