Author

James Lewis

Browsing
lattice as shop storage
Picture via makezine.com

The article caught my eye because I’m about to make a move, and I’ll be setting up my shop soon. Seeing these clever alternate uses is already giving me some ideas.

The perfect shop doesn’t need expensive storage options. While there are stores dedicated to containers, they to tend to run on the expensive side. A workshop, may not need the most expensive storage gear. Especially if it gets as dusty as mine! This Make article offers 5 Simple Shop Storage Solutions.

Another resource for shop hardware is Episode #92 of The Engineering Commons podcast, “Garage Gear.”

The Arduino Uno has six pins dedicated to Pulse Width Modulation (PWM). PWM is great for analog-like control for the speed of motors or LED fading. But what if you want to control more than 6 devices? Or what if you’re using the PWM pins to control servo motors, but still want to fade an LED on a 7th pin?

One option is to change boards and processors. For example, you could move up to the Arduino Mega 2560. That means a bigger board and more cost.

Using millis() and micros(), it is possible to do PWM entirely in software. The best part is; if you can set the pin to OUTPUT, you can use this technique.

This tutorial will explain how you can use micros() and millis() to get more PWM pins on an Arduino Uno, Nano, or Pro Mini. It will probably work on other boards and processor types, but I haven’t tested them yet.

There’s a reason I needed this software PWM code. Subscribe to the mailing list, RSS feed, or follow me on social media to see why next week…

Apologies to the email subscribers if the code isn’t formatted correctly. Click here to read the full post.

Arduino digitalWrite speedPreviously I looked at the speed difference between digitalWrite and direct port manipulation. It was a chance to check out a Saleae Logic Analyzer. Andrew at !Crash-Bang Prototyping took the analysis a step further. He broke down what is going on inside of digitalWrite().

This study is useful. When you’re ready to move beyond the Arduino IDE or the core functions, you can decide if you need your own version of digitalWrite().

Check out !Crash-Bang Prototyping’s “How Arduino digitalWrite Works – and why AVR is Faster“.

Deck out the rest of your Ghostbuster gear with a Ghost Trap. Dustin McLean from DIY Prop Shop from AWE me builds a trap in this quick 12-minute video. The build uses very basic materials: cardboard, popsicle sticks, tape, PVC, and spray paint. Of course, the tools used are just basic cutting and straight edges.

If you aren’t familiar with DIY Prop Shop, the show–as the name suggests–takes a DIY approach to building famous movie props. Totally fun to watch and get ideas for your projects.

Check out the Ghost Trap Build on YouTube. Who you gonna call?


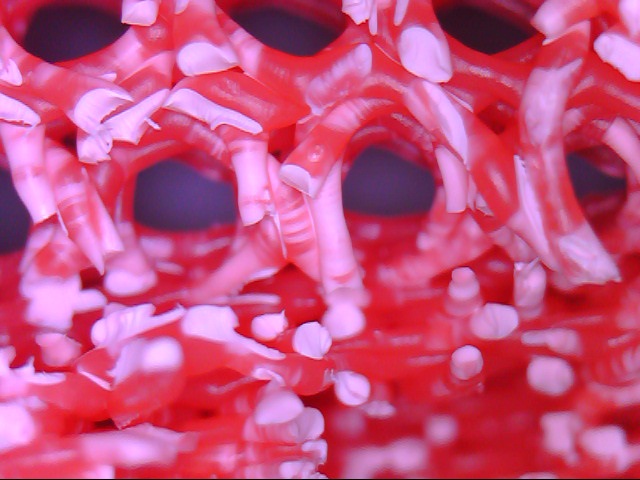
Polymer Crazing via engineerdog.com

Ever notice when you over-stress plastic, the stress points tend to turn white? The color or type of plastic doesn’t seem to matter, does it? So what is going on? This awesome post from EngineerDog explains why stressed plastic turns white.

If you’re starting to work with ABS on your 3d printer, it will help to understand what is happening to the polymer chains. It’s a process called crazing.

One good reason to learn about crazing is there is a way to fix it. So check out EngineerDogs’ explanation for more.