Author

James Lewis

Browsing

To detect a short and long button press using millis can give your project more functionality without adding more buttons. In this line-by-line example, I show how to react to a user pressing a button for a short period (100ms) or a long period (over 500ms). My example changes the blink rate of an LED on short presses. A long button press turns off the LED.

In the code, I make use of a struct so that a single variable can be used to track multiple parameters. The benefit of this method is that adding multiple buttons is easy. You could create an array of these tyepdef’d variables.

Download At GitHub
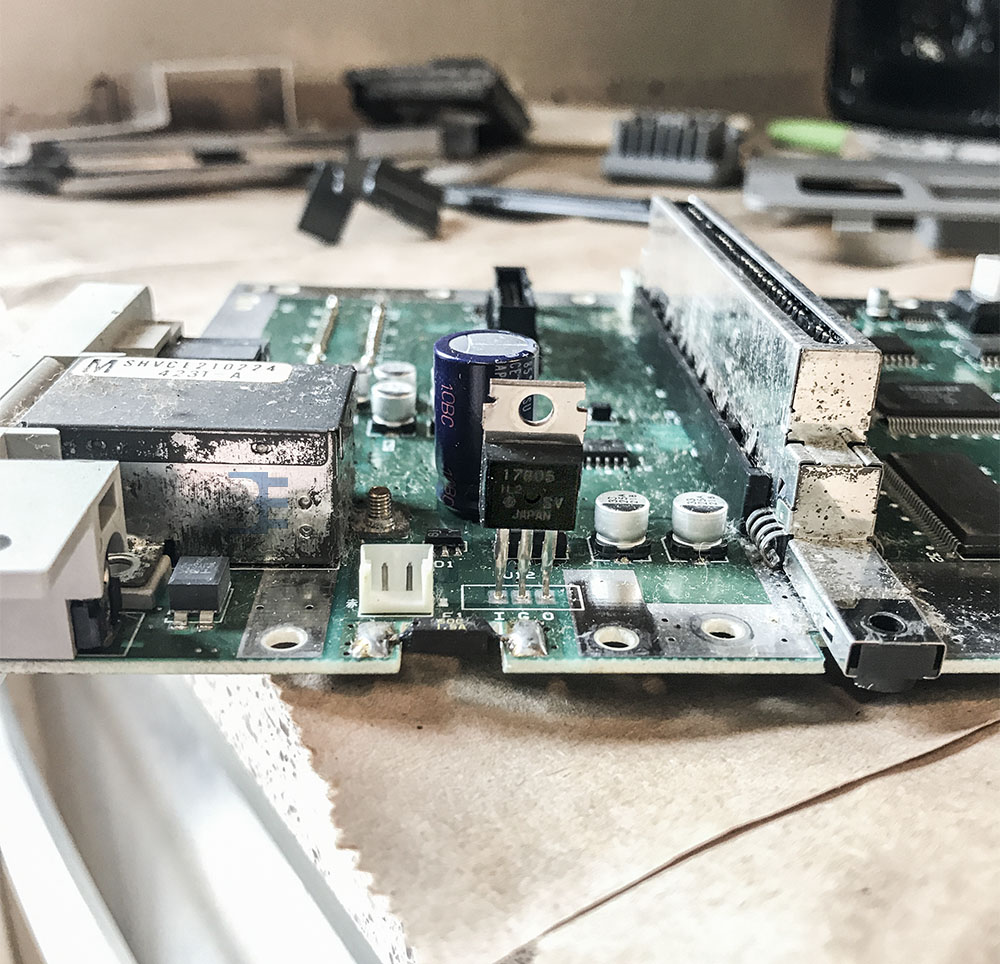
When I made the AddOhms Tutorial on Linear Regulators, I made a comment about the 7805. I said it may be one of the most important Integrated Circuits (ICs) ever made. That’s a bold statement. The 555, 805,  or 7400 might all qualify for such a distinction. My feeling about the 7805’s importance is because it is a chip that is still popular today. It is used, or at least was used, in so many applications. And it is the heart of many 5V digital systems.

Including the Nintendo Super Famicom (and I assume the US SuperNES).

This picture is from an SFC I disassembled to repurpose the case. While taking it apart, the 7805 caught my attention because it was attached to a shield as a heat sink. Also, I find it fascinating that it is one of 3 or 4 through-hole components on the entire system. As you can see from the picture, it needs some cleaning. I might post more pictures later.

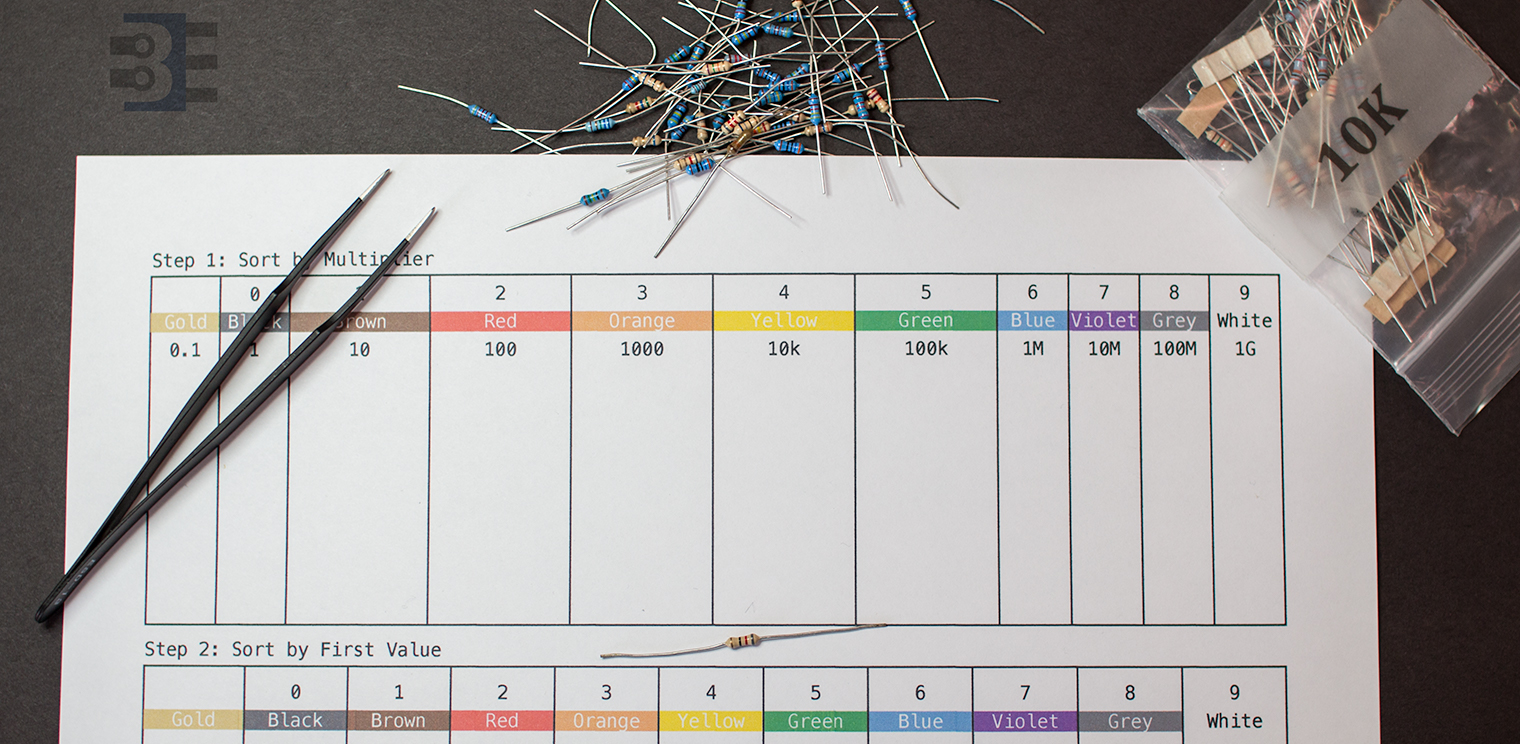
When you buy a grab bag of components, you might need to tackle sorting resistors. Here’s how I sorted some bags of random resistor assortments last week.

Objectives

Then method I use for sorting resistors achieves these objectives:

  1. Fewer Bins. It doesn’t take long to create a large matrix of resistor values. My resistor sorting method is relatively compact.
  2. Quick to find. When I’m building up a circuit, I don’t want to spend time sorting through a pile. Once I know the value I need, I find a single package and then look for a single color band.
  3. Works with 4-band and 5-band resistors. Let me be upfront: I *hate* 5-band resistor color codes. While the 5th ring is supposed to be slightly offset, or wider, or a different type of color; it doesn’t matter. It’s nearly impossible to tell read a 5-band resistor color code when they are in a pile. However, using my method for sorting resistors, it doesn’t matter if I’m looking at a 4-band or 5-band resistor. I can immediately identify the resistor value.

Based on #3 alone, you might be wondering what is the fantastic method (and how much will it cost to get it!) Here’s the basics of my method for sorting resistors. (For FREE!)

The Arduino serial monitor is usable when you want to watch data from an Arduino. However, it does not have a built-in method for saving the data. Here are some ideas if you want to build an Arduino data logger with or without a PC.

Important note on Arduino Data Logger examples

With all of these examples, please remember that whenever you open the Arduino’s serial port, the board will reset. So if your log file shows “Initializing SD card…” with a few data lines in between, it is because there is a reset happening.

Initializing SD card…initialized.
Temp: 34, Time: 03:24:44
Temp: 33, Time: 03:24:45
Temp: 34, Time: 03:24:46
Tem

Initializing SD card…initialized.
Temp: 34, Time: 03:24:50
Temp: 34, Time: 03:24:51
Temp: 33, Time: 03:24:52
Temp: 34, Time: 03:24:53
In that code you can see data logging started and then restarted. What happened is that after programming, the board starts logging. Then when you open the Serial Monitor, the data logger restarts. To solve this issue, either disable auto-reset, add a 3-4 second delay at the start of setup(), wait for a character to be received, or wait for a button press. That will give you time to open the Serial Monitor.
Sending simple serial commands to an Arduino is the easiest way to communicate between an Arduino and a computer. The computer could be a PC, a Raspberry Pi, or any device that communicates with serial. By sending and “decoding” a single character it is easy to add a simple debug menu or even serial menu. Plus, it is easy to extend.

Single Character vs. Full Words

The mistake I see many people make is that they try to send full-text strings as serial commands. For example, to turn on a LED, I have seen (silly) commands like “RED LED ON” or “RED LED OFF.” While you could use something like strcmp(), as I showed on the Multiple MQTT Topics example, that tends to be overkill for most serial commands. Humans like words, computers like binary. Just send one character over serial.

switch (variable) {
  case 'a':
	// A Stuff

  case 'b':
  case 'c':
	// B and C Stuff
  break;
}