
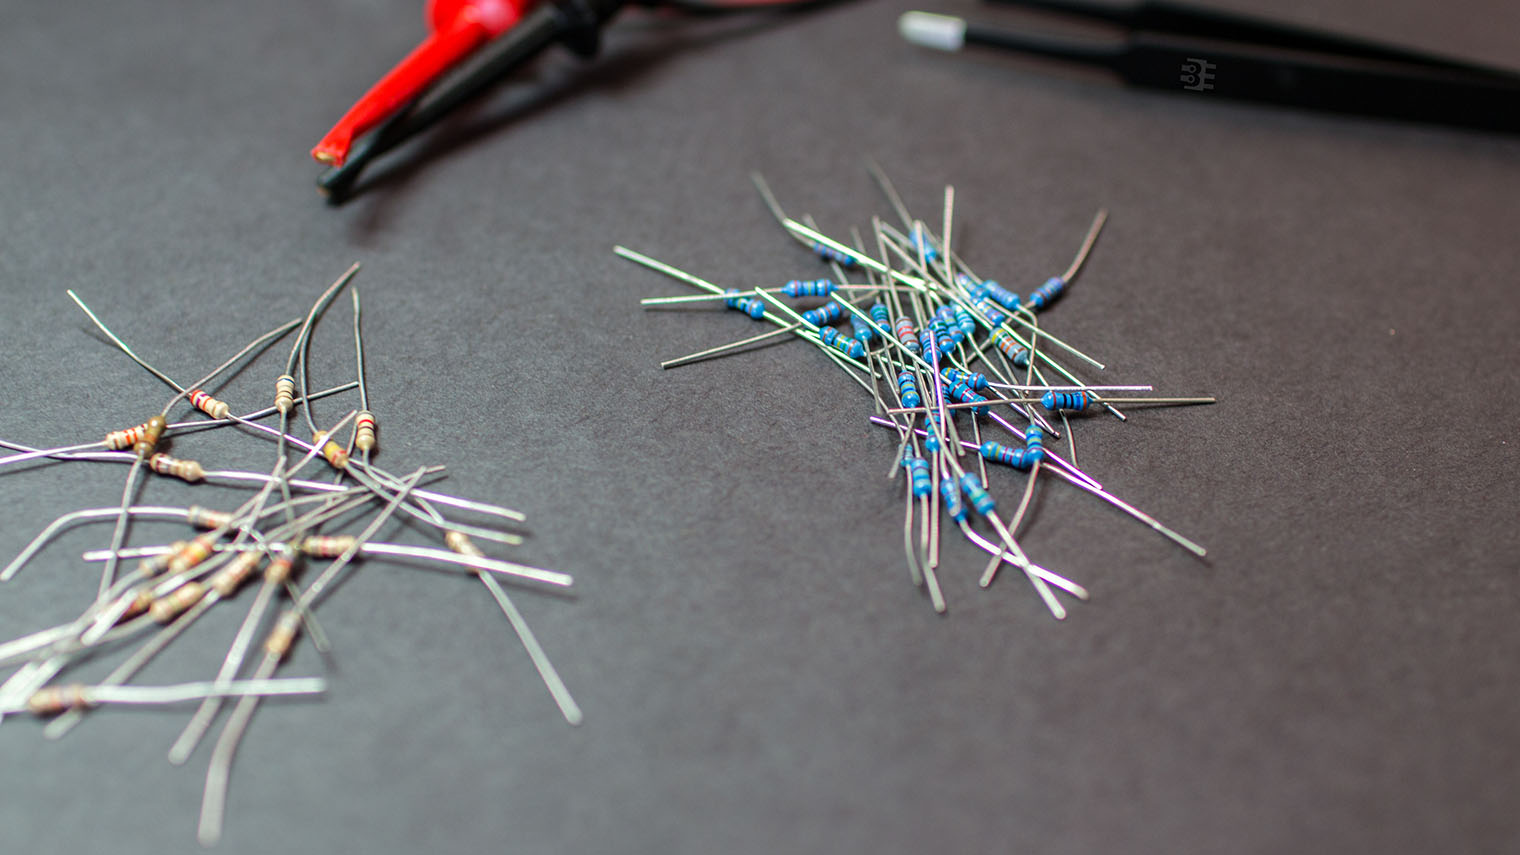
When you buy a grab bag of components, you might need to tackle sorting resistors. Here’s how I sorted some bags of random resistor assortments last week.
Objectives
Then method I use for sorting resistors achieves these objectives:
- Fewer Bins. It doesn’t take long to create a large matrix of resistor values. My resistor sorting method is relatively compact.
- Quick to find. When I’m building up a circuit, I don’t want to spend time sorting through a pile. Once I know the value I need, I find a single package and then look for a single color band.
- Works with 4-band and 5-band resistors. Let me be upfront: I *hate* 5-band resistor color codes. While the 5th ring is supposed to be slightly offset, or wider, or a different type of color; it doesn’t matter. It’s nearly impossible to tell read a 5-band resistor color code when they are in a pile. However, using my method for sorting resistors, it doesn’t matter if I’m looking at a 4-band or 5-band resistor. I can immediately identify the resistor value.
Based on #3 alone, you might be wondering what is the fantastic method (and how much will it cost to get it!) Here’s the basics of my method for sorting resistors. (For FREE!)
Sorting Resistors: 3-Step Process
The method for sorting resistors is pretty simple. First, sort them by 4-band and 5-band types. Next look at their multiplier code. Then, sort them by the first band’s color. Store them in bins or packets based on these two pieces of data.
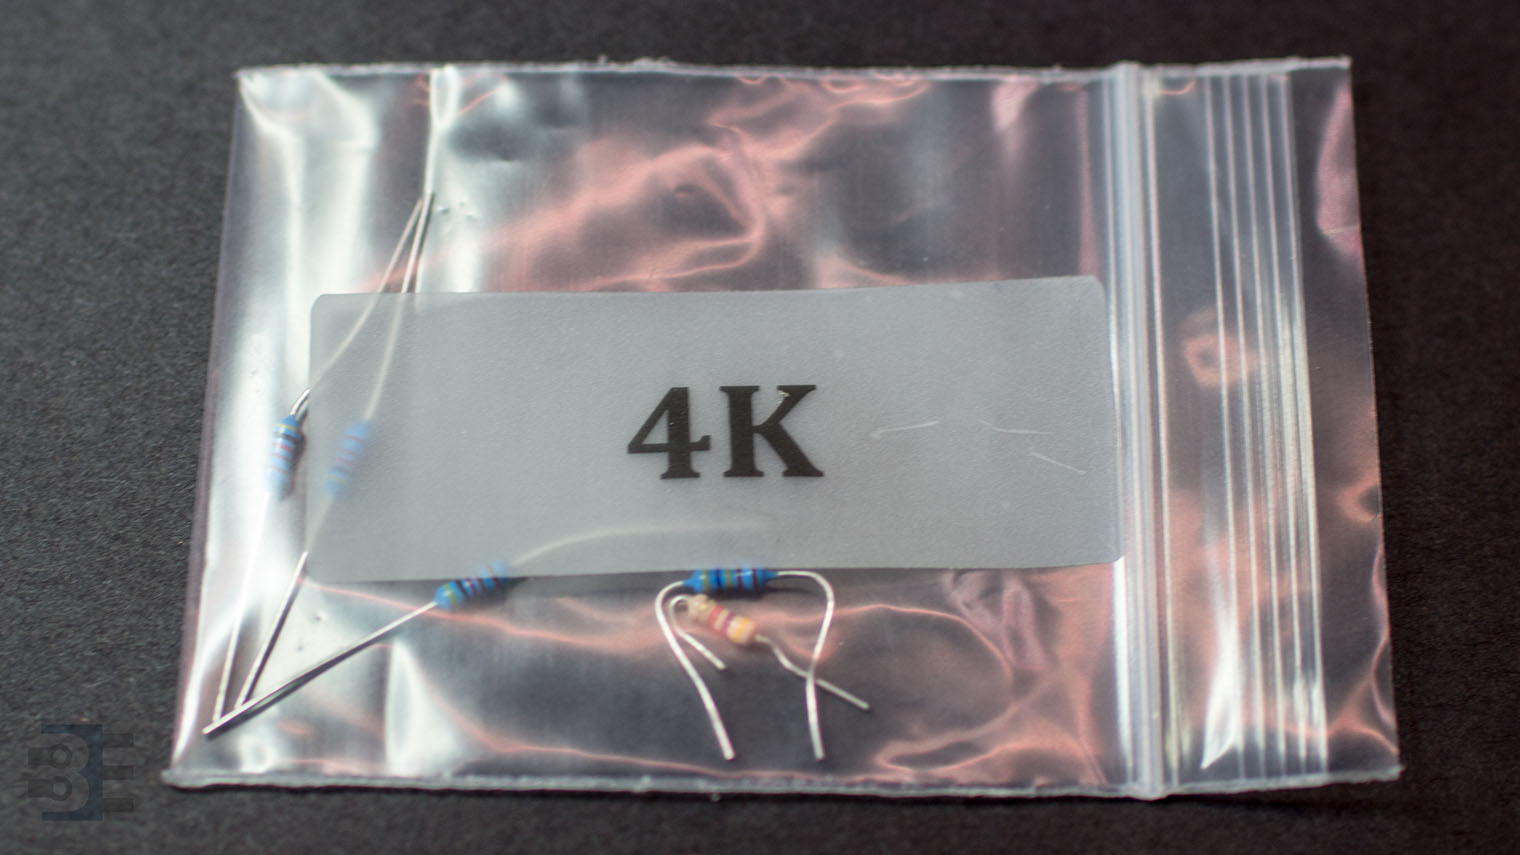
This way when you need a “4.7K” resistor, you can find the container with “4K” resistors. Just look at the second code to be a violet (or “7”), and you’re done!
Let’s go through the process I use for sorting resistors in more detail. I’ve even created a chart you can print out, ideally in color, to help.
Step 0: Download my resistor sorting chart
I made this chart to help when I sort resistors. I’ll use it on the 3 step process below. Leave comments on how we can improve this chart!
Download Sorting Template (Letter Size)Step 1: Sort by 4-band and 5-band
This first step is really more to keep you sane than anything. Dealing with 5-band resistors is frustrating. Once you get a pattern going though, it gets a bit easier. So I find it is better to divide and conquer. Sometimes I’ll do a few groups of 5-band first then do 4-band just as a break.
Step 2: Sort by Multiplier
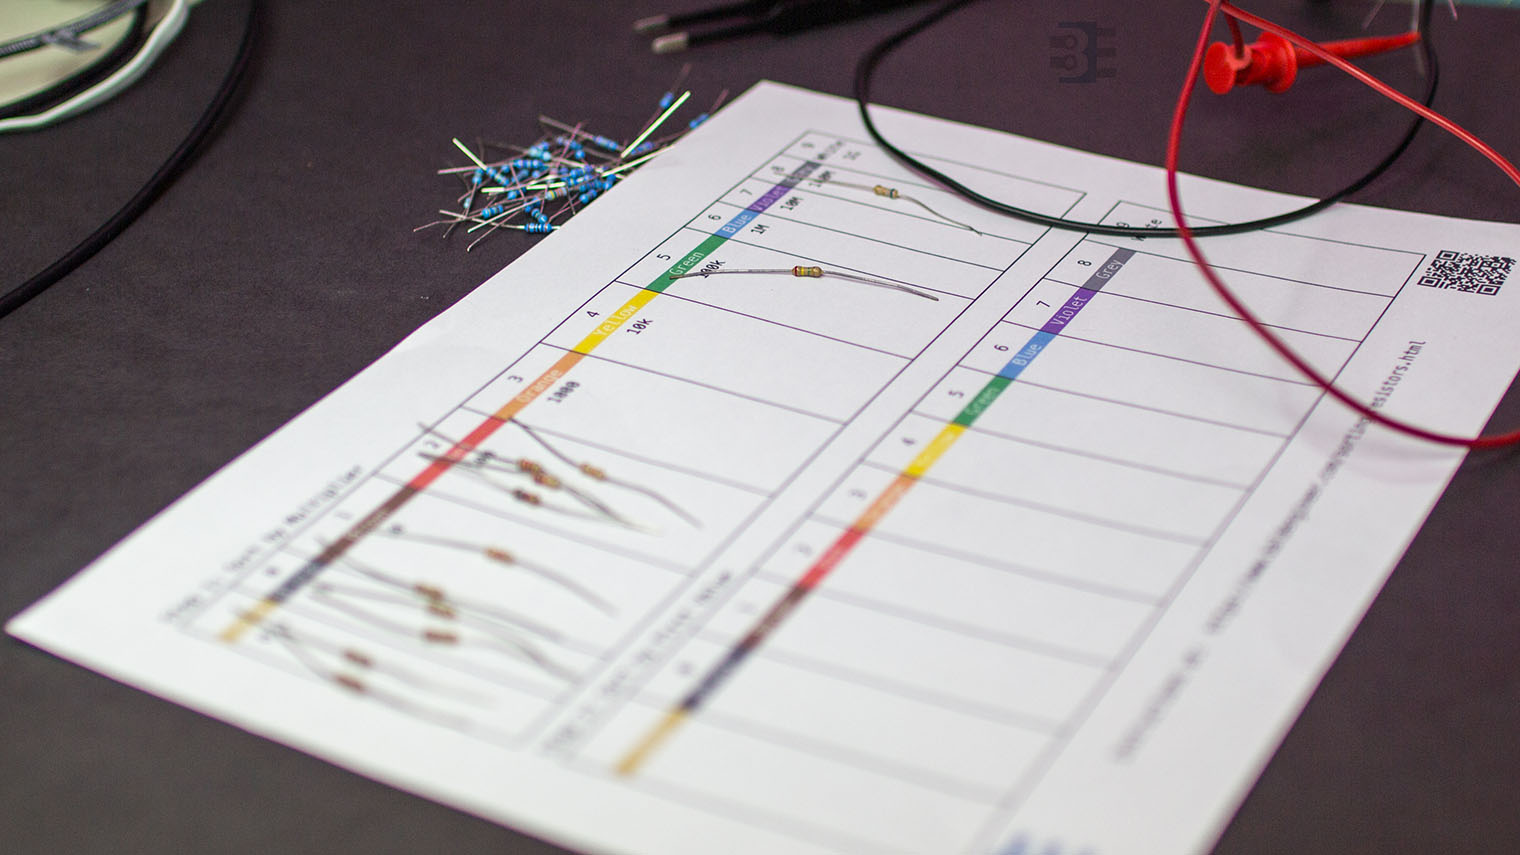
The second step is to identify the multiplier code for the resistor. On 4-band resistors this is relatively easy, but still necessary. On 5-band resistors, however, the process is more complicated. Thankfully, following this process makes dealing with 5-band resistors much easier. As you can see in the image, I’ve matched up the color of the muliplier band (3rd on a 4-band) to the box on the chart. The middle boxes are larger because I found those tend to be more common.
Step 3: Sort by First Digit
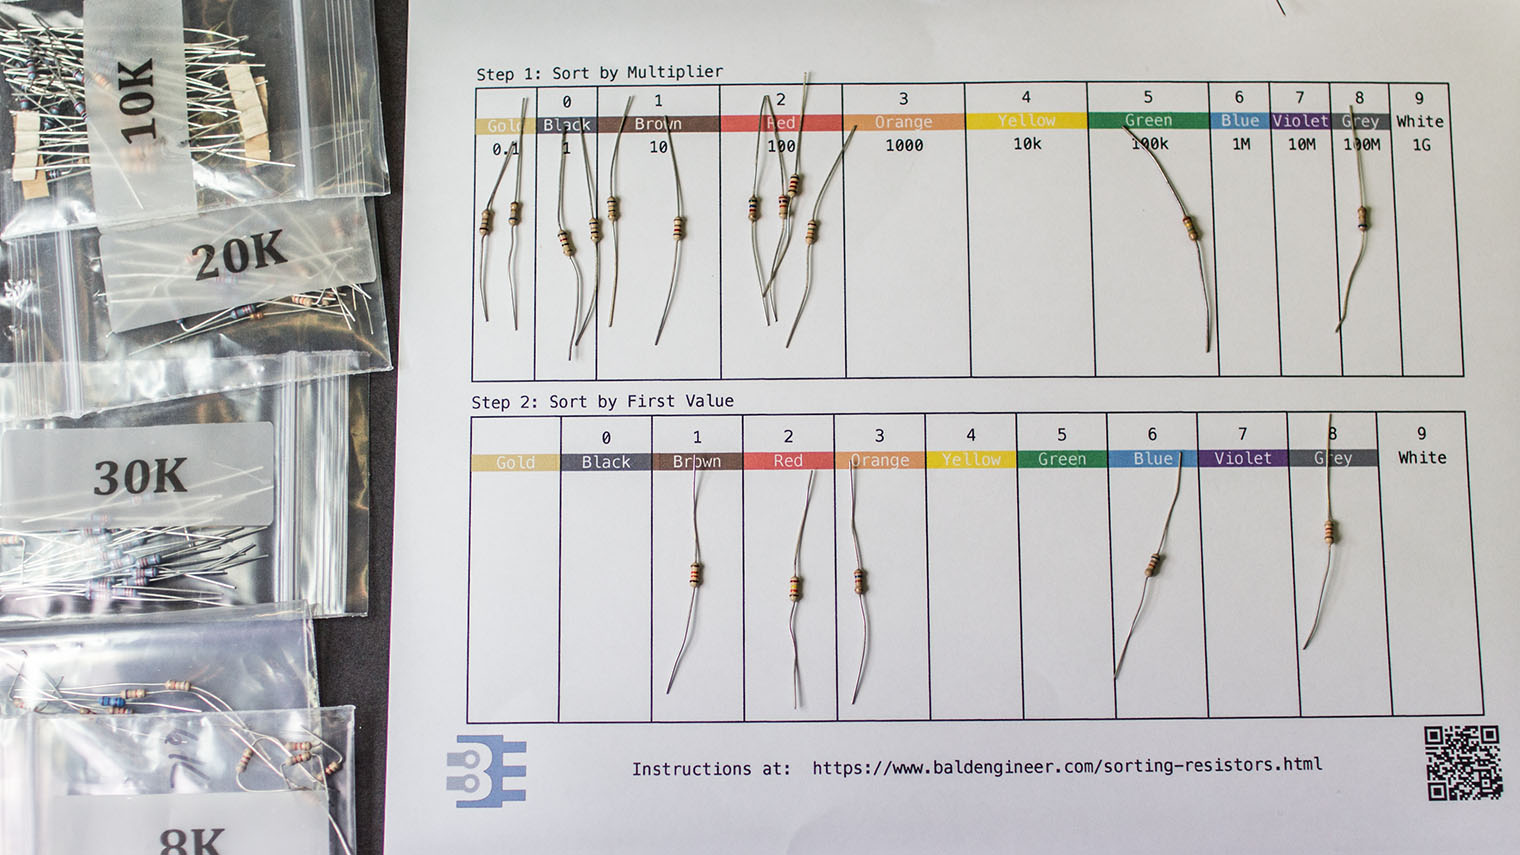
Once you’ve grouped by the multiplier, it is time to sort each group. Look at the color of the first band and class them into their proper bins. This step is the fastest and easiest, at least, in my experience. The picture shows I picked the orange group to sort first. This means the resistors should all be in the 19-99 kΩ range. Turns out I had a brown, red, orange, blue, and grey in that group.
How to use my resistor sorting method
When you’re looking for a resistor here’s how you use this method. Figure out the decade value, or multiplier you need, then look for the packet with the first digit. Once you have that packet or drawer, just look at the 2nd band.
If you have 5-band resistors mixed in with your 4-band resistors, this method *really* helps. Knowing what color the first color should serve to orient those hard to read 5-band resistors. Then you can verify the 4th circle is the right color, by the multiplier. Going back to my earlier example. When I need a 4.7 kΩ resistor, I pull out the “4K” packet and look for the second band to be violet! Easy, right?
Sorting resistors with this method is the only way I’ve found keeping 5-band resistors in my kit tolerable. It does mean during the initial sorting I need carefully sort the 5-bands. However, when I’m in a hurry to finish a circuit, they don’t pose a challenge!
General Sorting Tips
Here are a few things I learned while perfecting my resistor sorting method.
Get a headlamp

You’ll feel silly wearing one, but it’ll really help. Turn on the lamp and shine it on the resistors. It’ll make telling the difference between red and orange significantly easier. I use a Black Diamond spot lamp [Amazon]. Little more expensive than some, but worth it. It’s lightweight, very bright, and comfortable to wear. It’s worth a few extra dollars.
Make the DMM work for you
I highly recommend using a DMM during your resistor sorting. Every couple of minutes I’ll do random checks with mine just to make sure I didn’t mess up something.

Even still, here’s two tips I realized while sorting my resistors.
Minigrabbers
My number #1 suggestion is to change your leads to mini grabbers, or alligator clips. Especially when you get to values past 100 KΩ, your body’s resistance will throw off the meter. So holding the leads of the resistor against the leads of the DMM can cause mistakes in the measurement.
Plus, that is a dangerous measurement technique. You should never let both of your hands touch a device, or circuit, under test.
Forget Auto-ranging
If you are lucky enough to have an auto-ranging DMM, this is one time I’d recommend not using it. Or at least, not using the auto-ranging feature. Letting the meter automatically scan through the ranges takes time. If you only measure a few resistors maybe it doesn’t matter. A packet of 100 resistors 2-3 seconds can add up quickly.
After you finish Step 1 and start sorting the first band of the resistor, set your manual range to the max value. For example, if you’re looking at “xxK” values, set your meter to 200K. You’ll have enough significant figures that you won’t have to wait for the meter to click down a few times.
Don’t sort them all
For the less popular ranges, I don’t bother to sort into individual packets. For ranges 1-9, 10-99, or greater than 1 MΩ, I don’t bother to store by the 1st digit. Instead, I just keep them all together. Generally when I do need those values anything in those ranges will work fine. Your mileage by vary, however.
Conclusion
That’s how I sort my packets of random resistors. Please leave a comment with your suggestions or ideas on how to improve my method. Also, I’d like to hear clever ways to STORE resistors.

P.S. Here’s a nice tool for decoding color codes: http://resisto.rs. Put in a resistor value and it gives you the 4-band, 5-band, and SMT codes!


11 Comments
I’ve revamped my resistor sorting method. Well, I’ve revamped a lot more than that, but my new method fits nicely into the grander scheme of organizing all of my parts and pieces.
I’ve been scouring hi and low for the perfect plastic boxes for resistors. I finally settled on this one at Walmart: https://www.walmart.com/ip/Darice-No-Spill-Plastic-Organizer-32-Compartments/22027056
It has 32 compartments in an 8×4 confiugration. That means (3) E24 values per column, and each row is the multiplier. If I use 2 boxes, I can get up to 9.1M and still have a row left for gold/sub-1 ohm resistors. I suppose you could go up to 91M if you don’t care/store anything less than 1 ohm.
I had a “shelf cabinet thing” of 4 drawers wide by 9 high. So I used 8 drawers (2 rows) for each decade, and collected 3 values from E24 in each drawer. Worked well enough with 4 decades, from 100 ohms up to (not including) 1M. Was pretty quick to find what I needed. I just collected the under-100s and 1M and above in their own drawers, since there was a row of drawers left over.
Long story short, I’m rebuilding my small electronics corner, and I searched for other practical means of sorting resistors (even though I liked my previous method). I’m rather causal with electronics tinkering anyway, and my needs aren’t really a full E24 series. And as you noted some bins tend to be more used than others. Haven’t quite decided how I’m going to do this yet, but your method made for an interesting read!
Oh, and btw nice to know I’m not the only one dreading those 5-band resistors!
Also, thanks to Ted Olsen and you for including the schematics for that “Rube Goldberg” Arduino meter! Definitively going to test that.
I sort mine exponentially. <=50, <=100, <=500, <=1K, <=5K, <=10K, <=50K, <=100K, <=500K, <=1M, 5M. Yes, it requires a bit of searching per bin, but any more granular would take too many bins IMHO.
My favorite way to organize resistors (purchased in a resistor kit, 1/2W have stronger leads for breadboarding without bending like 1/4W) I learned from Dave Jones. Use the 5% steps for each drawer, so Drawer labeled 1 contains 1,10,100,1k,10k,100k,1M the next is 1.1 so 1.1,11,110,1.1k,11k,110k etc. 27 drawers.
Being able to grab the right resistor quickly is priceless.
could you please explain this method in details?
and there must be 100 drawers not 27
PTBAG.com sells little plastic bags really cheap (if you can use a lot of them)
After reading your article, I developed the “Rube Goldberg” method of measuring resistors with an Arduino. It does “auto range” instantly (if you remove the unnecessary delays and serial printing). I just love building strange stuff.
I hope I can put a picture of the schematic in here somewhere. It has 4 transistors, 4 base resistors, and 4 fixed resistors. Here is the code. It has a LOT of unnecessary display going on.
[arduino firstline=””]
// measure the resistance of a resistor quickly – auto range
// 4 circuits with 4 different fixed resistors
// putting a 200k resistor in series with a fixed 100 ohm may not be very accurate
// also putting a 100 ohm resistor in series with a fixed 100k may not be very accurate either
double tVolts = 5.0; // totalVolts above transistor.
double amps = 0;
double res[4]; // the resistance calculated in each of the 4 circuits
double resistance; // calculated resistance of unknown resistor
double rdg[4];
double t24 = 1024;
int pin[] = {4, 5, 6, 7};
double fixedR[] = {100, 3300, 10000, 100000};
int i = 0;
double volts = 0;
double avg = 0;
double totR;
void setup()
{
for (i = 0; i < 4; i ++)
{
pinMode(pin[i], OUTPUT);
}
Serial.begin(9600);
}
void loop()
{
for (i = 0; i < 4; i ++)
{
digitalWrite(pin[i], 1); // supply +v to base of transistor i
delay(50); // give the transistor time to turn on (probably unnecessary)
rdg[i] = analogRead(A0); // read the voltage between the fixed resistor[i] and the resistor being tested
volts = rdg[i] * tVolts / t24; // volts across fixed resistor[i] and transistor
amps = volts / fixedR[i]; // amps through this circuit
res[i] = (tVolts – volts) / amps; // resistance of the resistor being tested
digitalWrite(pin[i], 0);
Serial.print(i); Serial.print(" ");
Serial.print(rdg[i]); Serial.print(" rdg "); Serial.print(volts); Serial.print(" volts ");
Serial.print(amps * 1000); // Display as mA.
Serial.print(" mA "); Serial.print(res[i]); Serial.println(" ohms");
totR += res[i]; // sum up the 4 readings
}
avg = totR / 4; // get the average to decide which reading to use
if (avg < 1000) resistance = res[0];
else if (avg < 5000) resistance = res[1];
else if (avg < 20000) resistance = res[2];
else resistance = res[3];
Serial.println(avg); Serial.print(" And Finally – TA DAH— "); Serial.print(resistance);
Serial.println(" ohms"); Serial.println(" ");
delay(4000);
totR = 0;
}
[/arduino]
(I don’t see how to insert a picture – schematic) – not that anyone would really want to build this.
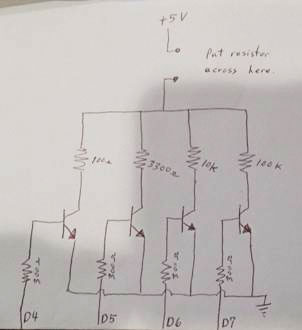
Very cool! (I added the picture you emailed me.)
I store my resistors in old used paper envelopes that continually come in the mail. When I open the letter, I just cut neatly along the top, so there is no ragged edge. There is one envelope for each decade range (0.1 to less than 1, 1 to less than 10, 10 to less than 100, etc. up to 1M and over. Withiin each decade range there are 4 envelopes: 1 to less than 2, 2 to less than 4, 4 to less than 7, and 7 to less than 10. All the envelopes are kept in a tin box that came with biscuits in it, years ago.
On the subject of storing resistors, I have my leaded resistors in a pull out drawer for components. It has 25 (5 across, 5 high) drawers. First one is special I have labelled it everything less than 1 Ohm, next starts at 1 Ohm, next 2.2, next 4.7, next 10, 22, 47… 470k, 1M. Takes up 20 drawers total. In practice the group sizes work out well and I usually can find (say) a 6k8 by opening one drawer, the next lowest down value, 4k7 drawer. The down side is the drawer takes up quite a lot of space. There’s a lot of waste air in there which you don’t get with plastic bags. Since then I have moved a lot into surface mount parts. For those I went and bought a couple hundred small resealable plastice bags from the local $2 (cheap nasty imports) shop. All the same sive. As I then bought resistors (usually 50 at a time for a particular value from Digikey) I would start a new bag with the Digikey label and the resistors in the bag. Then always keep the bags in a sorted stack in another larger plastic bag that’s small enough so they don’t get mixed up (out of order). That way to find a particular resistor involves opening the outer bag, removing the stack, performing a binary search (see Wikipedia ;)) to locate the correct resistor bag, then opening that bag to remove the cut tape strip with the desired resistors. Only ever work with one bag at a time and you will never get mixed up or have to ever read the value on the surface mount chip. I’d be curious to know what other people do. I have seen special SMD folders advertised but haven’t tried those.
It’s a well thought out method. I have not found sorting to be worth the time, especially now since you can get various resistor packs so inexpensively. Time is valuable as well.