
When you start creating your own parts in EAGLE, you’re going to want to store them somewhere. Here’s how to setup EAGLE to use custom directories and how to create your own Library, which gets stored in the custom directory. There are a number of steps involved, but once setup custom libraries give you a place to store components you create as well as the ability to copy other parts into your library.
The following directions are based on the OSX version of EAGLE. If you are using Windows or Linux, the screens will look a little bit different. However, everything else should work the same.
These are instructions to create a custom library. These are not instructions on how to create a custom part, that’s a different (future) post.
Step 1: Create a custom directory
By default, EAGLE stores a lot of information in a standard installation directory. It is not a good idea to store files in the default locations, since they may get deleted or overwritten when updating versions of EAGLE. So the first thing to do is create a folder on your computer to store custom EAGLE stuff. I call mine “eagle” and store it in my Dropbox folder. (Creative name, I know.)
Step-by-step instructions on how to create a folder aren’t going to be provided. You need to at least know how to create directories on your computer to follow this tutorial…
Step 2: Configure EAGLE’s Directories
Once you have a directory, you need to tell EAGLE about it.
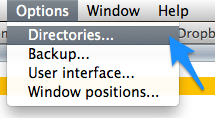
From any of EAGLE’s Menubars select “Options” then Directories…”
The Directories Dialog lets you setup directories to automatically find Libraries, Design Rules (DRU), User Language Programs (ULP), Scripts, CAM Jobs, and Projects. Picture 2 shows how I have my EAGLE directories setup. In my case, I’ve created a custom folder for each entry.
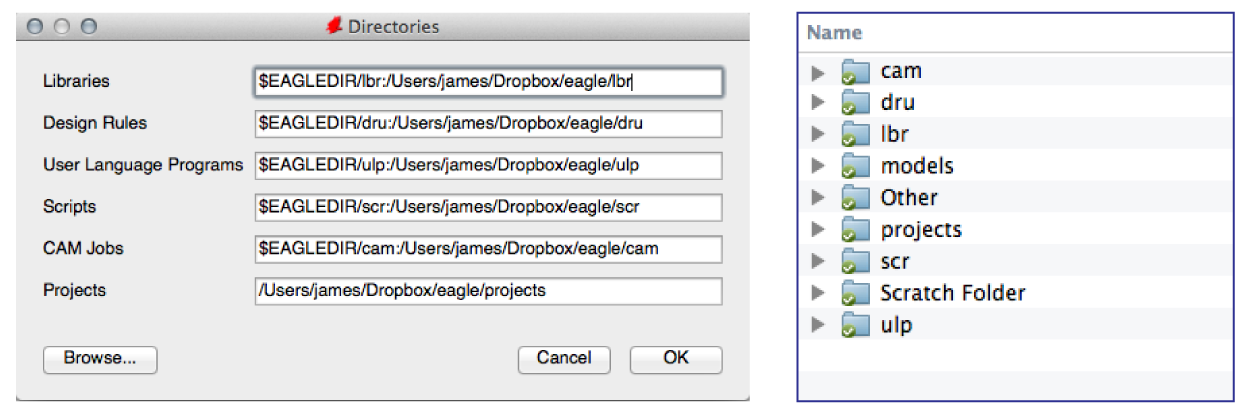
You can setup the other directories now, but for the rest of this tutorial, you only need to setup the Libraries directory. Either type in the full path to where your custom EAGLE directory is, or use the “Browse…” button to find it. Either way, you’ll want your Libraries box to look like mine as shown in #4.

Notice that you’ll always want to keep the “$EAGLEDIR/lbr” part, because that’s the default path. What you’ll be adding is a “:” (or “;”) and then the path to wherever your custom files are kept. Mine are kept at /Users/james/Dropbox/eagle/lbr/.
Step 3: Get the Control panel Window
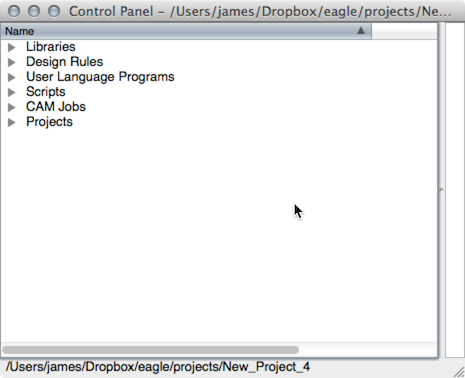
The default window that EAGLE shows when it loads, is called the “Control Panel.” If you have an active Schematic or Board open, you can also open it from the Window menu. When you do, it’ll look like Picture 5. You may need to collapse the disclosure triangles to match.
Once you’re in the Control Panel select New -> Library from the File Menu
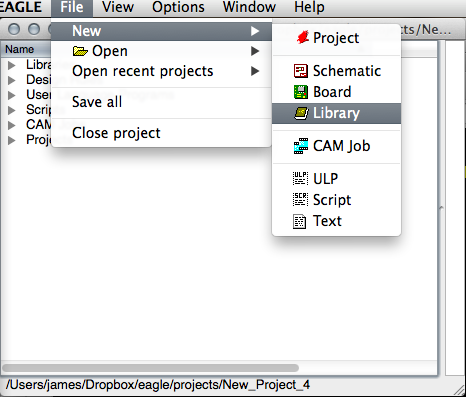
This will open up a “Library Workspace” like Picture 7.
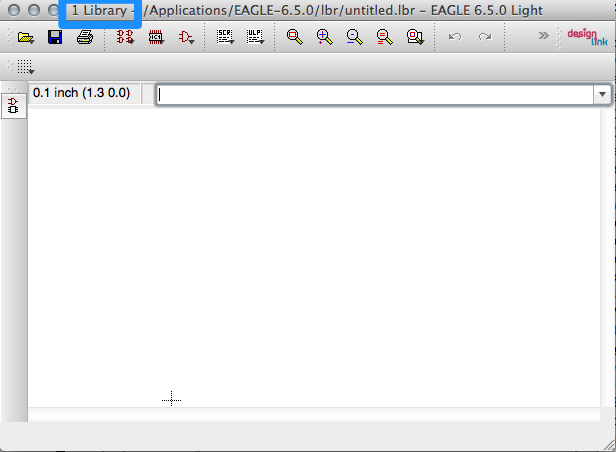
This looks like the schematic editor, but it isn’t. It is a very different workspace. For now, let’s save this new “Library”.
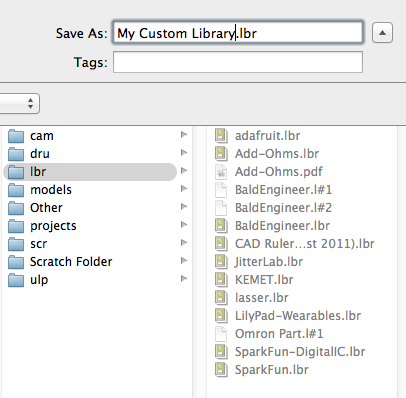
Step 4: Saving the Library
Nothing really fancy here. Just Go to File -> Save. Save the Library in your custom EAGLE directory. As an example, mine is saved in /Users/james/Dropbox/eagle/lbr/ on my Mac. For now, name the file “My Custom Library.lbr”.
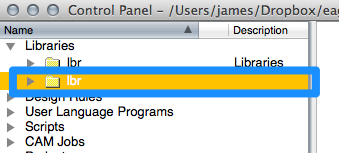
Step 5: Verify it worked!
For now, close the Library Workspace to get back to the EAGLE Control Panel window. Click the disclosure Triangle next to the world Library. You should have two directories listed: the Default EAGLE lbr directory, and whatever you called your custom library directory. I wasn’t very original, I called my lbr. You can tell which is the new custom one in Picture 9, because there’s no description on it.
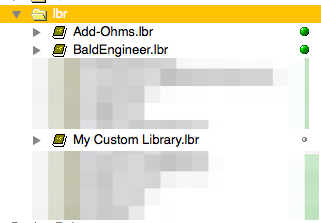
Click the disclosure triangle on that custom directory and you should see our new library listed, ready for action.
Now that you have a library what can you do with it? Well you can open it up and create custom parts. Or you can copy parts from other libraries into it, for easy access. Both which will be covered in future posts.
What if it doesn’t work?
This seemingly complex number of steps really only needs to be done once. There’s a couple of key things to remember and check if you get lost along the way.
- You need to create a directory on your computer first
- You need to setup that “Directories” in the directories dialog
- Save your Library from the Library Workspace, before checking the Control Panel
If you have questions or run into problems, leave a comment and I’ll see if I can help.
6 Comments
Is there anyway to create a library inside of a library? For example, Eagle has a folder (lbr) that contains multiple libraries with devices. But can you make a library of, let’s say, headers, and in that library, can you create other libraries for different types of headers? Or are folders the only to accomplish this type of thing?
No.. but you could name each library a sequential name. HDR01 – Big Headers, HDR02, Little Headers, etc
Hi James,
As always a great tutorial. Very well presented and easy to follow.
That said, i’m having issues with the directory file i created for my library.
I followed all the steps above, created my custom directory on my desktop, but any / all files i copy into my custom library to edit don’t show in my custom directory?
To add some confusion to the above, i’m on an Imac 10.6.8 Snow Leopard, running Parallels 9 & Windows 7. Everything to do with Eagle are within the virtual machine and not running on the mac side.
Could you PM me so i can forward some screenshots?
Dizzwold.
Oops,
Never mind. I saw my little library buried in with all the default libraries, and it works fine. thanks again for a good tutorial.
Mike
Thanks for leaving the update! Let me know if there’s something else I can help with on EAGLE.
Thanks for your tutorials. They are very well done and easy to follow. Using your Eagle Creating custom folders tutorial, I created a custom library and added a custom part to it, which I have edited a few times. So far, so good.
However, when I try to add a part in the schematic editor, I can only choose parts from the default lbr library. I cannot figure out how to make the schematic editor let me choose from my own library.
My custom library is located in Users/admin/documents/eagle/MIkesCustomLibraries. Within that folder is my first custom library called MikesDevices.lbr.
I have right-clicked MikesCustomLibraries in the control panel and clicked “Use All.”
What am I missing?
Thanks for your time,
Mike