When connecting multiple oscilloscope probes to a circuit, does each probe need to connect to ground?
The short answer is yes!
Why? The long answer is kind because of the ground loop. Remember, a circuit needs a closed path. And while on DC circuits we may rarely think about the distance of that path, it absolutely matters when there is an AC or frequency component.
When you do not connect each probe’s ground, the signal path because enormous since it must connect to the circuit’s ground through another probe. (See the animation in the video above.)
Okay, technically, this circuit *does* use Op-Amps. However, the ones shown here are integrated into an ATmega128DB microcontroller from Microchip. The DIP package breaks out two operational amplifiers that are controllable entirely by software. Even better, you can program them like they are an Arduino!
Logic analyzers capture digital signals and then display a waveform or list. Serial busses like I2C, SPI, or UART (Serial) can be decoded or triggered on when there are problems in your circuit. In this video, learn the basic controls you need to use (almost) any logic analyzer. You’ll learn how to set up a simple trigger, make measurements, and set things like sample rate or memory depth.
When I first graduated from college, I started as an Application Engineer for Agilent Technologies. Based in Austin, I supported computer companies like Dell, Compaq, HP, IBM, and Tandem. I helped their engineers set up million-dollar logic analyzer configurations to measure various PC busses.
I did embellish a tad during the introduction. Shown in the video is an HP 16500. While I did occasionally help program a trigger on these analyzers, my career really started with its successor, the HP 16700. Both were amazing analyzers for their time. It is mind-boggling to think that a small $150 USB-based device has very similar measurement capabilities to those old beasts.
Previously, I made a written Logic Analyzer introduction tutorial and benchmarked digitalWrite() with a Salee Logic 8. Contrary to what people have said, the LA2016 featured in this video does NOT use Salee’s excellent Logic software. However, the user interface is clearly copied from it.
I had the chance to spend some time with the Arduino team before and during Maker Faire Bay Area 2019. I also attended Massimo’s “State of Arduino” talk. In short, there are new Arduino Nano boards coming, a certification available today, updates on the Vidor, interesting education kits, and one more special announcement.
It rained most of the weekend, which I am sure caused attendance to take a hit. Normally this would not be a big deal, but there was some talk it may be the last year for the Bay Area’s show. As usual, I walked the show on Friday and did take note there were several new exhibitors throughout. For that reason, I hope it is not the last one.
Depsite the grim news, spirits from attendees were high. On Saturday I helped answer questions and give out t-shirts at the Arduino booth. The time flew by fast but not before I got to overhear and explain tidbits about this year’s Arduino announcements.
New Arduino Nano (Every, IoT, BLE, and BLE Sense)
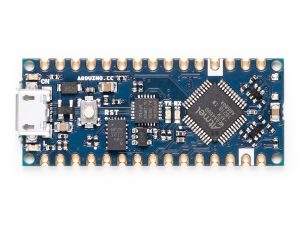
My favorite announcement, hands down, is the new Arduino Nano boards. The boards are a new small form factor featuring castellated edges. A “castellated edge” means you can solder the entire module to a PCB. It is a cost-effective way for adding a complex microcontroller solution to small and medium run products. You might be familiar with the concept from the ESP, WiFi, or Bluetooth modules.
The board form factor is really the only thing these new Arduino Nano boards have in common. Each offers a slightly different feature set. Oh, and the price for each is shocking for an Arduino branded board.
In the past, I’ve covered how to reset Arduino millis() and have provided a growing list of examples using millis(). While reviewing the code for the elegoo Penguin Bot, I was reminded of a millis() mistake I see often: addition. The only way to properly handle millis() rollover is with subtraction. Let’s look at why (and how.)
What is Arduino millis()
The Arduino library has a function called millis() which returns the number of milliseconds the processor has been running. On other platforms, you might see references to a “tick counter.” It is the same idea. A hardware timer keeps incrementing a counter at a known rate. In this case, that rate is milliseconds.
A mistake new programmers often make is trying to “reset millis().” A better method is to compare two time-stamps based on millis(). So this if-statement is comparing a previous timestamp to the current value of millis().
Like other websites, this one uses cookies to remember things. Mostly, I use Google Analytics to know how many people come here. ¯\_(ツ)_/¯
By clicking “Accept”, you consent to the use of ALL the cookies.
This website uses cookies to improve your experience while you navigate through the website. Out of these, the cookies that are categorized as necessary are stored on your browser as they are essential for the working of basic functionalities of the website. We also use third-party cookies that help us analyze and understand how you use this website. These cookies will be stored in your browser only with your consent. You also have the option to opt-out of these cookies. But opting out of some of these cookies may affect your browsing experience.
Necessary cookies are absolutely essential for the website to function properly. These cookies ensure basic functionalities and security features of the website, anonymously.
Cookie
Duration
Description
cookielawinfo-checkbox-advertisement
1 year
Set by the GDPR Cookie Consent plugin, this cookie is used to record the user consent for the cookies in the "Advertisement" category .
cookielawinfo-checkbox-analytics
11 months
This cookie is set by GDPR Cookie Consent plugin. The cookie is used to store the user consent for the cookies in the category "Analytics".
cookielawinfo-checkbox-functional
11 months
The cookie is set by GDPR cookie consent to record the user consent for the cookies in the category "Functional".
cookielawinfo-checkbox-necessary
11 months
This cookie is set by GDPR Cookie Consent plugin. The cookies is used to store the user consent for the cookies in the category "Necessary".
cookielawinfo-checkbox-others
11 months
This cookie is set by GDPR Cookie Consent plugin. The cookie is used to store the user consent for the cookies in the category "Other.
cookielawinfo-checkbox-performance
11 months
This cookie is set by GDPR Cookie Consent plugin. The cookie is used to store the user consent for the cookies in the category "Performance".
CookieLawInfoConsent
1 year
Records the default button state of the corresponding category & the status of CCPA. It works only in coordination with the primary cookie.
viewed_cookie_policy
11 months
The cookie is set by the GDPR Cookie Consent plugin and is used to store whether or not user has consented to the use of cookies. It does not store any personal data.
Functional cookies help to perform certain functionalities like sharing the content of the website on social media platforms, collect feedbacks, and other third-party features.
Cookie
Duration
Description
language
session
This cookie is used to store the language preference of the user.
Performance cookies are used to understand and analyze the key performance indexes of the website which helps in delivering a better user experience for the visitors.
Analytical cookies are used to understand how visitors interact with the website. These cookies help provide information on metrics the number of visitors, bounce rate, traffic source, etc.
Cookie
Duration
Description
_ga
2 years
The _ga cookie, installed by Google Analytics, calculates visitor, session and campaign data and also keeps track of site usage for the site's analytics report. The cookie stores information anonymously and assigns a randomly generated number to recognize unique visitors.
_ga_LHR6J24XSY
2 years
This cookie is installed by Google Analytics.
_gat_gtag_UA_42726312_1
1 minute
Set by Google to distinguish users.
_gid
1 day
Installed by Google Analytics, _gid cookie stores information on how visitors use a website, while also creating an analytics report of the website's performance. Some of the data that are collected include the number of visitors, their source, and the pages they visit anonymously.
browser_id
5 years
This cookie is used for identifying the visitor browser on re-visit to the website.
CONSENT
2 years
YouTube sets this cookie via embedded youtube-videos and registers anonymous statistical data.
Advertisement cookies are used to provide visitors with relevant ads and marketing campaigns. These cookies track visitors across websites and collect information to provide customized ads.
Cookie
Duration
Description
VISITOR_INFO1_LIVE
5 months 27 days
A cookie set by YouTube to measure bandwidth that determines whether the user gets the new or old player interface.
YSC
session
YSC cookie is set by Youtube and is used to track the views of embedded videos on Youtube pages.
yt-remote-connected-devices
never
YouTube sets this cookie to store the video preferences of the user using embedded YouTube video.
yt-remote-device-id
never
YouTube sets this cookie to store the video preferences of the user using embedded YouTube video.
yt.innertube::nextId
never
This cookie, set by YouTube, registers a unique ID to store data on what videos from YouTube the user has seen.
yt.innertube::requests
never
This cookie, set by YouTube, registers a unique ID to store data on what videos from YouTube the user has seen.

 plus addition does not add up")