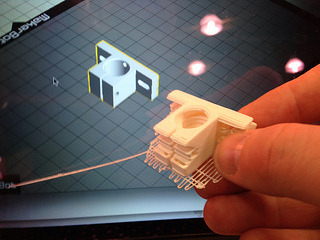
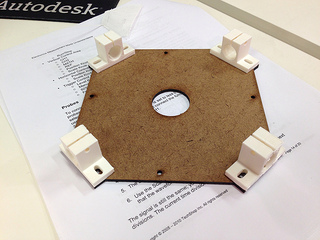
While practicing the Quadrotor‘s motor mounts on a Shopbot gave me experience in how to register two sides for milling, I didn’t want to invest the time required for the arm mounts. So I decided to make use of the MakerBot Replicator 2 to print physical samples in PLA. Time per piece went from about an hour to about 15 minutes.
This is the first time I used the Makerware software, which looks to be a much prettier version of ReplicatorG. The workflow for using the software is a little bit more straight forward than ReplicatorG. For example, a single “Make” button generates the Gcode and Scd Files
Lessons Learned
As usual, there were a few steps I forgot when going from Inventor to Makerware to Makerbot. Here are a a couple of notes for problems that caused me issues. Once I remembered these, I had no problem replicating parts.
1. Choose the right file format

Newer firmware on the Replicator and Replicator 2 use different formated scode files. The printer will run with either, but you’ll get errors in the final model.

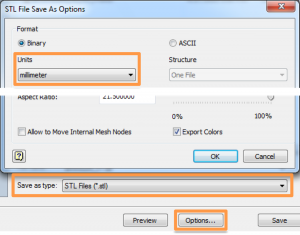
2. Adjust units on Autocad Inventor
When Autocad exports a STL file, the default units are centimeters (cm). The Makerware (and ReplicatorG) seem to expect units to be in millimeters (mm) or inches (in). This can cause your files to get scaled wrong. There doesn’t seem to be an option to tell Makerware what units your STL used, so make sure you check how big your thing is, before printing.

Conclusion

In the end, the 3D printer provides a great representation of the parts, even though its process for creating them is much different than the milling machine. Already I can see we made some bad assumptions about slots and holes, so it is nice to get those adjusted before cutting into metal.


