24 Results

kicad

Search

Out of context screenshots are out of context

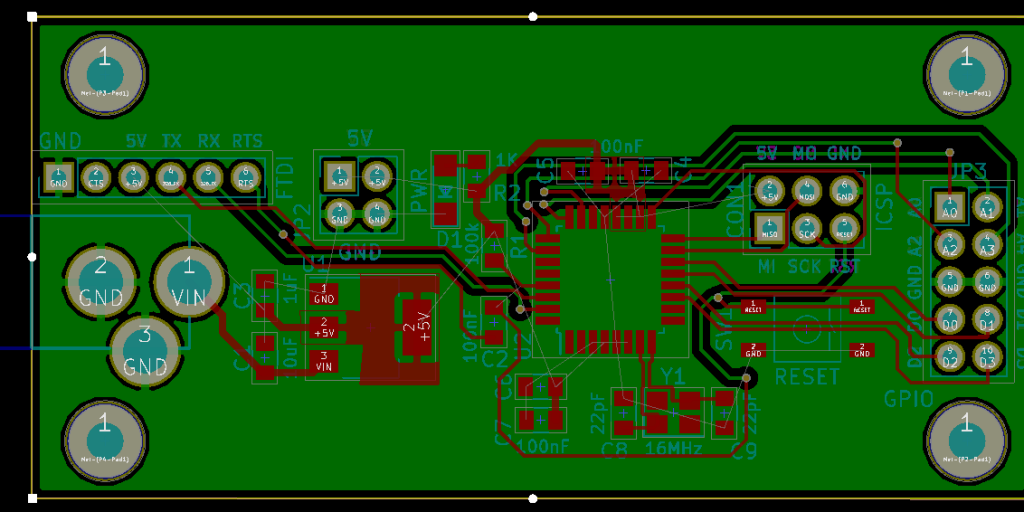
On the Mini Apple IIe project, I am testing the composite/sync amplifier, which is an MC1377. The composite output looks great, until connecting the output cable to a receiver. It outputs about 2.6 Vpp until loaded with 75 ohms, then it drops to about 400 mVpp. We have replaced most of the passives on the output and have tried 3 different MC1377s. The measurements below are from a known good MC1377 removed from a working Apple IIgs.

Here is an MC1377 datasheet mirror link. The Figure references below match Page 8 of that datasheet. The biggest suspects are the Luma signals.

Not captured, but tested, none of the input signals change amplitude when the output (pin 9) is loaded with a 75 ohm load.

Problem: Update, SOLVED

Update: Turns out, R9 in the schematic above wasn’t fully soldered. After doing that, the computer now boots… at least, until it locks up.

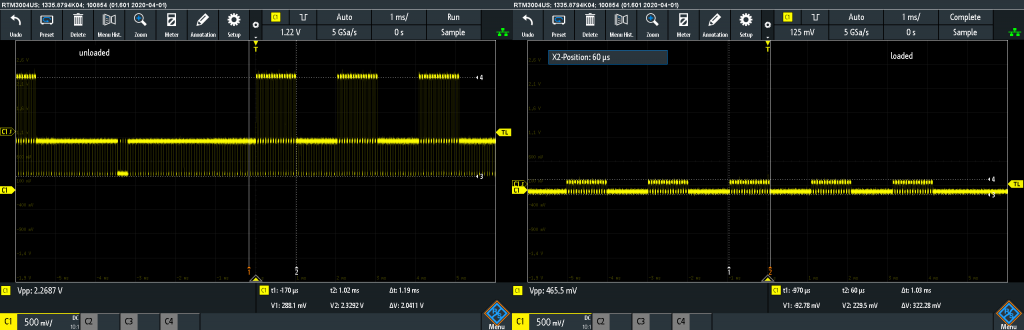
These two screenshots are the same point, RCA Out Header in the schematic. On the left is the output when the node is left open. It is about 2.6Vpp with minimal DC offset. However, when the signal is terminated with a 75 ohm resistor (or a receiver circuit) it drops to about 300 mVpp!

00c-side-by-side uncropped

Python is everywhere. Its capabilities continue to grow. Not only can you create simple scripts, but you can create full-blown applications with it. The core has been scaled down to run on 32-bit microcontrollers like the ESP32 and Adafruit Feather M0. You can even use Python engineer modules to design stuff like circuits. There are electronics Python modules that create schematics, simulate circuits, and make solving math a cinch. Here are some of the modules I found that make Python usable for (electronics) engineering.

Upfront, make sure you have a functioning Python environment. Update the package manager “pip” since all of these electronics python modules rely on it. Speaking of dependencies, you may need to also install third-party libraries for some of them. From what I can tell, these all should be platform-independent. However, I only tested these electronic modules with 64-bit Windows.

A project I work on in my spare time is creating a portable Apple II. Like many of my projects, one leads into another. I started out wanting to make a mobile Apple II, and now I’m working on a project called Bit Preserve. How did I get from one project to the next? Well, as I looked into how to make a portable Apple II, I realized a significant issue. The original Apple II logic board has almost 80 ICs. Being a design from 1975, they are all through-hole packages. The good news is that except for the ROM chips, they are all off-the-shelf components. But such a size means it might be impossible to turn it into something handheld. I almost abandoned the project. Then, I learned about a chip included in the Apple IIgs. The name of the ASIC is “MEGA II.” (Nothing to do with Arduino.) It is a chip that integrates all of those off-the-shelf chips into an 84 pin package.

As I dove deeper into the project, I realized I needed other support chips to make the MEGA II useful. There is a decent book that discusses the technical details of the Apple IIgs, but it does not get into chip or board level design. For that detail, I had to look at the original schematics. While I am ecstatic that someone archived these original documents as PDFs, I quickly became frustrated. Sometimes the scan quality is not very good, and it is nearly impossible to search for symbols across multiple pages. I thought to myself, “There has got to be a better way!”

Bit Preserve on GitHub

Earlier this week, I looked at the Arduino MKR Vidor 4000 during an AddOhms live stream. My goal was to understand the Vidor better. It is the new FPGA-based Arduino which started shipping this month. It runs about $60. You can learn more at the Vidor Product Page on the Arduino website.

In this post, I briefly touch on the difference between an FPGA and a microcontroller. Then I walk you around the MKR Vidor 4000’s board. Using one of the examples, I talk a bit about how the various chips communicate with each other. This section also highlights what makes the Arduino FPGA board different from other development boards. Lastly, I answer “should you buy an Arduino MKR Vidor 4000?”

Continuing the DIY Arduino tutorial series, this AddOhms episode shows how to create a PCB in KiCad. I make a joke that the original design was a rectangle, which I found boring and pointless. So instead, I designed a triangle to give the board 3 points. Get it? Puns! I am calling it the Pryamiduino. To be honest, I found not having a constraint to be a problem. By forcing a specific board size and shape, many decisions were more manageable.

boring rectangular arduino nano clone
First design – Boring!

In the end, the video ended up more edited than I planned. KiCad is just so finicky and crashy that I could not make a coherent start to finish tutorial. At least, I could not work with a board at this level of complexity. Something simple like a 555 flasher would be easier to show from start to finish. I am planning some immediate follow-ups with quick tips on using KiCad. It is a frustrating suite of applications, but the results can be quite nice.

AddOhms Pyramiduino Show Notes