Category

millis()

Category

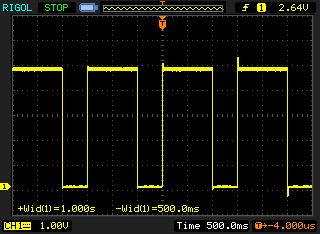
Since most Arduino boards do not have debug capability, this limits the programmer to using Serial.prints. A useful piece of information might be knowing how long certain parts of code are running. Here’s a simple example that demonstrations:

  1. How to properly use Serial.flush() (hint: it’s for TRANSMIT, not RECEIVE!)
  2. How long Serial.print()s can “tie up” the Arduino.

When using delay() to flash a LED there is a time for the LED to be on and then off. This makes it easy to have independent control of the “on” and “off” times. The standard blink without delay example doesn’t give you this flexibility.

millis-cookbook-two-duty-cycles

This example code gives you complete independent control of how long a LED (or any OUTPUT pin) stays “ON” or “OFF”. This also demonstrates a very simple two-state state machine.

The variable “LED13state” is used to track what should happen each time the millis() event fires.

You’ve recently learned about millis() and can’t way to delete all of your references to delay().  The problem is that you don’t know quite how to convert your code into millis()-compatible code.  Here is a (running) list of millis() examples I’ve put together to help. Baldengineer’s Arduino millis() Examples Arduino Multitasking – Step by step examples of how to convert delay() code into millis() based code, to simulate multitasking. Police Lights – Flash two LEDs like…

After learning how to flash a single LED on your Arduino, you are probably looking for a way to make cool patterns, but feel limited by the use of delay(). If you ask in the forums, you get told to look at the “Blink Without Delay” example. This example introduces the idea of replacing delay() with a state machine. If you’re confused how to use it, this tutorial is setup to take you from blinking two LEDs with delay, to using an alternate method, right down to how you can use millis().