
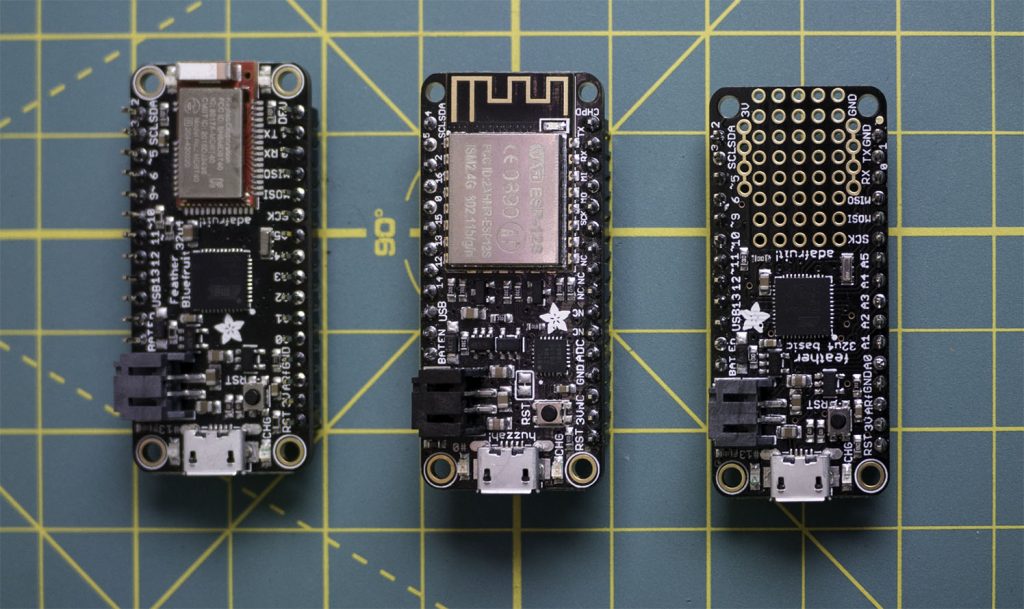
Four days ago, I found out I needed to make a piece of a costume. The idea was to combine a TFT LCD with a microcontroller and Bluetooth Low Energy. I checked my microcontroller bin and found some Adafruit Feather Boards. In this post, I will introduce the feather family and provide a decision chart for choosing the right one for your project.
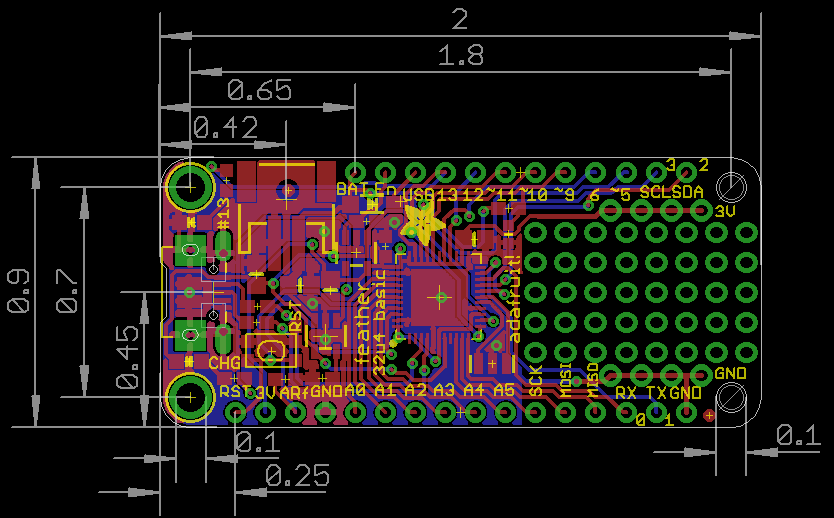
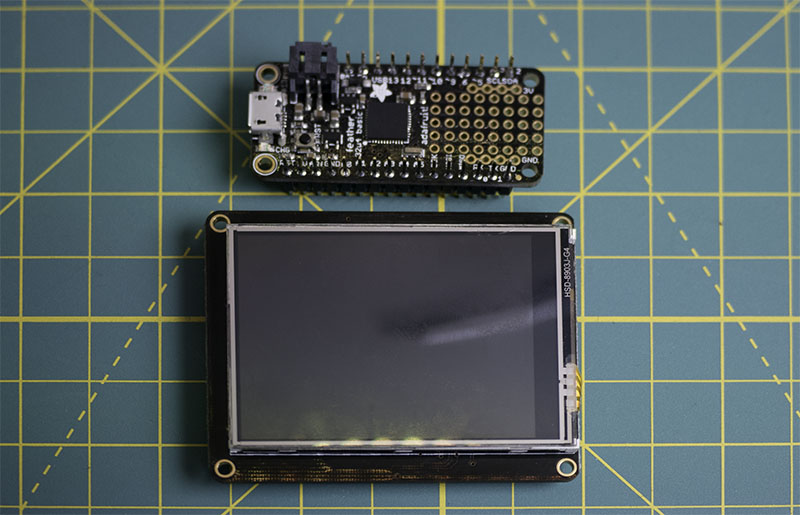
The Feather board have a standard footprint and pinout. Most(All?) have a USB connector, a microcontroller, two rows of pins, and a battery charger. They measure 50.80 by 22.86 mm, which is 2.0 by 0.9 inches.
Built-In Battery Charging
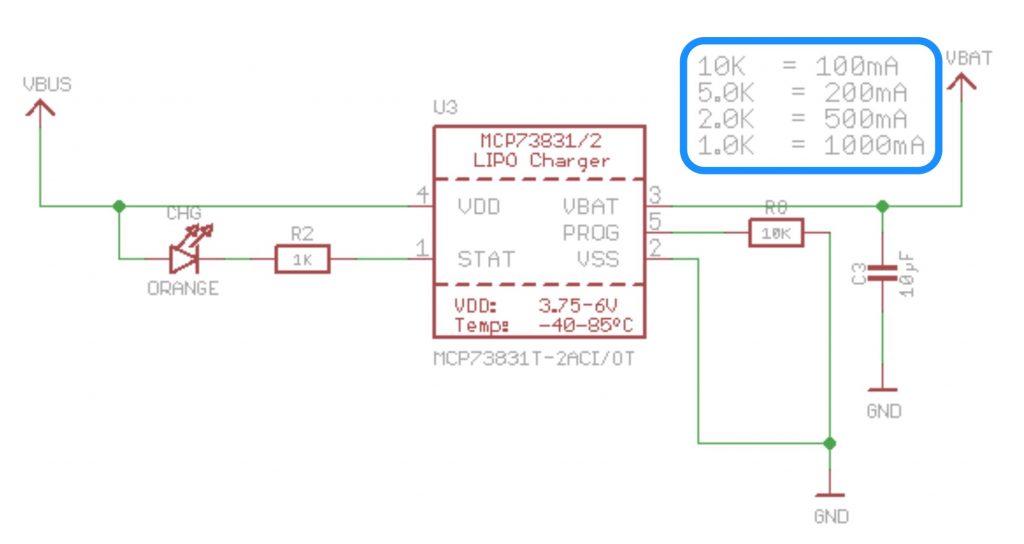
For me, the built-in Lithium Polymer (LiPo) battery charger was the key feature that drew me in. When it comes to LiPo batteries, I prefer not to take any chances. So, having a proper charger circuit is essential. Looking at the Adafruit schematic, they are using a Microchip MCP73831 LiPo charge controller. The diode connection between VBUS and VBAT is a clever trick.
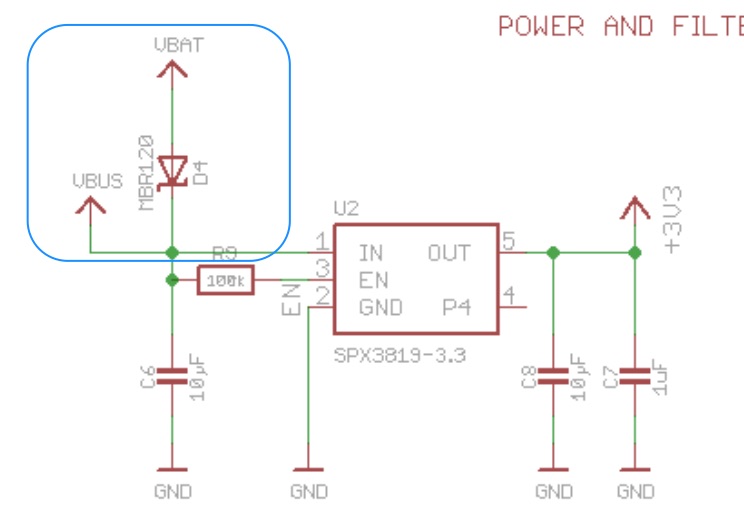
When both a USB and a Battery are connected, the diode allows auto-switching between the bus and battery power. This design prevents the load from being powered by the battery while it charges. I think it is an intelligent design. By default, these chargers are limited to a 100 mA charge rate. Which, by my rough calculations, means it will take at least 4 hours to charge a 500 mAh battery pack.
Direct Battery vs. Connector
In my project, I almost soldered the battery directly into the circuit. This move would have bypassed the JST PH connectors. I held back because, at one point, I was going to use a 2500 mAh battery. At 100 mA, it’d take quite some time to charge the pack entirely. So I kept the JST connector so I could use a similar circuit, but designed for charging at 500 mA.
The other problem with this approach is that there is no way to turn off the microcontroller. It is likely possible to design with sleep modes to minimize current draw, but this means that any time the battery is connected, it is in use.
32u4 Feather
The 32u4 is the same processor found in the Arduino Leonardo. It is similar to the 328p regarding MCU specifications. Regarding capability, it has a key difference: a built-in USB interface. In most of my custom Arduino projects, I replaced my prototype ATmega328P design with an ATmega32U4. The built-in USB reduces the parts count on the board. Plus, you get a free UART or serial port for design use.
M0 Feather
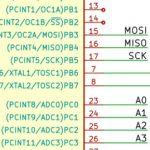
The Atmel (Microchip) SAMD21E ARM Cortex-M0+ processor is the brain of the M0 Feather. (The Arduino Zero uses the same processor.) Let me tell you, if you’re ready for 32-bit operations, these are amazing chips. They run up to 48 MHz and have 32 KB of RAM and 256 KB of Flash. Plus, there are six serial communication (SERCOM) ports. However, those highly flexible ports support I2C, SPI, or UART. You pick the port’s function!
ESP8266 (Huzzah!)
The Huzzah ESP8266 Feather has ESP12 modules. Not that it matters, but this was my first introduction to the Feather. It’s the same processor that’s on the Huzzah breakout board. I’ve also read that they have an ESP32 version available.
Choosing an Adafruit Feather
If you’re working on a portable or battery-powered project, the Feather is a no-brainer. However, which one should you choose? Based on the boards I worked on this weekend, I developed this guide.

For this selection chart, I used “dot.” I mentioned that tool in the post on the soft power controller state machine.
WiFi
If you need WiFi, the ESP8266 Huzzah Feather board is an excellent choice. There is an M0-based board with a separate WiFi Radio. I do not know much about that radio, so I can’t comment on it. I left it off my chart until I know more about it.
BLE
Bluetooth Low Energy (BLE) is an ideal wireless protocol for interfacing with mobile devices. On iOS, there are no special licensing requirements to communicate with BLE devices. On Android, you’ll just need to make sure your Android device supports BLE. Windows, Linux, and Mac support depend on the age of the Bluetooth chipset. In my case, I was using both the 32u4 and M0. What was surprising was how easily the software could be changed. The pins are the same on the 32u4 BLE and M0 BLE modules. So to upgrade from the 32u4 to the M0 was as easy as
Uno, Nano, Leonardo Replacement
If you’re just looking to power a Uno or Leonardo project by battery, consider the 32u4 Proto. Keep in mind that these boards are clocked at 8 MHz and designed for 3.3-volt I/O logic. You might think that since the Feather and Nano are so close in size, why worry about a Nano replacement? Well, one reason is power. The 32u4 by itself draws less current than a 328p and USB-to-Serial chip. Also, the Nano form factor lacks a battery charger.
Non-Battery (and Non-Adafruit) Alternatives
If you’re looking for a small board but don’t care about battery, or you need faster processing than these boards offer, then you can consider two other form factors. The Nano, mentioned above, is very popular as a direct replacement for Uno. And there are PRJC’s Teensy boards. The Teensy 3.x are ARM-based solutions that come in ultra-small form factors. They are not the same processor used by the Adafruit feathers. However, the Arduino builder process supports them well. This support means moving code over to them is painless.
Adafruit Feather Accessories.
In addition to the microcontroller boards, there are plenty of accessory options designed to attach directly. I made use of the 2.0 TFT Featherwing. It has built-in touch support, but I did not make use of the touchscreen.
You can also solder a jumper to connect up a PWM signal to the backlight. Furthermore, the SPI control pins can be rearranged by cutting small traces with a sharp knife and performing some soldering.
TFT 2.0 FeatherWing Template
Adafruit’s technical documentation has the PCB design for the TFT Featherwing. However, the LCD side of the board is missing dimensional data. So, I have created this TFT Featherwing SVG. It is not exact, but it was close enough for me to cut a hole and make a simple spacer. Since SVGs seem to resize based on the program reading them, I included a 10mm line in the middle for scaling purposes.
Other Accessories
Other accessories include various LED panels, NeoPixels, sensors, and even relays. There are, of course, blank prototyping “shields” or “feathers” that can be attached as well. With all of these accessories, you can purchase them much cheaper without the feather boards connected. However, if space or time is at a premium, they make for a compact solution.
Conclusion
For now, I am keeping the costume piece under wraps. You can follow me on Hackster.io if you want to see it. I will release the project after the party. For now, I need to get back to modifying the BLE code.


1 Comment
If you replace one of the SMD resistors on the Feather boards you can make them charge at 500mA. There is an enable pin broken out so you can add a “power” switch to turn the feather off while leaving it’s charging circuit active. To really turn the whole thing of wire a switch in series with the battery.