
While I bought my 3D printer a couple of years ago, in March of this year, it only had 75 hours of use. Since March, my counter is over 300 hours. Why? After spending some time doing the right tweaks my printer is printing crazy good. Here are some of my 3D printer tips.
Maybe you’re in the market for a printer, use one at school, get access to one through a maker space, or (like me) used to use yours for a desk ornament, these 3D printer tips are likely to help.
1. Level the Bed
Every tutorial you read starts with this suggestion. “Get a level bed.” After years of using an FDM style printer, I finally learned how to “level the bed properly” Well, not until I printed a dial indicator bracket.
Use a Dial Indicator
This Thingiverse Dial Indicator bracket is designed for a replicator but fits my Flash Forge Pro Creator. Analog works, I prefer digital. The idea behind this tool is to set your desired bed height, zero the indicator, and then adjust the rest of the bed until all adjustment points are zero. It will take several iterations. I learned the leveling procedure from this YouTube video.
Get a feeler gauge
Trying to make precision prints with a piece of paper, is stupid. Get a proper 0.1 mm or 0.2 mm feeler gauge. And, learn how to use it. Once you have a 3d printer feeler gauge set, dial indicator, and a bracket, you’re ready to start leveling.
Mark your bed
One thing I do on my bed is make three marks. These dots help me find the same 3 points during each round of leveling. Without them, I would endlessly circle the bed until I gave up.
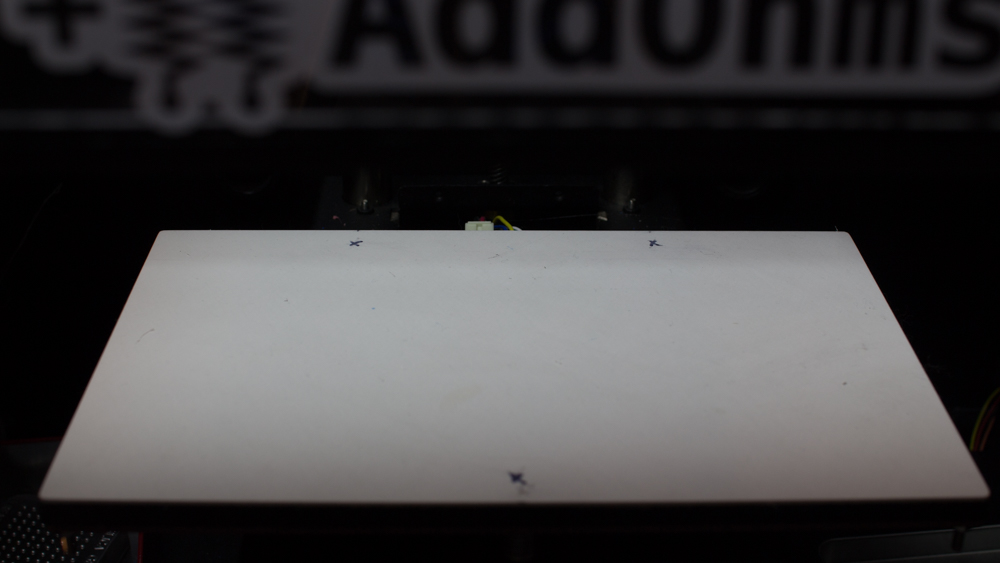
You might notice, I have a bright white bed. Let’s talk about that next.
2. Get a new bed material
For years I printed on Kapton tape and blue painter’s masking tape. The particular Kapton film I used had a weak adhesive. So after 1 or 2 hours of printing, it would start to peel up.
The masking tape was a cost-effective alternative, which was easy to reapply. However, I found getting a good level bed with it was a nightmare. If I stuck to 0.2mm or 0.3mm printing thickness, the blue masking tape is okay. After a few practice attempts, I got pretty good at applying this 3d printer blue masking tape from Amazon.
From what I can tell there have been some advances in 3D printer bed technologies. Glass seems to be popular for older machines like mine. Recently I came across a product called PRINTinZ. Not sure what the coating is, but I can tell you it works fantastic. For my printer, I use the PRINTinZ Skin.
It’s recommended to apply the blue masking tape first, then this skin. However, I found that after about 20 printing hours at 50°C, the masking tape would peel. So now I just apply directly to my bed. It’s a mess to clean up later, but it stays stuck.
One trade-off to the PRINTinZ Skin is that it gets damaged pretty easily. It’s critical you do not crash your head into it. This need leads me to wonder how I could offset my Z axis in software.
3. Try a new slicer
My printer shared the same firmware as early Makerbot printers. So I could use the Makerbot or the ReplicatorG slicer. While straightforward, both lack many important advanced features.
Like with all of these 3D Printer Tips, there are a few options available. In this case, one free and one paid. There are probably more. If you know of another slicer, leave a comment.
Free Slicer Option: Cura
Cura from Ultimaker is a very flexible slicer. It’s free, even if you aren’t using their printer. If you are brand new to 3D Printers, the sheer volume of knobs to tweak may overwhelm you (on non-Ultimaker printers). However, some clever internet searches will get you on your way.
One issue I ran into, is that I couldn’t get Cura to work with my Sailfish firmware. There are some translators I tried, but none seemed to work right. That’s when I found Simplify3D.
Paid, but worth it: Simplify3D
At first, I was apprehensive to give Simplify3D a try. It’s $150 with no free trial. Then I realized it’s only $150. Compared to how much I’ve spent on my printer, filament, tools, and TIME that wasn’t much. Also, they offer a two-week refund policy.
One example: Makerbot vs Simplify3D
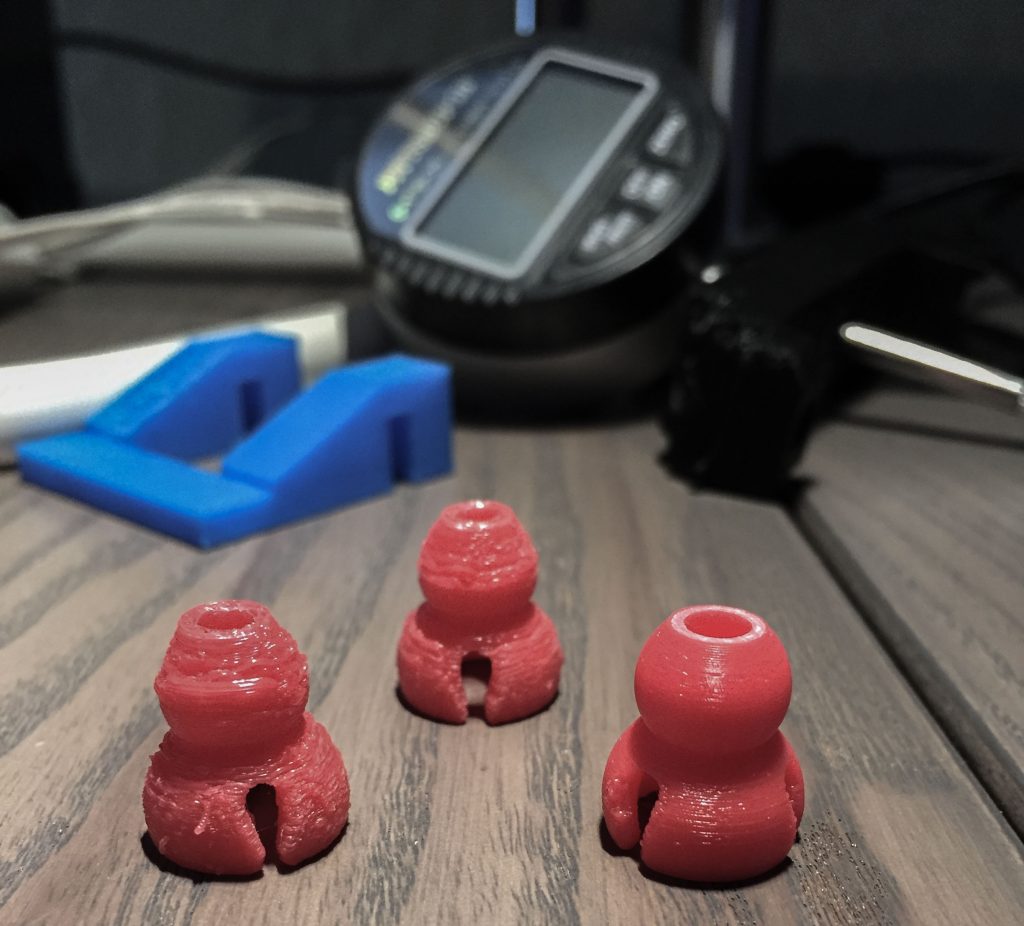
This picture is my favorite to show off Simplify3D’s polish. I changed absolutely nothing on my printer from the prints on the left to the print on the right. The *only* difference is I printed with the file sliced by MakerBot’s software and then with the file sliced by Simplify3D. This print test was BEFORE I tweaked any settings. Both prints used out-of-the-box defaults. That was proof enough for me.
Z-Axis Off-Set
Remember on 3D Printer Tip #2 I mentioned the importance of not crashing your head? With a good slicer, it is easy to start with a large Z-Axis offset and incrementally reduce it. I start with 0.2mm on mine and then reduce by 0.05mm increments until I get a solid first layer. Sometimes it takes 3 or 4 attempts. However, the result is fantastic prints and a very long life on my bed.
4. Buy high-quality filament
You’d think buying the right filament would be apparent. However, early in the life of my printer, I got some super cheap crap for mine. And nearly every print has been utter trash. Compare these two prints. Same printer file, both with the settings I “dialed in.” The Green one is horrid compared to the Blue.
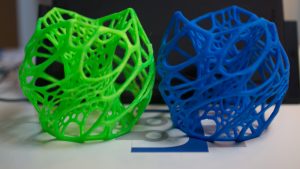
When you’re buying filament, don’t go super cheap. Saving $10 on a reel today is going to cost you big in wasted prints—and time.
Lately, I’ve been printing with these filaments.
NGEN from Colorfabb
NGEN from Colorfabb. If you are like me and switching from PLA, NGEN will need some tweaking. Once your settings are dialed in, though, prints turn out amazing. See below. Based on the packaging and reels, this falls into the premium category.
Hatchbox ABS
From Amazon, I picked up some ABS from Hatchbox. So far, for the price, I’m happy with this material.
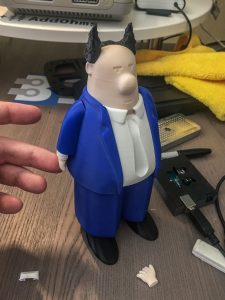
My only prints are this unglued Dilbert Pointy Hair Boss. The blue shirt and head are Hatchbox ABS. The black and white are NGEN.
5. Get a camera
The last of my 3D printer tips comes from my friend’s recent experience. If you’re going to leave your 3D printer unattended, GET A CAMERA. In his case, the raft broke free mid-print. Eventually, the wad of filament jumped the Y-Axis’s belt. The printer shook itself hard enough the filament came off the spool holder. Definitely not a good situation.
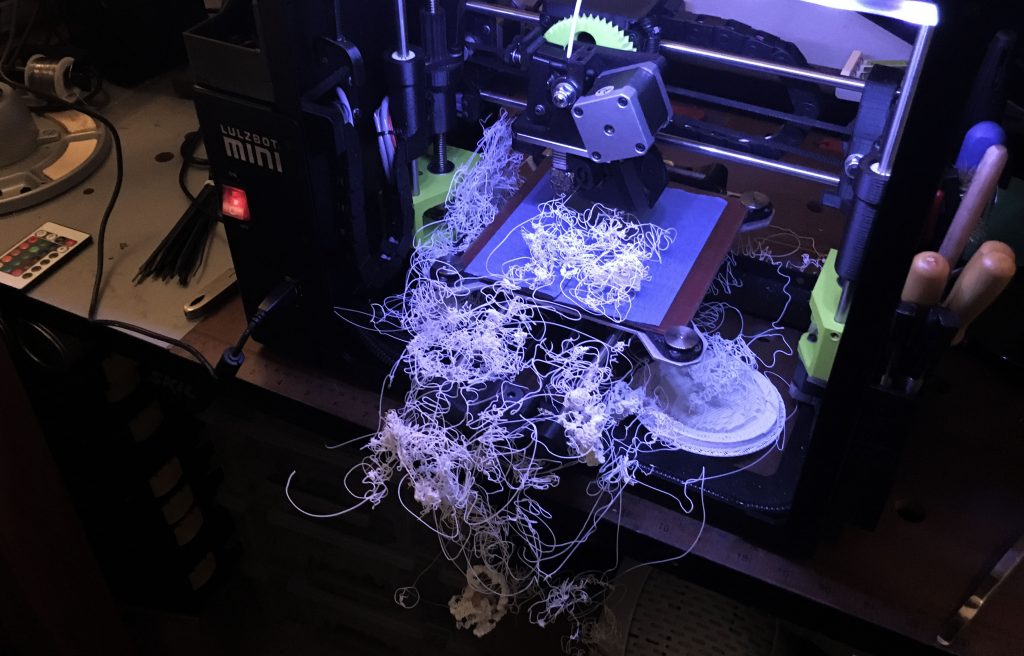
Ideally, use a tool that lets you remotely kill the print job too!
Other 3D Printer Tips?
That’s my five learnings from the past few months of endless 3d printing. What other 3d printer tips or suggestions have you run across in your quest to print things?


6 Comments
I found it interesting when you explained that it is important to avoid purchasing cheap material for printing when using a 3D printer. When I was a teenager, my high school had a 3D printer and I have always been interested in learning more about them. It would be interesting to learn more about the different kinds of materials that are used.
Try PEI as a bed material. It is so carefree, just print and remove.
Great collection of insights!
After a couple years of ritual and potions for ABS printing, I switched to PLA. I was excited to see Adafruit come out with the PRINTinZ (https://www.adafruit.com/products/2233) plate, but at $120 for my Lulzbot Taz, I was seriously disappointed, a few months later, to find that the top surface slowly erodes over time and makes for a very rough and, eventually, dished surface. Back to blue tape which is cheap and effective and flat. I buy 3M 2.83 inch (weird dimension) wide tape which is very affordable compared to the super-super wide stuff. Getting nice seams on the bed is an easy skill to acquire and saves considerable $ over dedicated plates that eventually become unusable. (https://www.amazon.com/gp/product/B001EJMS4M). Just my $0.02
I keep hearing about the difficulties people have keeping their beds level. I have four printers (incl one kit- and two scratch- built) and my bed leveling has always been a set-it-and-forget-it task. If you have a lot of problems keeping your bed level, you should address why that’s happening. Occasionally I have to adjust my bed height by a fraction of a mm, but I don’t monkey with the corners. I have had good luck with using silicone washers instead of leveling springs and lock nuts with the leveling bolts. I didn’t have to make any modifications to my Lulzbot leveling hardware.
I have had good luck with cheapo filament (Shaxon) and bad luck with cheapo filament (Hatchbox). I make cameras, so opacity is of paramount importance. I have switched to using higher quality filaments lately in pursuit of absolute and consistent opacity, and I am a recent convert to Rigid.ink and Matterhackers PLAs. I use 2-3 spools a month, so the printers (mostly the Taz) are working a lot.
And a big shout out to Slic3r for a great slicer that doesn’t try to do everything else.
Thanks for the great article.
Simplify3D does not work well with Velleman Vertex K8400, prints look terrible. At least factory setting is useless for both PLA and ABS. I prefer spending time tweaking Cura or Slic3er.
Yes, when I use Cura I get ripples and squashed and some balls. When I used to use Slic3r I got just like your Simplify3D sample. However Slic3r 3D some times cant read all stl because creates some holes on design. SO I have to reedit the stl and create it again.
Thanks for the tips. Do you know anyone with experience using the Afinia H800?