This week the bald engineer unboxes swag from electromaker.io, programs the Adafruit Coin Accepter, with a Pyramiduino, and answers questions along the way.
Interesting time code jump points:
This week the bald engineer unboxes swag from electromaker.io, programs the Adafruit Coin Accepter, with a Pyramiduino, and answers questions along the way.
Interesting time code jump points:
Pretty often I am asked about how I create the AddOhms animations. Currently, I’m working on the final part of the DIY Arduino Series. In the first part, I showed the elements of an Arduino schematic. The second part showed an overview of the PCB design. Finally, I will take the finished board and explain how to turn it on the for the first time. Lucky for me, there was a “mistake” on the board. This error gives some context for the episode.
I needed to explain how the Arduino Uno’s (and Mega’s) “auto-reset” circuit works. I did a live stream showing how I created the animation sequence for this explanation. Well, I started to explain. After almost three hours of streaming, I was only about half-way through the one-minute explanation.
While long, I think the stream helps to illustrate the kind of work I put into my videos. Speaking of which, I need to get back to finishing this one.
Watch Video On YouTubeCommon question that comes up about pull-up resistors: what value do you pick and why not just use a piece of wire? In this follow-up electronics tutorial, the bald engineer looks at how to pick a pull-up resistor value. Note that while focused on pull-up everything said in this video would apply to pull-down as well.
If you’re new to pull-up resistors, check out this longer Pull-Up Resistor Tutorial.
Watch the full videoAutodesk released EAGLE 9. This new version continues the improvement that Autodesk has been providing since acquiring the infamous ECAD tool. There are three areas I look at in this AddOhms Livestream.
In the beginning, I use an old training class I wrote about five years ago when I was using EAGLE daily. It shows how to design a 555 flashing circuit from schematic to PCB. A follow-on class taught how to mill the PCB on a Shopbot. I might update the course and release it if I have time. The exercise class helps me find some surprises with EAGLE’s incremental improvements.
After that, I check out three new features. I also looked at the “Design Blocks” stuff which is a way to incorporate completed schematics like the Adafruit PowerBoost circuit. I need to come back and look at that function again later. Also, I am not positive, but I think that feature was introduced before 9.
The quick routing reminds of the old “follow me” option. You can select individual airwires, entire nets, or multiple signals to route interactively. Unlike the Autorouter, which routes the board as the whole. In the video, I build a simple 555-based PCB. I couldn’t try out routing multiple signals, like address and data for DDR memory. The value I see most from this feature is selectively routing your critical signals and then quick routing the remaining non-critical nets.
This informational window provides a clean break-down of many pieces of data. Need to know what layers a footprint use? How about the length of an entire net? In the video, I show that you can use this feature to verify all of your passive components have the same package style. The information is all there, Device Manager brings it to your attention.
Spoiler Alert: I really like the Breakout Feature. (For those that say I don’t smile in videos, I did this time.) Long story short, this is a shortcut to expand all of the pins for an IC. A great example is in the AddOhms Pyramiduino DIY PCB episode. In the beginning, you can see my time lapse as I break out each of the GPIO pins. That can happen in EAGLE now with a single click.
Have you had a chance to check out EAGLE 9 yet? If so, what are your thoughts?
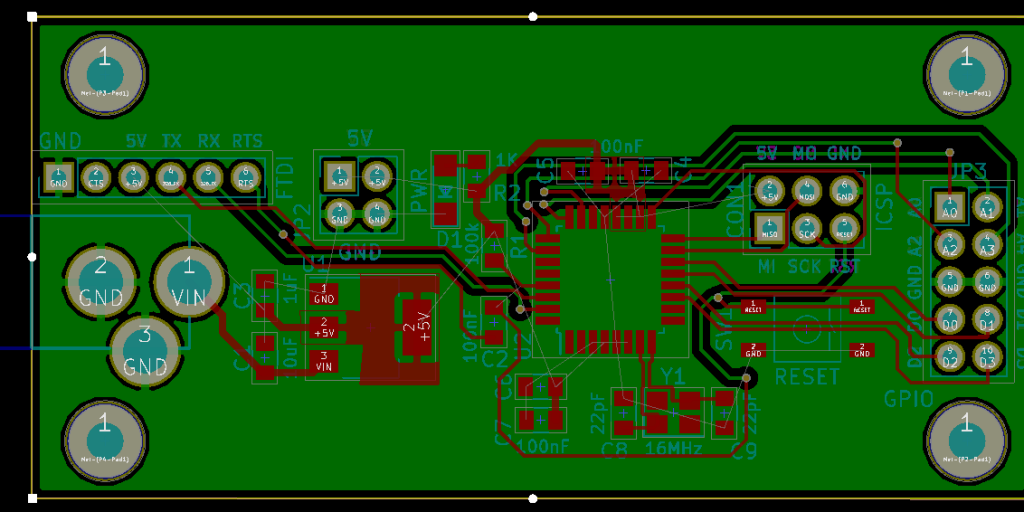
Watch EAGLE 9 First Look on YouTubeContinuing the DIY Arduino tutorial series, this AddOhms episode shows how to create a PCB in KiCad. I make a joke that the original design was a rectangle, which I found boring and pointless. So instead, I designed a triangle to give the board 3 points. Get it? Puns! I am calling it the Pryamiduino. To be honest, I found not having a constraint to be a problem. By forcing a specific board size and shape, many decisions were more manageable.

In the end, the video ended up more edited than I planned. KiCad is just so finicky and crashy that I could not make a coherent start to finish tutorial. At least, I could not work with a board at this level of complexity. Something simple like a 555 flasher would be easier to show from start to finish. I am planning some immediate follow-ups with quick tips on using KiCad. It is a frustrating suite of applications, but the results can be quite nice.
AddOhms Pyramiduino Show Notes