I’ve been working with Arduino boards for a number of years, as shown by the dates on some of my older blog posts. In that time I’ve only used boards based on the ATmega8 (like the Duemilanove or Uno). The Due is the first Arduino board I have used in what I would call the Mega form factor.
Physical Differences
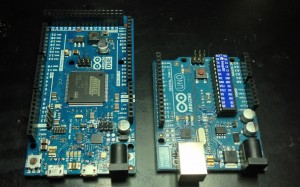
I’m surprised by the size difference. I’ve always thought the original Arduino form factor was small, the Due is larger but still feels small.

What really catches my attention is the level of complexity on the board.
Design Differences

There’s the ARM-based SAM3X processor, the ATmega16u2 is still hanging about for serial stuff, and there are several more header pins of which I haven’t identified their functions. I’m also happy to see the 5V regulator is now a switching regulator instead of the simpler linear regulator.
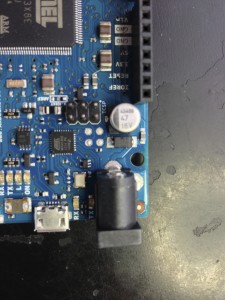
One caution I do have is that the input filter capacitors are only rated for 16V. While the regulator can tolerate voltages up to 20V, I would not recommend exceeding 12V on this board because of those caps.
From the official Due hardware specification page about using 5V or 3.3V pins:
Supplying voltage via the 5V or 3.3V pins bypasses the regulator, and can damage your board. We don’t advise it.
This is a little bit of a surprise to see. A common practice suggested in the forums is to inject voltage on both the 5V and 3.3V in order to bypass the regulator. With the move to a switching power supply, this practice may no longer be valid.
Downloading
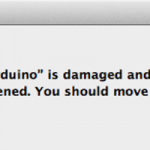
As of today (11/22/2012) the IDE version that supports the Due is still in beta and available at this link. Note for Mac Mountain Lion users: You need to do this Gatekeeper work around to make new versions of Arduino software to work.
Connecting
There are two Micro USB connectors on the Due. The “Native USB” is connected directly to the SAM3X chip. The port titled “Programming” is connected to the ATmega16u2 which provides a way for the Arduino IDE to program the chip. (The Native port would be used if you wanted to create a USB Mouse.)
Sweet! First time I connected to the programming port, the green ON LED came on and the L LED started flashing. Good signs. It’s time to see if Blink and Blink Without Delay work.
Programming Examples
Loaded up blink, hit upload and got a blinking LED with this as a debug output:
Erase flash
Write 9556 bytes to flash
[ ] 0% (0/38 pages)
[======= ] 26% (10/38 pages)
[=============== ] 52% (20/38 pages)
[======================= ] 78% (30/38 pages)
[==============================] 100% (38/38 pages)
Verify 9556 bytes of flash
[ ] 0% (0/38 pages)
[======= ] 26% (10/38 pages)
[=============== ] 52% (20/38 pages)
[======================= ] 78% (30/38 pages)
[==============================] 100% (38/38 pages)
Verify successful
Set boot flash true
CPU reset.
The debug output is kind of fun to watch and cool.
Since there are the two USB ports, I confirmed that the Programming port would work as the standard Serial port showing up in the Serial Monitor. I used one of my favorite examples, the “ASCIITable” example.
Unfortunately, I don’t have a 2nd USB Micro cable, so I can’t test using both ports at the same time. But that will come soon enough. Next I need to do some more extensive testing with some of the more advanced features of the new processor on the Due.


