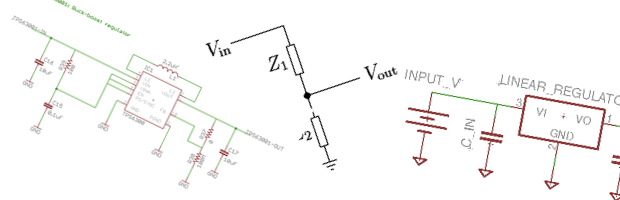
Fundamentally there are two types of voltage regulators: linear and switching. The names come from how they operate and how they achieve voltage regulation. Linear regulators tend to be a little cheaper to implement, but they aren’t as efficient as their more complex switching variants.
There are also some “cheap and dirty” methods that some designs use. Below is a brief description and example of each.
After getting a couple of flashing lights working on a microprocessor, the next fun project is generally building some kind of Matrix. At first I built a 5×5 LED matrix which was relatively simple to solder together. When trying to make one much larger, the task because significantly more complex. That’s when I decided to build a LED Matrix Shield for the Arduino which did not use Charliplexing, like the LoL shield. I wanted something that was simpler to understand and (ultimately) code for. Unfortunately, 5mm LEDs means 8 columns x 6 rows, instead of the traditional 8×8.
Digital ICs like microcontrollers, memory, and shift registers need a stable voltage source to make sure they work as expected. Most circuits are designed with a voltage regulator to accomplish this stability. In theory voltage regulators will vary their output to stay at a set voltage, regardless of how much current the load is drawing. As a load draws a little bit more current, the supply voltage will begin to sag. Conversely when the load is reduced the voltage may rise a little bit. Regulators work to eliminate, well minimize, this change.
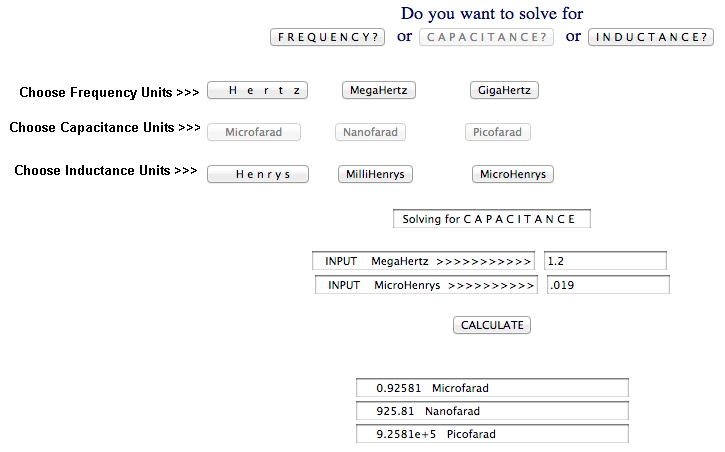
When working with components like capacitors and inductors it is always helpful to know how to calculate a resonant frequency. This Resonant Frequency Calculator is an excellent resource because it allows for calculating for Frequency, Inductance, or Capacitance. Sometimes plugging in what you know is faster than working through some algebra.
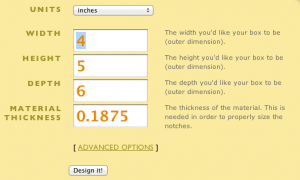
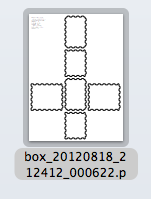
When I was working on BinBoo (A Binary Clock), I decided I was going to create a custom enclosure with a laser cutter. The process took me a couple of iterations. The very first box I had cut didn’t hold together because I didn’t make enough “teeth.” The 2nd box included these and holds together solid.
One of the big advantages to using this script is defining the material thickness. For example, BinBoo is stuck with 3mm material because that’s how I designed the notches. I have to re-design from the start to use another type of material.
Step Two: Download the PDF
Step Three: Check out the box
At this point the you can submit the file to a laser cutter or import it into a vector program to make modifications. Simple, eh?
Like other websites, this one uses cookies to remember things. Mostly, I use Google Analytics to know how many people come here. ¯\_(ツ)_/¯
By clicking “Accept”, you consent to the use of ALL the cookies.
This website uses cookies to improve your experience while you navigate through the website. Out of these, the cookies that are categorized as necessary are stored on your browser as they are essential for the working of basic functionalities of the website. We also use third-party cookies that help us analyze and understand how you use this website. These cookies will be stored in your browser only with your consent. You also have the option to opt-out of these cookies. But opting out of some of these cookies may affect your browsing experience.
Necessary cookies are absolutely essential for the website to function properly. These cookies ensure basic functionalities and security features of the website, anonymously.
Cookie
Duration
Description
cookielawinfo-checkbox-advertisement
1 year
Set by the GDPR Cookie Consent plugin, this cookie is used to record the user consent for the cookies in the "Advertisement" category .
cookielawinfo-checkbox-analytics
11 months
This cookie is set by GDPR Cookie Consent plugin. The cookie is used to store the user consent for the cookies in the category "Analytics".
cookielawinfo-checkbox-functional
11 months
The cookie is set by GDPR cookie consent to record the user consent for the cookies in the category "Functional".
cookielawinfo-checkbox-necessary
11 months
This cookie is set by GDPR Cookie Consent plugin. The cookies is used to store the user consent for the cookies in the category "Necessary".
cookielawinfo-checkbox-others
11 months
This cookie is set by GDPR Cookie Consent plugin. The cookie is used to store the user consent for the cookies in the category "Other.
cookielawinfo-checkbox-performance
11 months
This cookie is set by GDPR Cookie Consent plugin. The cookie is used to store the user consent for the cookies in the category "Performance".
CookieLawInfoConsent
1 year
Records the default button state of the corresponding category & the status of CCPA. It works only in coordination with the primary cookie.
viewed_cookie_policy
11 months
The cookie is set by the GDPR Cookie Consent plugin and is used to store whether or not user has consented to the use of cookies. It does not store any personal data.
Functional cookies help to perform certain functionalities like sharing the content of the website on social media platforms, collect feedbacks, and other third-party features.
Cookie
Duration
Description
language
session
This cookie is used to store the language preference of the user.
Performance cookies are used to understand and analyze the key performance indexes of the website which helps in delivering a better user experience for the visitors.
Analytical cookies are used to understand how visitors interact with the website. These cookies help provide information on metrics the number of visitors, bounce rate, traffic source, etc.
Cookie
Duration
Description
_ga
2 years
The _ga cookie, installed by Google Analytics, calculates visitor, session and campaign data and also keeps track of site usage for the site's analytics report. The cookie stores information anonymously and assigns a randomly generated number to recognize unique visitors.
_ga_LHR6J24XSY
2 years
This cookie is installed by Google Analytics.
_gat_gtag_UA_42726312_1
1 minute
Set by Google to distinguish users.
_gid
1 day
Installed by Google Analytics, _gid cookie stores information on how visitors use a website, while also creating an analytics report of the website's performance. Some of the data that are collected include the number of visitors, their source, and the pages they visit anonymously.
browser_id
5 years
This cookie is used for identifying the visitor browser on re-visit to the website.
CONSENT
2 years
YouTube sets this cookie via embedded youtube-videos and registers anonymous statistical data.
Advertisement cookies are used to provide visitors with relevant ads and marketing campaigns. These cookies track visitors across websites and collect information to provide customized ads.
Cookie
Duration
Description
VISITOR_INFO1_LIVE
5 months 27 days
A cookie set by YouTube to measure bandwidth that determines whether the user gets the new or old player interface.
YSC
session
YSC cookie is set by Youtube and is used to track the views of embedded videos on Youtube pages.
yt-remote-connected-devices
never
YouTube sets this cookie to store the video preferences of the user using embedded YouTube video.
yt-remote-device-id
never
YouTube sets this cookie to store the video preferences of the user using embedded YouTube video.
yt.innertube::nextId
never
This cookie, set by YouTube, registers a unique ID to store data on what videos from YouTube the user has seen.
yt.innertube::requests
never
This cookie, set by YouTube, registers a unique ID to store data on what videos from YouTube the user has seen.