This past weekend Arduino fans celebrated Arduino and Genuino Day 2016. In classrooms, maker spaces, and impromptu meet-ups around the world enginerds got together to learn and create with Arduino. At the Jacobs Institute for Design Innovation on Berkeley’s Campus, I first heard that Arduino Create had been launched.
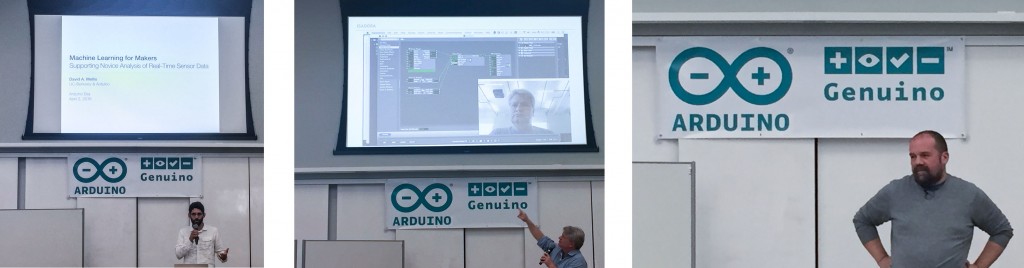
In addition to hands-on learning workshops, there was a display of Arduino/Genuino projects by students. In the afternoon, three Arduino co-founders gave a short talk. David Mellis spoke on Machine Learning. Tom Igoe did his first talk on Technology and Humanities. Lastly, Massimo Banzi talked about IoT.
Arduino Day, Mellis, Igoe, Banzi
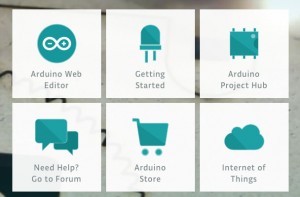
Massimo’s IoT discussion related to the earlier announcement that day of Arduino Create. This new platform has a web-based IDE, Arduino Project Hub, and Arduino IoT.
Excited about the announcements, I spent some time with the hackster.io powered Arduino Project Hub and the Arduino IoT. Here’s my hands-on with Arduino Create.
create.arduino.cc
The Arduino IoT service is a publicly accessible MQTT server. Compared to a service like Adafruit IO, Arduino IoT is very simplistic. Your dashboard is a simple list of registered devices (or things). The API is just MQTT publishing and subscriber. There are no GUI widgets or automation.
Arduino IoT is good if you want a publicly accessible MQTT server, but don’t want to run your own. A huge plus, in my opinion, this is one of the few MQTT solutions that requires SSL.
Since I have already provided an introduction to MQTT and how to make Arduino communicate with Mosquitto, I’ll focus on what makes Arduino IoT different. First, I’ll show how easy it is to connect an Arduino device and then show how to get mosquitto connected to Arduino IoT.
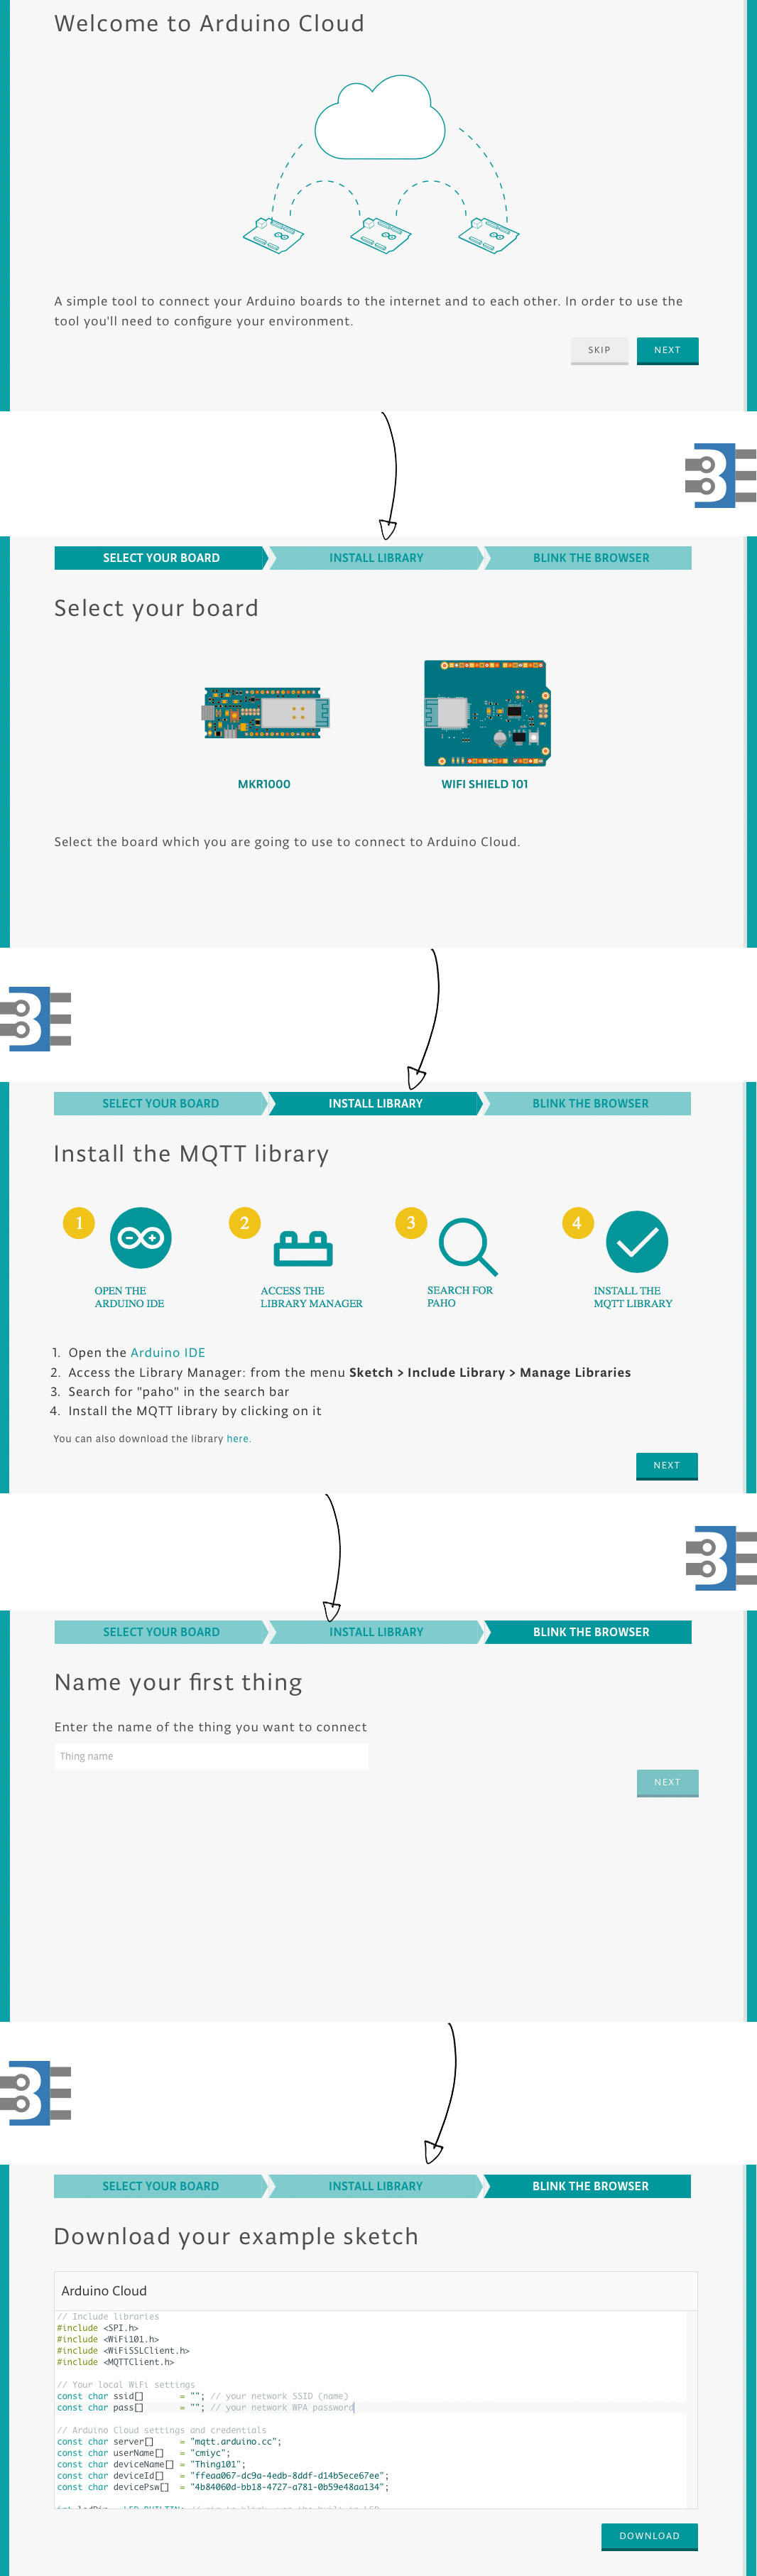
Getting started with Arduino/Genuino Hardware
Click for Step by Step Guide
If you’re using a MKR1000 or an Arduino connected to the WiFi 101 Shield, getting started with Arduino IoT is awesomely simple. Just follow the “new thing” wizard. You end up with code that can be pasted directly into an Arduino code window.
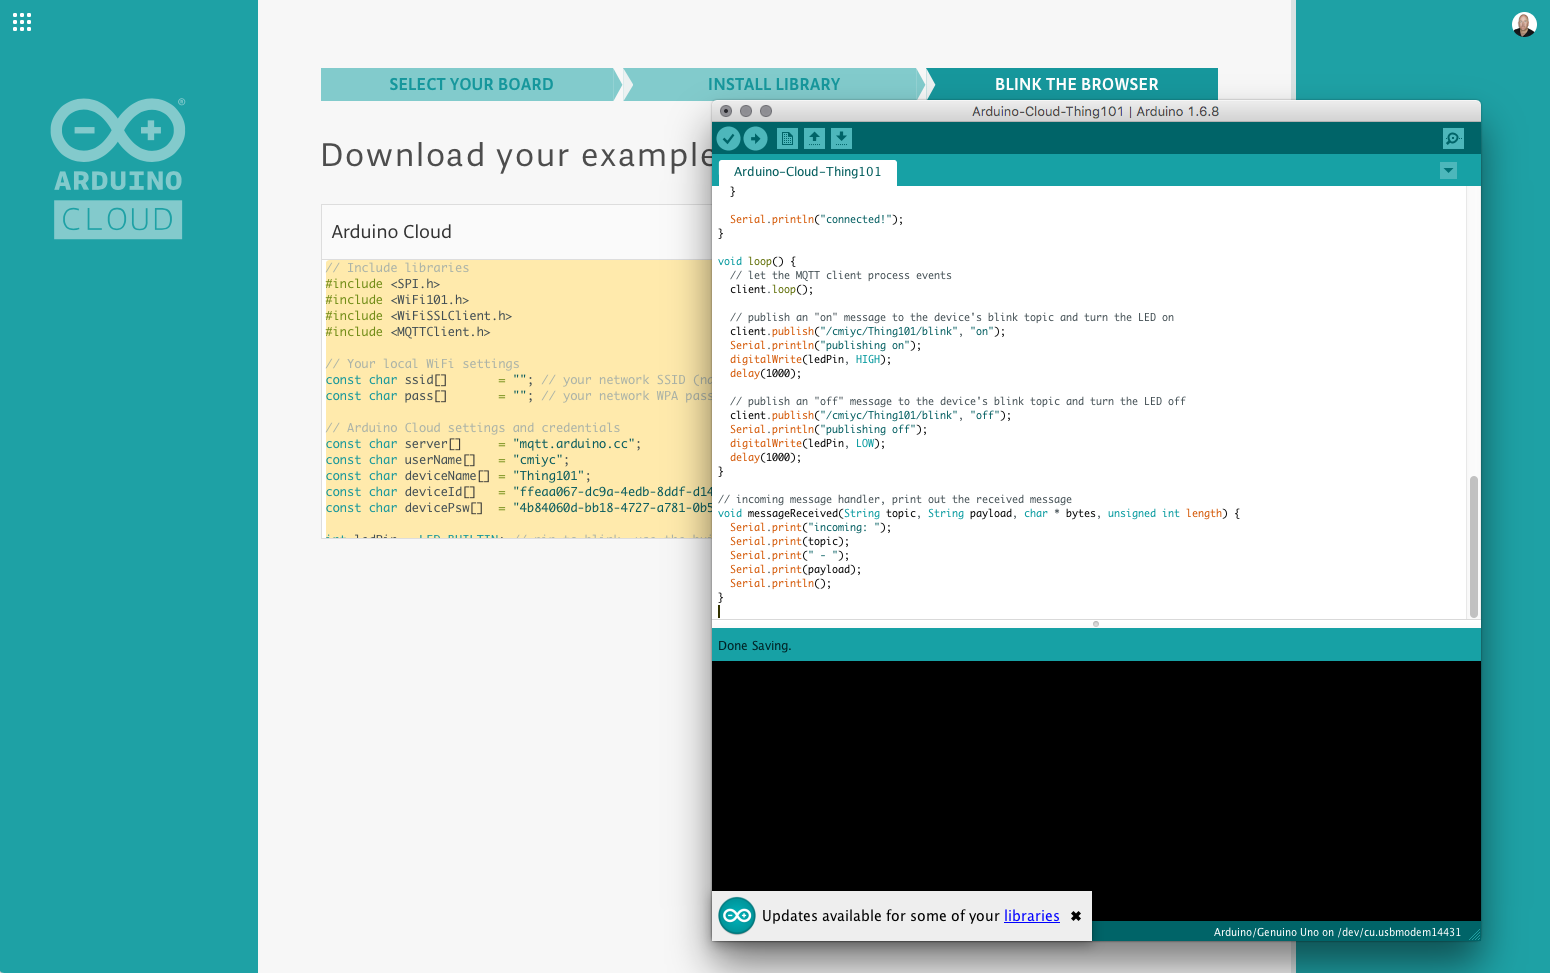
Just Copy and Paste!
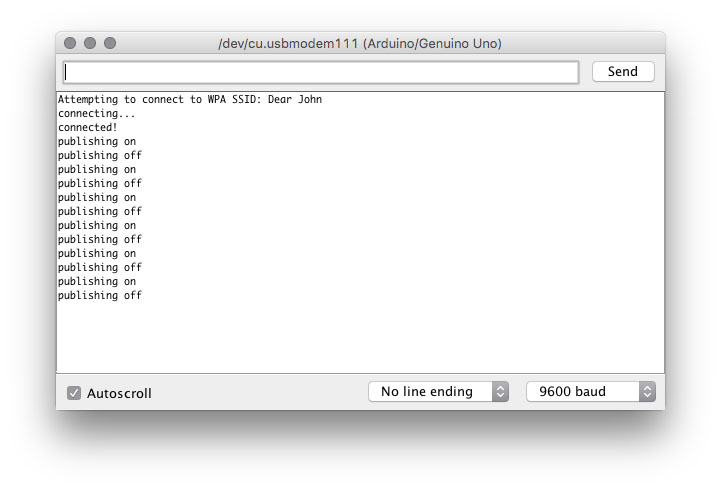
The code is only missing your WiFi name and password. Add those details, compile, and upload. Once uploaded, open a serial monitor and you’ll see the debug message saying that it is publishing the message “on” and then the message “off.”
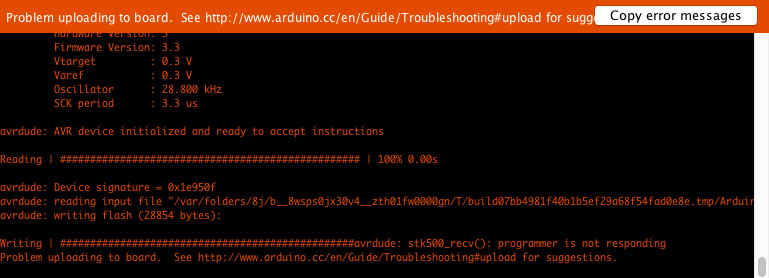
My Arduino IoT code wouldn’t upload (at first)
Upload error due to burned out flash.
There was one issue I ran into with my code upload. The compiled code is over 28k in size. My upload would make it most of the way through, but fail. My theory is I’ve uploaded a couple of thousand times to this board. I may have a failed FLASH cell that only gets accessed with large code blocks. I swapped the ATmega328p out with a new chip, and the upload worked fine.
Subscribing to Arduino IoT with mosquitto_sub (and SSL)
Since Arduino IoT doesn’t have widgets (yet?) or logs, I needed a MQTT client to subscribe to my thing’s feed. At this point, I was out of WiFi shields. So I decided to use mosquitto’s mosquitto_pub as the client. If you aren’t familiar with the open source tool mosquitto, check out my connecting Arduino and Raspberry Pi with mosquitto tutorial.
This point is when I discovered that Arduino IoT requires SSL connections. For mosquitto_pub (and mosquitto_sub) to use SSL, you need to provide it a Certificate Authority. In this case, I used GoDaddy’s Certificate Authority File, which you can download from their cert repository. You want one named gdroot-g2.crt, which is the GoDaddy Class 2 Certification Authority Root Certificate – G2.
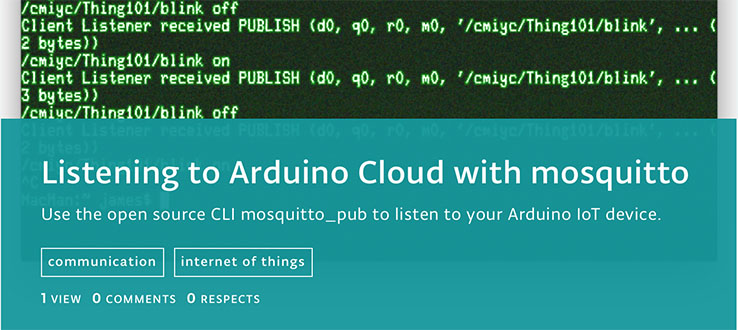
For more information on this process, visit my Arduino Projects Hub project named, “Connecting to Arduino Cloud with mosquitto.”
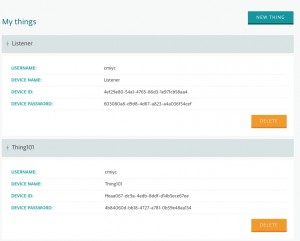
Understanding Arduino IoT’s Device ID, Name, and Password
In my previous MQTT tutorial, I didn’t cover Usernames, Passwords, or authentication. All of these extra parameters are needed for mosquitto_pub to work properly with Arduino IoT. So you’ll need four pieces of information from your Arduino Cloud Dashboard.
Arduino IoT Username: Start of *your* MQTT feed
Device Name: “MQTT Client ID”
Device ID: MQTT Username
Device Password: MQTT Password
In addition to the GoDaddy Certificate Authority file mentioned in the previous section, “gdroot-g2.crt”, you’re ready to subscribe to your Thing’s feed. In my case, I kept the default feed name of “blink”, my device’s name is “Thing101”, and my Arduino IoT username is “cmiyc”. These parameters make the MQTT feed I want to be subscribed to be called:
/cmiyc/Thing101/blink
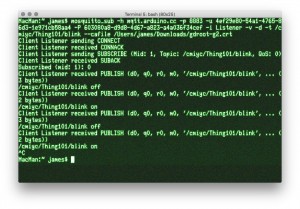
Here’s the command I called to make mosquitto connect. (Don’t use these numbers obviously, they no longer exist!)
[bash]mosquitto_sub -h mqtt.arduino.cc -p 8883 -u 4ef29e80-54a1-4765-86d3-1e971cb58aa4 -P 603080a8-d9d8-4d67-a823-a4a036f34cef -i Listener -v -d -t /cmiyc/Thing101/blink –cafile /Users/james/Downloads/gdroot-g2.crt[/bash]
Once connected, I could see my Uno+WiFi 101 publishing “on” and “off”!
One feed per device
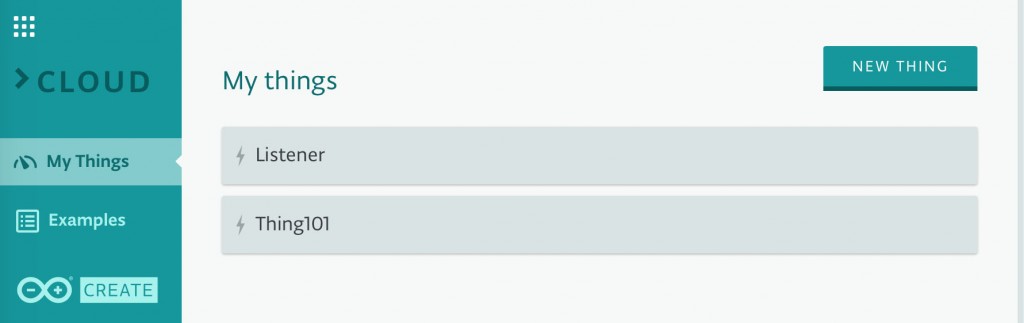
An important aspect of the Arduino IoT MQTT server is that only one device can publish to a specific feed. However, multiple devices may subscribe to a single feed. If you have two sensors, they each get defined as a device (or thing) in your Arduino IoT dashboard. They can only publish to their respective feeds.
This “feature” means you need at least two devices defined in your IoT dashboard to pass messages. As you can see in my dashboard, I made one called the apt name, “Listener.”
Conclusion
If you don’t want to or can’t run your own MQTT server—and you want one that is public— then the Arduino IoT will be a great option for you.
Even with a few rough spots around the edges, the platform has the polish you’d expect from the Arduino team.
Arduino Create is an exciting addition to the Arduino Platform. Personally, I am excited to see #TeamArduinoCC push forward with an expanded definition of what defines Arduino and Genuino.
Go check out Arduino Project Hub and Arduino IoT,
Fan of making things beep, blink and fly. Created AddOhms. Stream on Twitch. Video Host on element14 Presents and writing for Hackster.IO. Call sign KN6FGY.
Even now in September 2018 the cloud / IoT only works with an extremely limited number of devices, and not even the most popular, powerful or latest ones.
Like other websites, this one uses cookies to remember things. Mostly, I use Google Analytics to know how many people come here. ¯\_(ツ)_/¯
By clicking “Accept”, you consent to the use of ALL the cookies.
This website uses cookies to improve your experience while you navigate through the website. Out of these, the cookies that are categorized as necessary are stored on your browser as they are essential for the working of basic functionalities of the website. We also use third-party cookies that help us analyze and understand how you use this website. These cookies will be stored in your browser only with your consent. You also have the option to opt-out of these cookies. But opting out of some of these cookies may affect your browsing experience.
Necessary cookies are absolutely essential for the website to function properly. These cookies ensure basic functionalities and security features of the website, anonymously.
Cookie
Duration
Description
cookielawinfo-checkbox-advertisement
1 year
Set by the GDPR Cookie Consent plugin, this cookie is used to record the user consent for the cookies in the "Advertisement" category .
cookielawinfo-checkbox-analytics
11 months
This cookie is set by GDPR Cookie Consent plugin. The cookie is used to store the user consent for the cookies in the category "Analytics".
cookielawinfo-checkbox-functional
11 months
The cookie is set by GDPR cookie consent to record the user consent for the cookies in the category "Functional".
cookielawinfo-checkbox-necessary
11 months
This cookie is set by GDPR Cookie Consent plugin. The cookies is used to store the user consent for the cookies in the category "Necessary".
cookielawinfo-checkbox-others
11 months
This cookie is set by GDPR Cookie Consent plugin. The cookie is used to store the user consent for the cookies in the category "Other.
cookielawinfo-checkbox-performance
11 months
This cookie is set by GDPR Cookie Consent plugin. The cookie is used to store the user consent for the cookies in the category "Performance".
CookieLawInfoConsent
1 year
Records the default button state of the corresponding category & the status of CCPA. It works only in coordination with the primary cookie.
viewed_cookie_policy
11 months
The cookie is set by the GDPR Cookie Consent plugin and is used to store whether or not user has consented to the use of cookies. It does not store any personal data.
Functional cookies help to perform certain functionalities like sharing the content of the website on social media platforms, collect feedbacks, and other third-party features.
Cookie
Duration
Description
language
session
This cookie is used to store the language preference of the user.
Performance cookies are used to understand and analyze the key performance indexes of the website which helps in delivering a better user experience for the visitors.
Analytical cookies are used to understand how visitors interact with the website. These cookies help provide information on metrics the number of visitors, bounce rate, traffic source, etc.
Cookie
Duration
Description
_ga
2 years
The _ga cookie, installed by Google Analytics, calculates visitor, session and campaign data and also keeps track of site usage for the site's analytics report. The cookie stores information anonymously and assigns a randomly generated number to recognize unique visitors.
_ga_LHR6J24XSY
2 years
This cookie is installed by Google Analytics.
_gat_gtag_UA_42726312_1
1 minute
Set by Google to distinguish users.
_gid
1 day
Installed by Google Analytics, _gid cookie stores information on how visitors use a website, while also creating an analytics report of the website's performance. Some of the data that are collected include the number of visitors, their source, and the pages they visit anonymously.
browser_id
5 years
This cookie is used for identifying the visitor browser on re-visit to the website.
CONSENT
2 years
YouTube sets this cookie via embedded youtube-videos and registers anonymous statistical data.
Advertisement cookies are used to provide visitors with relevant ads and marketing campaigns. These cookies track visitors across websites and collect information to provide customized ads.
Cookie
Duration
Description
VISITOR_INFO1_LIVE
5 months 27 days
A cookie set by YouTube to measure bandwidth that determines whether the user gets the new or old player interface.
YSC
session
YSC cookie is set by Youtube and is used to track the views of embedded videos on Youtube pages.
yt-remote-connected-devices
never
YouTube sets this cookie to store the video preferences of the user using embedded YouTube video.
yt-remote-device-id
never
YouTube sets this cookie to store the video preferences of the user using embedded YouTube video.
yt.innertube::nextId
never
This cookie, set by YouTube, registers a unique ID to store data on what videos from YouTube the user has seen.
yt.innertube::requests
never
This cookie, set by YouTube, registers a unique ID to store data on what videos from YouTube the user has seen.

 If you’re looking for a place to show off your Arduino or Genuino project, check out the Arduino Project Hub.
 Arduino IoT is good if you want a publicly accessible MQTT server, but don’t want to run your own. A huge plus, in my opinion, this is one of the few MQTT solutions that requires SSL.
Since I have already provided an introduction to MQTT and how to make Arduino communicate with Mosquitto, I’ll focus on what makes Arduino IoT different. First, I’ll show how easy it is to connect an Arduino device and then show how to get mosquitto connected to Arduino IoT.
Arduino IoT is good if you want a publicly accessible MQTT server, but don’t want to run your own. A huge plus, in my opinion, this is one of the few MQTT solutions that requires SSL.
Since I have already provided an introduction to MQTT and how to make Arduino communicate with Mosquitto, I’ll focus on what makes Arduino IoT different. First, I’ll show how easy it is to connect an Arduino device and then show how to get mosquitto connected to Arduino IoT.

4 Comments
Even now in September 2018 the cloud / IoT only works with an extremely limited number of devices, and not even the most popular, powerful or latest ones.
Will the code work on an Arduino Uno or Mega if you replace the wifi routines with ethernet routines?
I’m not sure since the example code is using WiFiSSLClient. I don’t know if this means it is using SSL hardware on the WiFi101 or not.
Thanks, I will try and see if I can get a mega to work and post the results.