
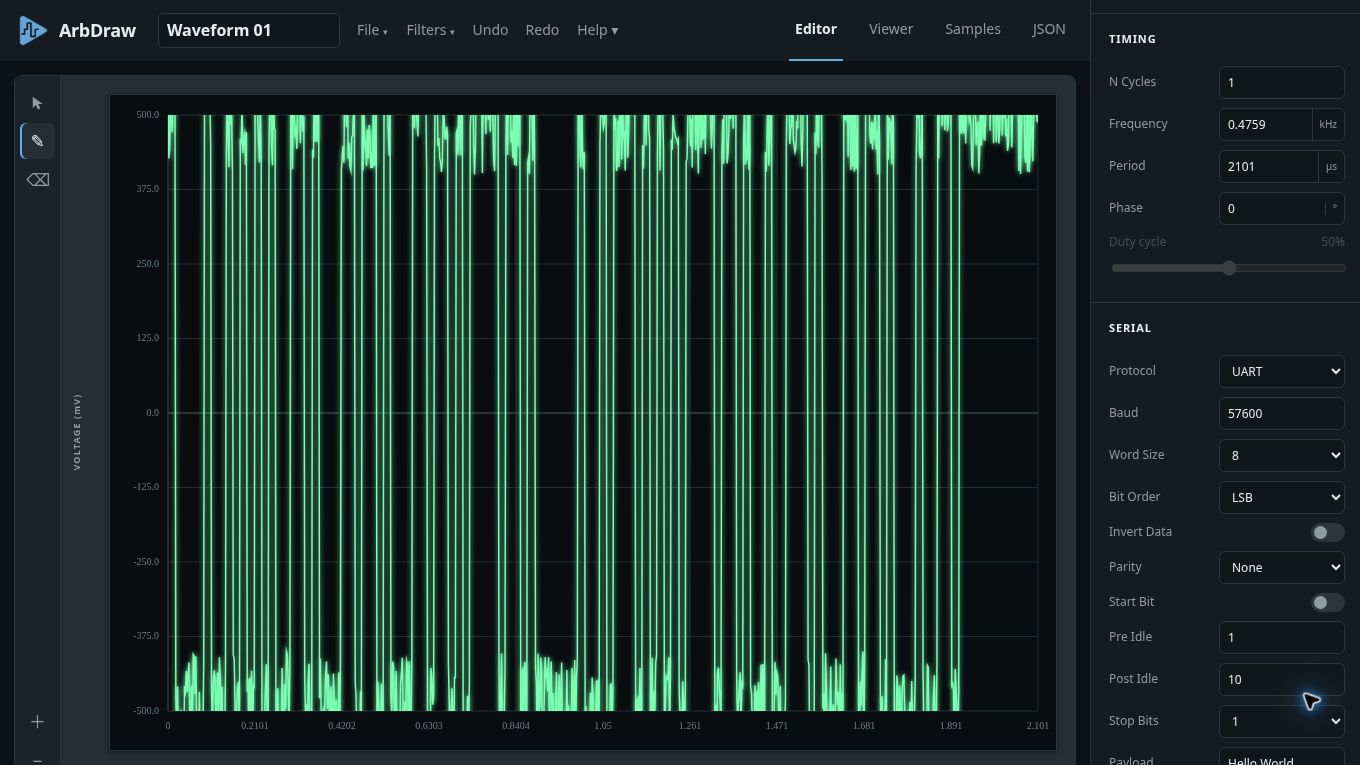
Sometimes the test signal needs a flaw. A clean waveform is easy to generate, but a narrow glitch in the middle of it can replicate a behavior or gives an oscilloscope something (in-band) specific to trigger on.
That kind of waveform generation is why I created the open-source ArbDraw. It is browser/HTML based. Check it out now on GitHub.
ArbDraw is most useful when you do something with the samples. Here are five ways I use it, starting with a waveform you can draw on and ending with one you can type!
1. Draw a glitches on an arbitrary waveform
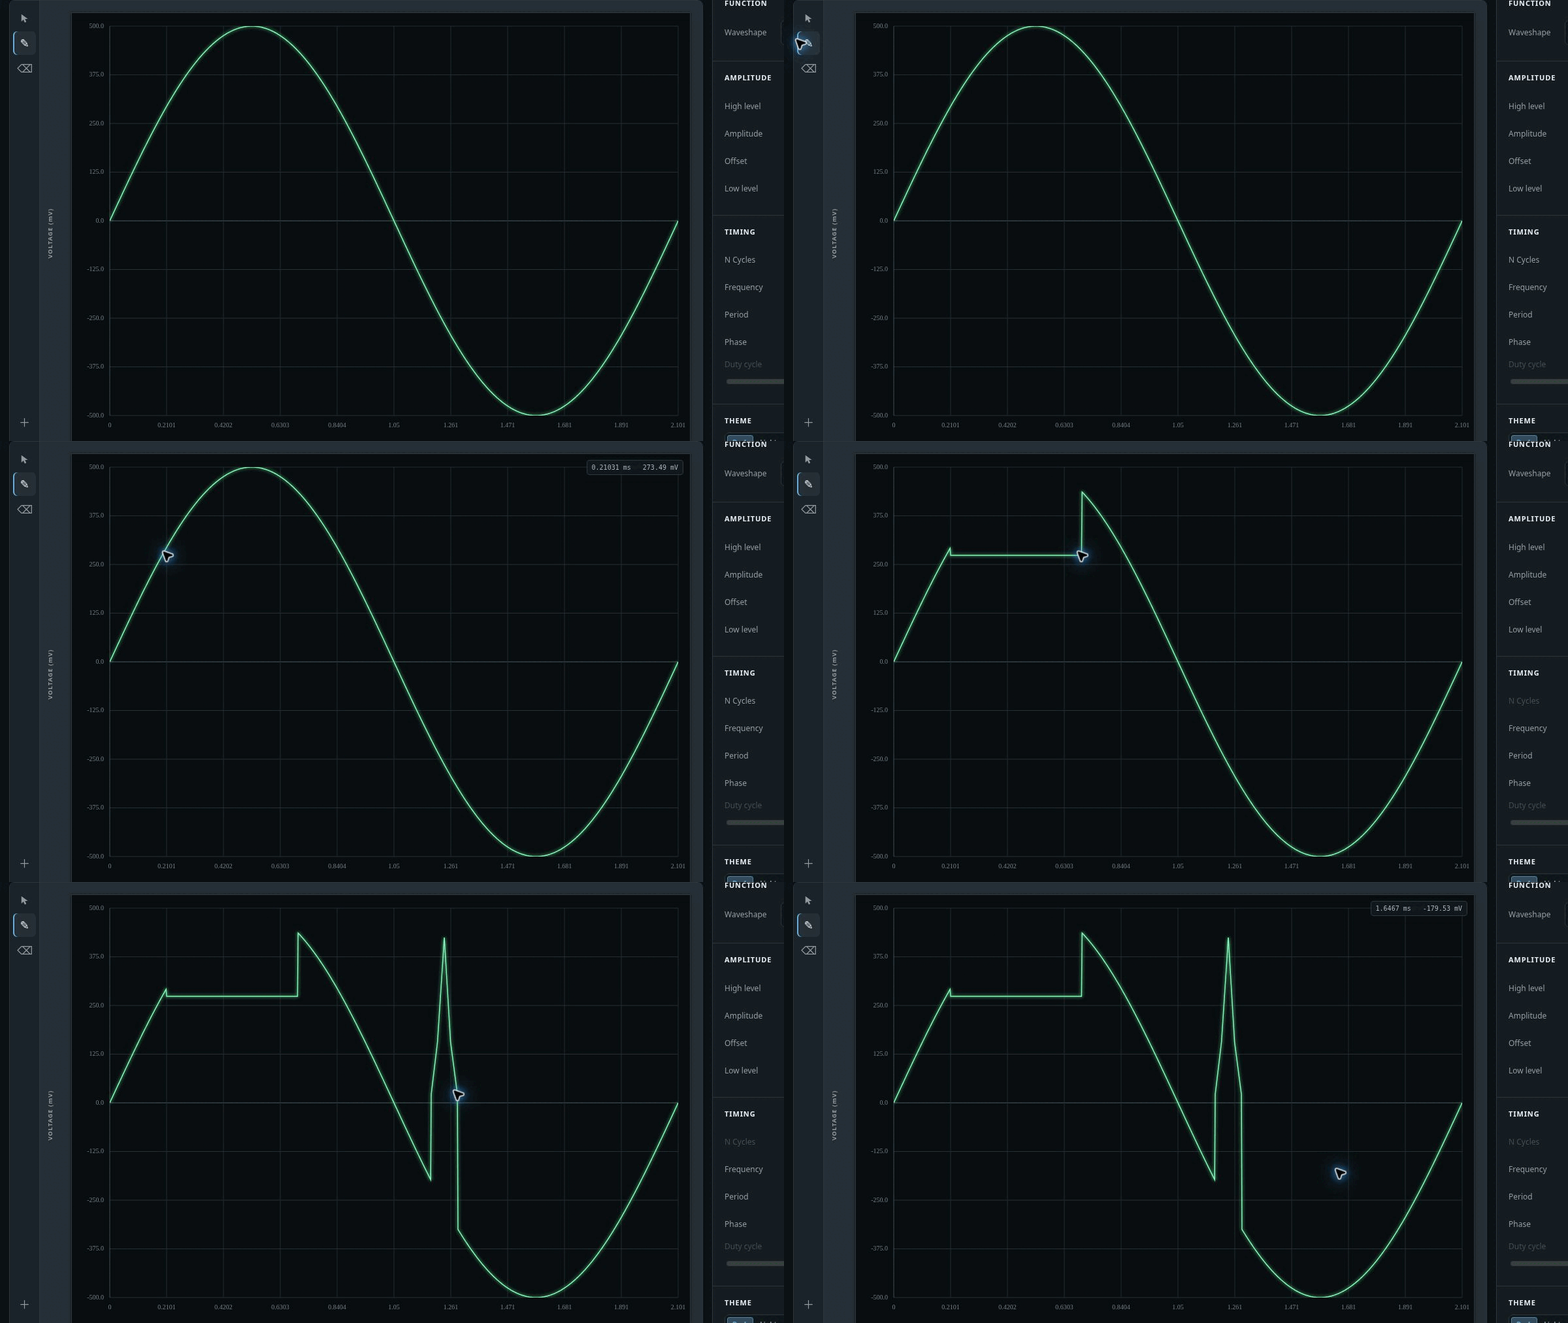
Start with a default, then use the Edit tool.
Choose a starting Waveshape such as Sine or Square. In the Editor, select the pencil-shaped Edit tool on the left, then drag across the trace where you want a change. The editor updates the samples under your stroke and changes the waveshape to Custom. A short notch, an extra edge, or a deliberately ugly pulse can become the signature for a scope trigger.
My process is to start with a recognizable shape, add a few glitches, and send it to hardware. If I am trying to make a clean continuous waveform, I’ll check in the Viewer. It repeats the waveform like a real oscilloscope+AWG combo would. Keep enough samples for the glitch you drew: a feature narrower than your sample spacing will not survive a trip to an AWG (for now).
2. Add a little noise
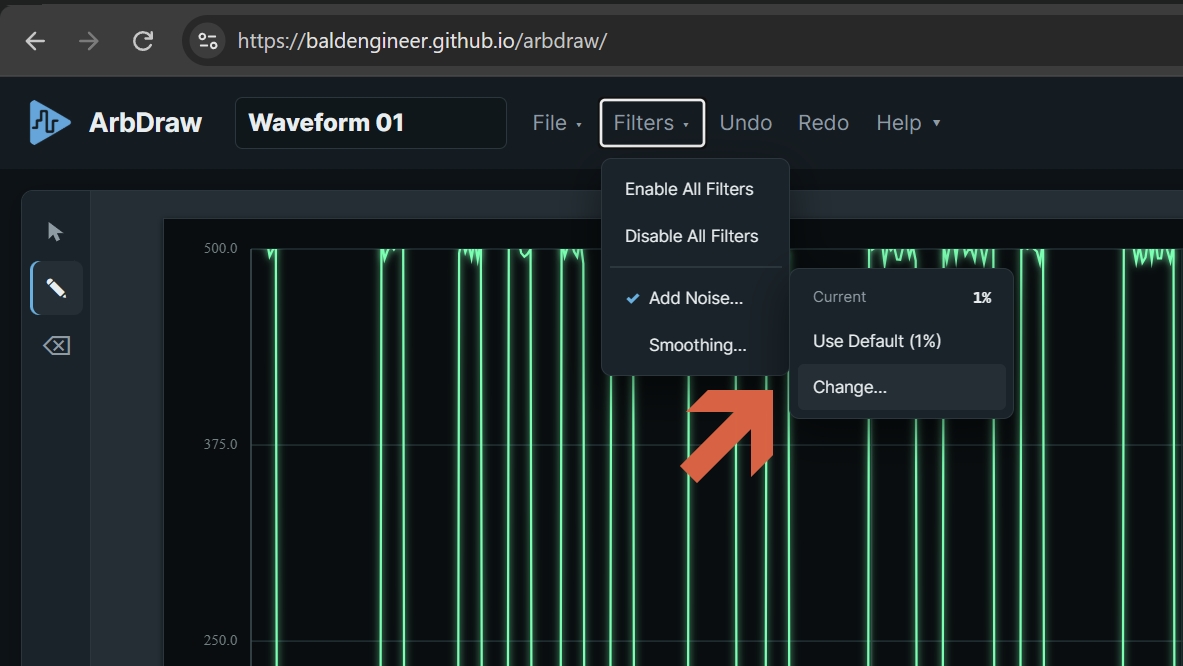
Add noise for effect or to simulate real-world signals.
Open Filters → Add Noise, set a percentage, and apply it. The filter adds random vertical variation to the samples. A small amount like 1% is a good starting point. It adds enough noise that the signal looks real, but it doesn’t cause significant distortion.
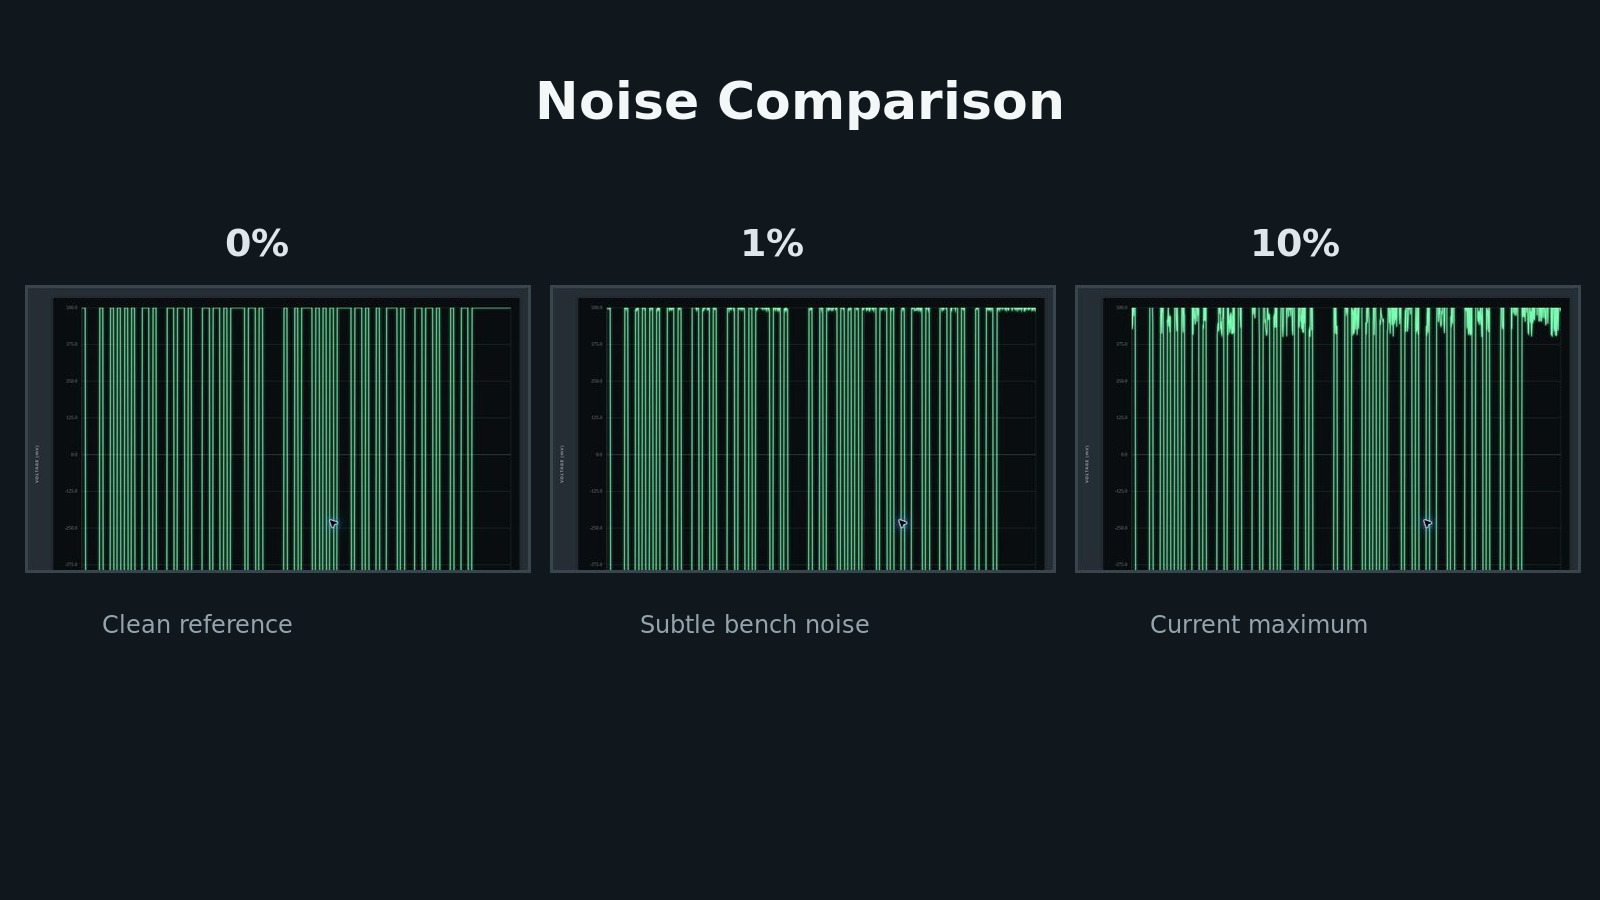
Noise comparison at 0%, 1%, and 10% (maximum).
The percentage is relative to the waveform’s high-to-low span, so the same setting has a different voltage effect if you change those levels.
You can turn the filter off again from Filters to compare clean and noisy versions.
Currently, only one noise filter is applied. So as you change the percentage, the noise is recalculated—it is not additive.
3. Send samples with the Python bridge
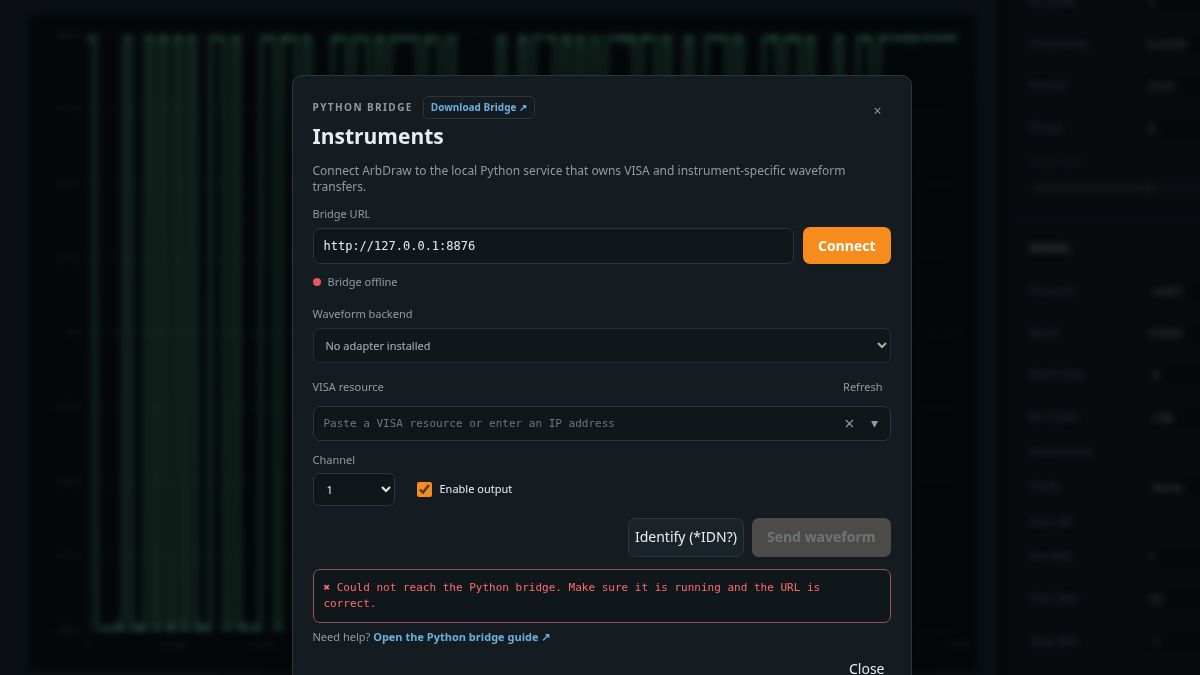
Connect to AWGs with arbdraw-python-bridge.py
The optional Python bridge removes the file-export-and-import shuffle. It does require the arbitrary function generator (or arbitrary waveform generator) instrument to have a supported adapter.
Open File → Instruments, connect to the local bridge, select the waveform backend and VISA resource, identify the instrument, and send the waveform. Check the channel and Enable output setting before you send it.
The bridge runs on a computer and connects to ArbDraw via HTTP. It uses pyVISA to communicate with instruments that support SCPI commands. The instrument-specific adapters handle the actual waveform transfer. The supported list is short today. If your instrument is missing, the adapter guide explains how to build and register a bridge adapter. The editor and file exports still work without one. Feel free to issue a Pull Request (PR) to expand AFG and AWG support in ArbDraw.
4. Play the arbitrary waveform with Browser Audio
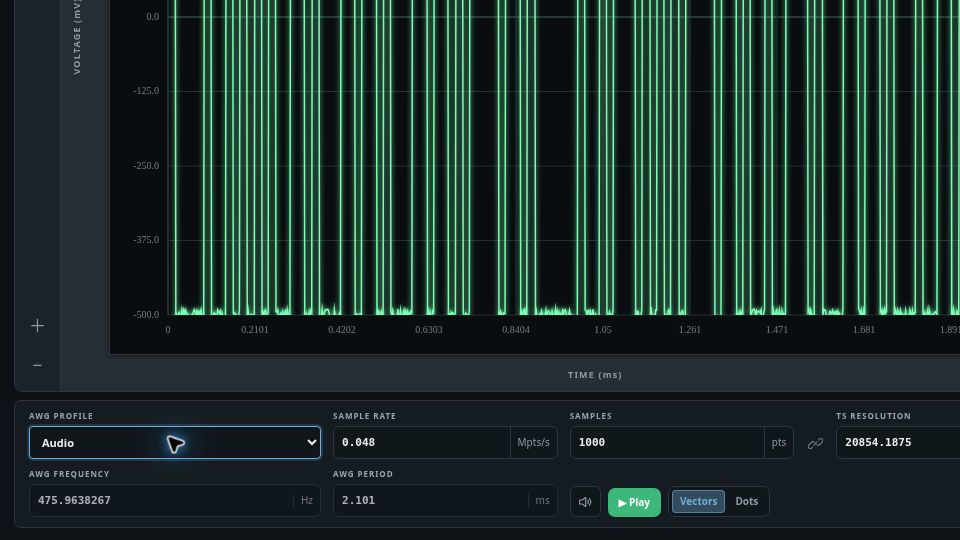
Beep. Beep. I am a real program. Beep. Beep.
Select Audio under AWG Profile, create a waveform, and press Play in the editor controls. (Press Stop when you have heard enough!) The Audio profile uses a 48 kHz sample rate, and playback happens in the browser through your computer’s audio output. There is no Python bridge involved.
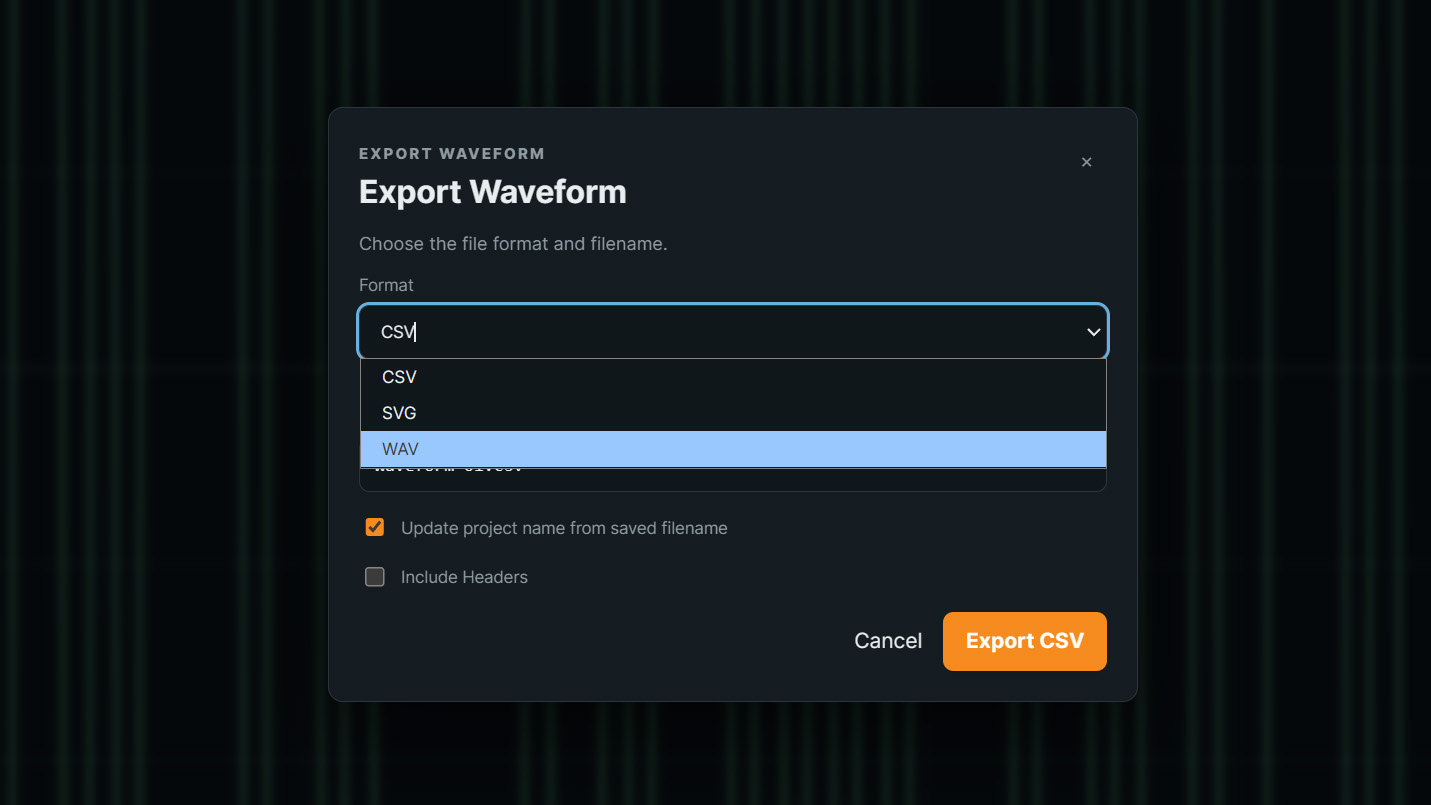
Export in CSV, WAV, or SVG. SVG is great for documentation.
This is a handy way to hear a tone, sweep-like shape, or deliberately rough waveform when you do not have an AWG on the bench. The sound card is an audio output, though, not a calibrated voltage source. You can also export a mono WAV file from File → Export Waveform if another audio application is the next stop.
5. Type a string and get UART
The basic waveforms are useful, but most ARBs support those already. Even the somewhat limited AFGs included with oscilloscopes support those shapes. The reason I built ArbDraw was for complex waveforms, like a serial sequence.
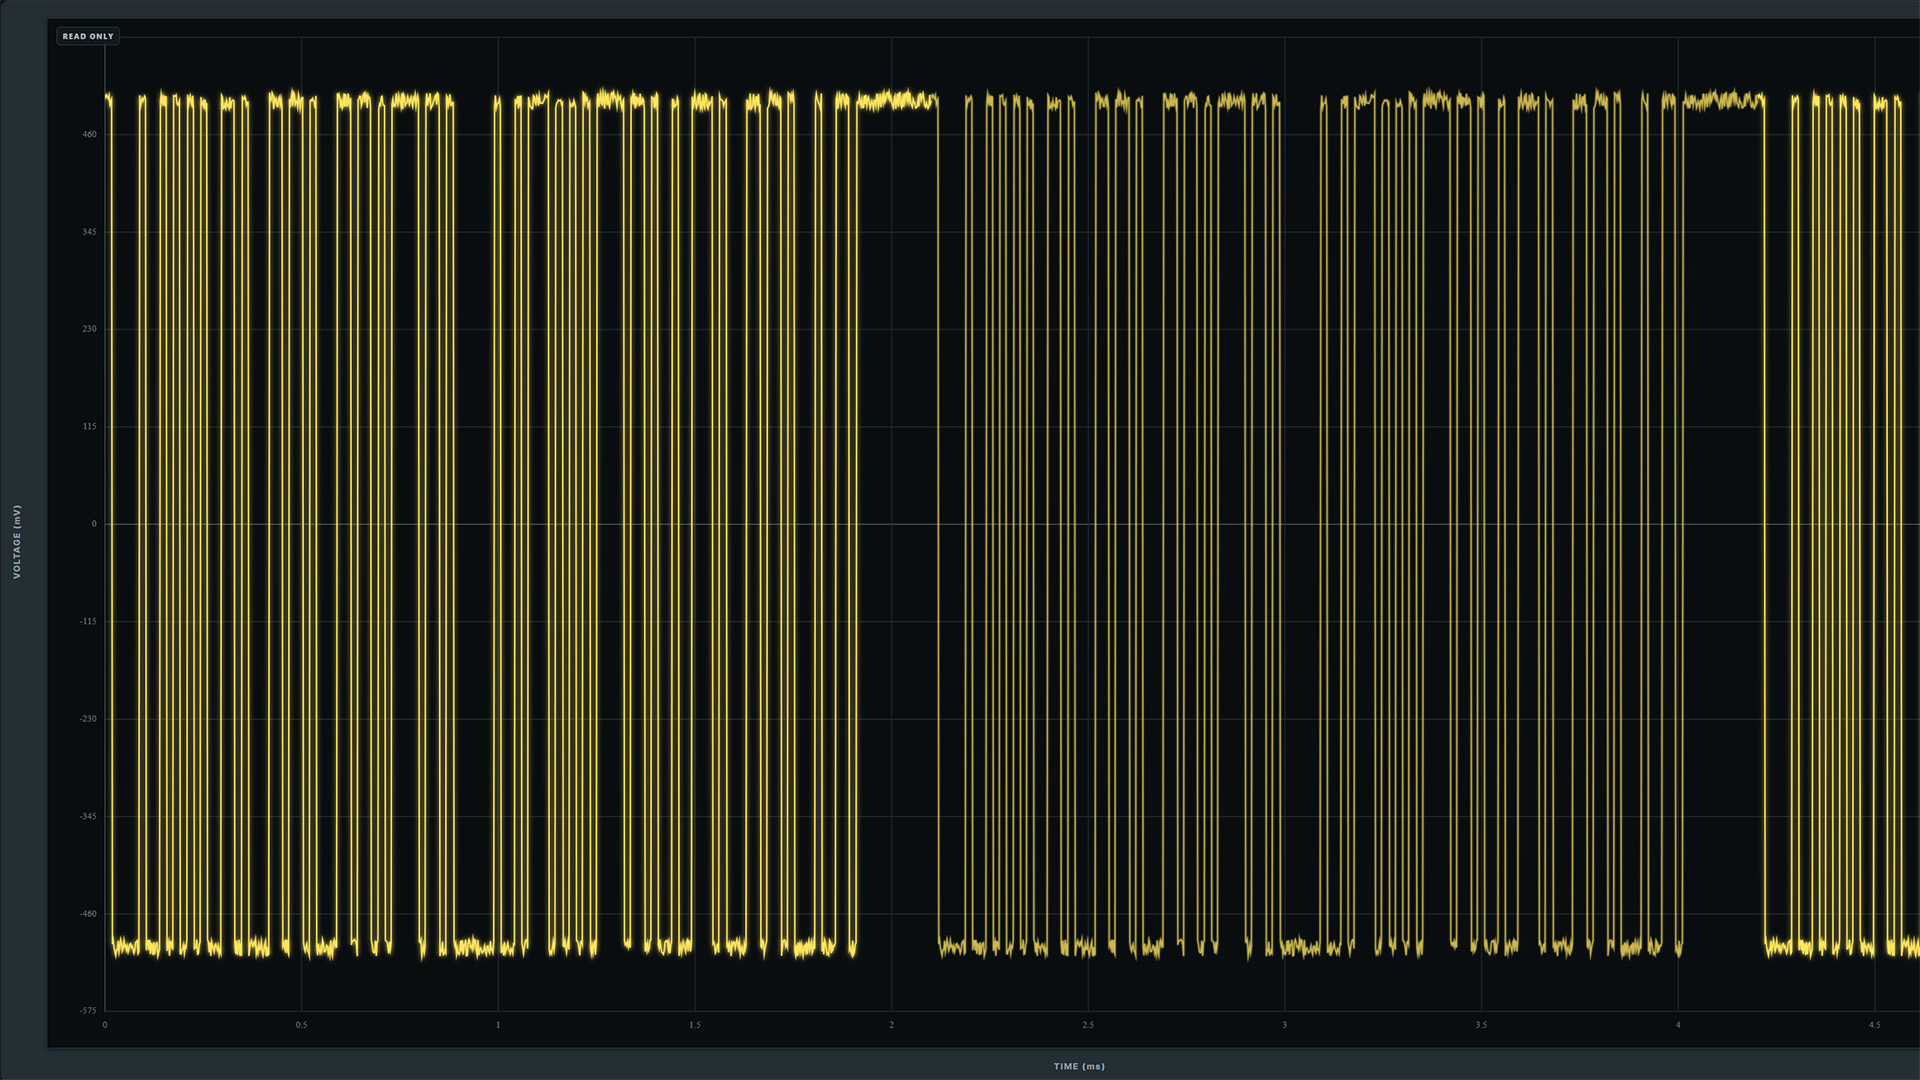
Add noise to serial signals.
Select Serial as the Waveshape, leave Protocol on UART, and type a string into Payload. Watch as the waveform updates in real-time!
ArbDraw builds the bit pattern’s pulse train. Set the baud rate, word size, bit order, parity, start bit, stop bits, and idle intervals to match the device you are testing. You can enter (single) hexadecimal bytes (0xAA) instead of text when the payload is not printable.
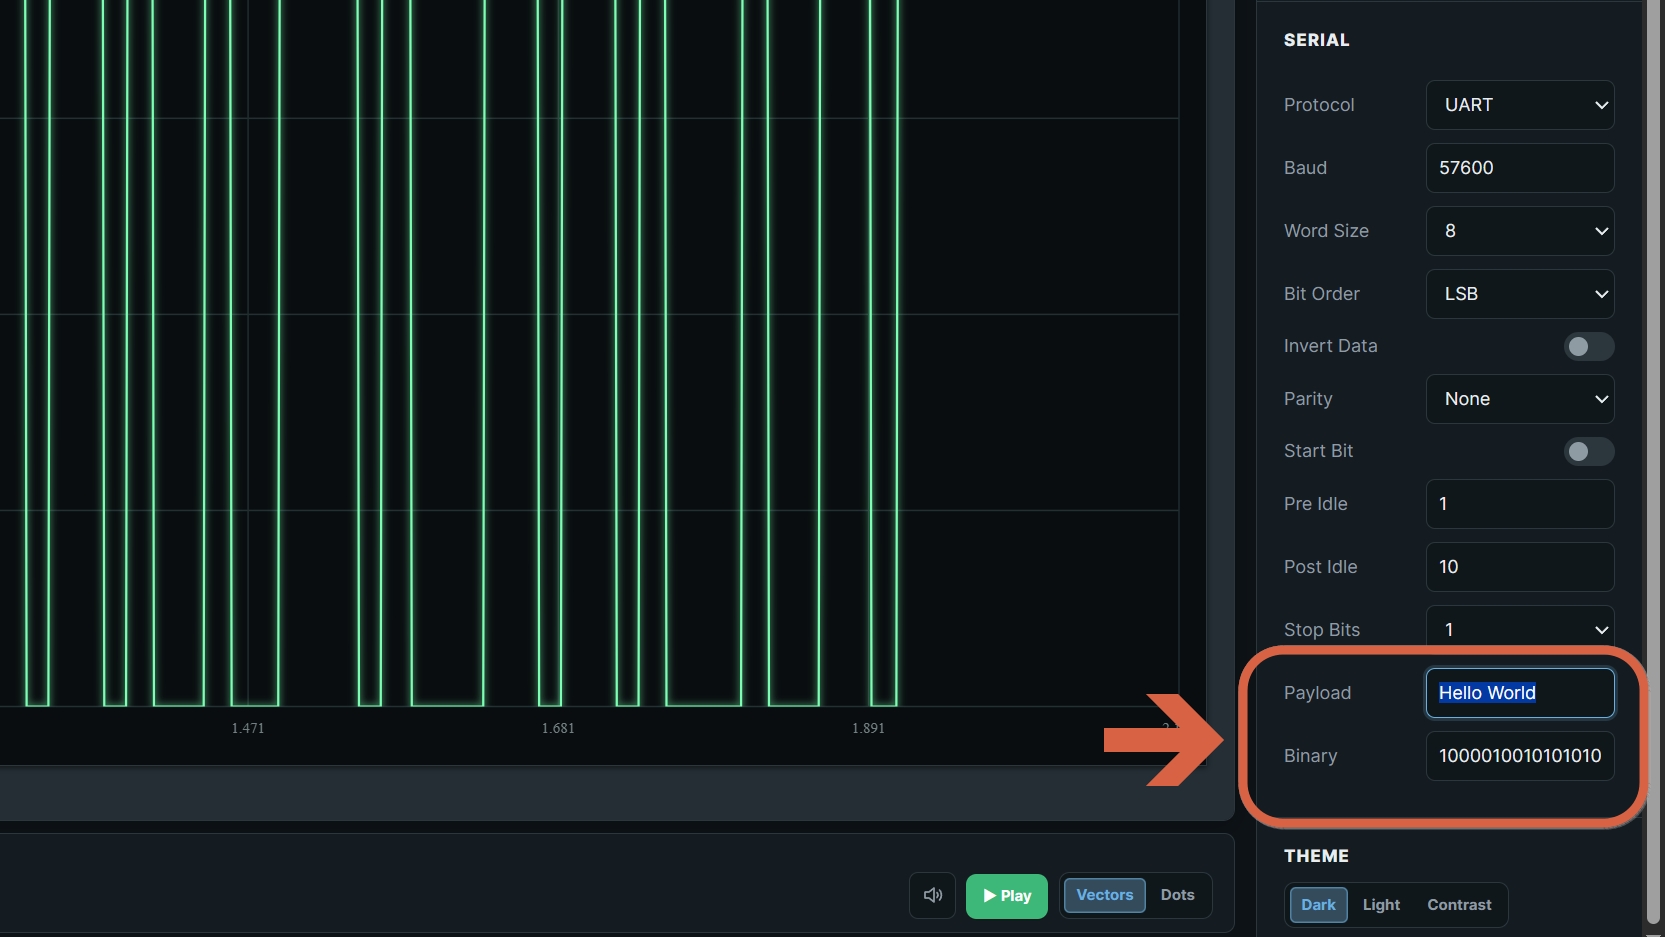
Type the payload and adjust the framing. The waveform changes live.
Then check Invert Data if you need to flip the data polarity. For example, on Tektronix Oscilloscopes, the RS-232 serial decode expects inverted data. The control flips the generated data bits; it does not convert the output into RS-232 voltage levels or invert the entire frame. (I’m open to feedback on how to handle this situation.)
Get Started Today!
ArbDraw saves settings in the browser’s local storage between sessions. You can export an .arbdraw.json project when you need the actual waveform for later editing. The project’s code (JavaScript) is also deliberately split into human-readable pieces, so if a control is almost what your bench needs, the source is practical to inspect and change.